Agent Starter App - React Native
VideoSDK enables you to add a voice-enabled AI agent to your React Native app. This guide walks you through connecting your React Native frontend to an agent configured and deployed directly from the VideoSDK dashboard.
Prerequisites
- A deployed AI agent on VideoSDK Agent Cloud. If you haven't done this yet, create and deploy your agent using the Low-Code Deployment UI on the VideoSDK Dashboard. Once deployed, note down your Agent ID.
- Node.js (v18.x or later) and a working React Native environment (Android Studio and/or Xcode)
- Valid Video SDK Account
Explore the complete Quickstart implementation in the React Native Agent Starter and see how to run and customize it for your own use case.
Generate Token
To manage secured communication, every participant that connects to a meeting needs an access token. You can easily generate this token by using your apiKey and secret-key, which you can obtain from the VideoSDK Dashboard.
For development purpose, you can generate a temporary token from VideoSDK Dashboard's API section.
The best practice for obtaining a token involves generating it from your backend server which will help in keeping your credentials safe.
Run the Sample Project
Step 1: Clone the sample project
Clone the repository to your local environment.
git clone https://github.com/videosdk-live/agent-starter-app-react-native.git
cd agent-starter-app-react-native
Step 2: Install dependencies
Install all the dependencies to run the project.
npm install
# or
yarn install
If you are developing for iOS, install the pods:
cd ios && pod install && cd ..
Step 3: Create Your Agent (Optional)
If you've already configured and deployed your agent from the VideoSDK Dashboard, you can jump directly to Step 4.
You can create and configure a powerful AI agent directly from the VideoSDK dashboard — no coding required.
Step 1: Create Your Agent
First, follow our detailed guide to Build a Custom Voice AI Agent in Minutes. This will walk you through creating the agent's persona, configuring its pipeline (Realtime or Cascading), and testing it directly from the dashboard.
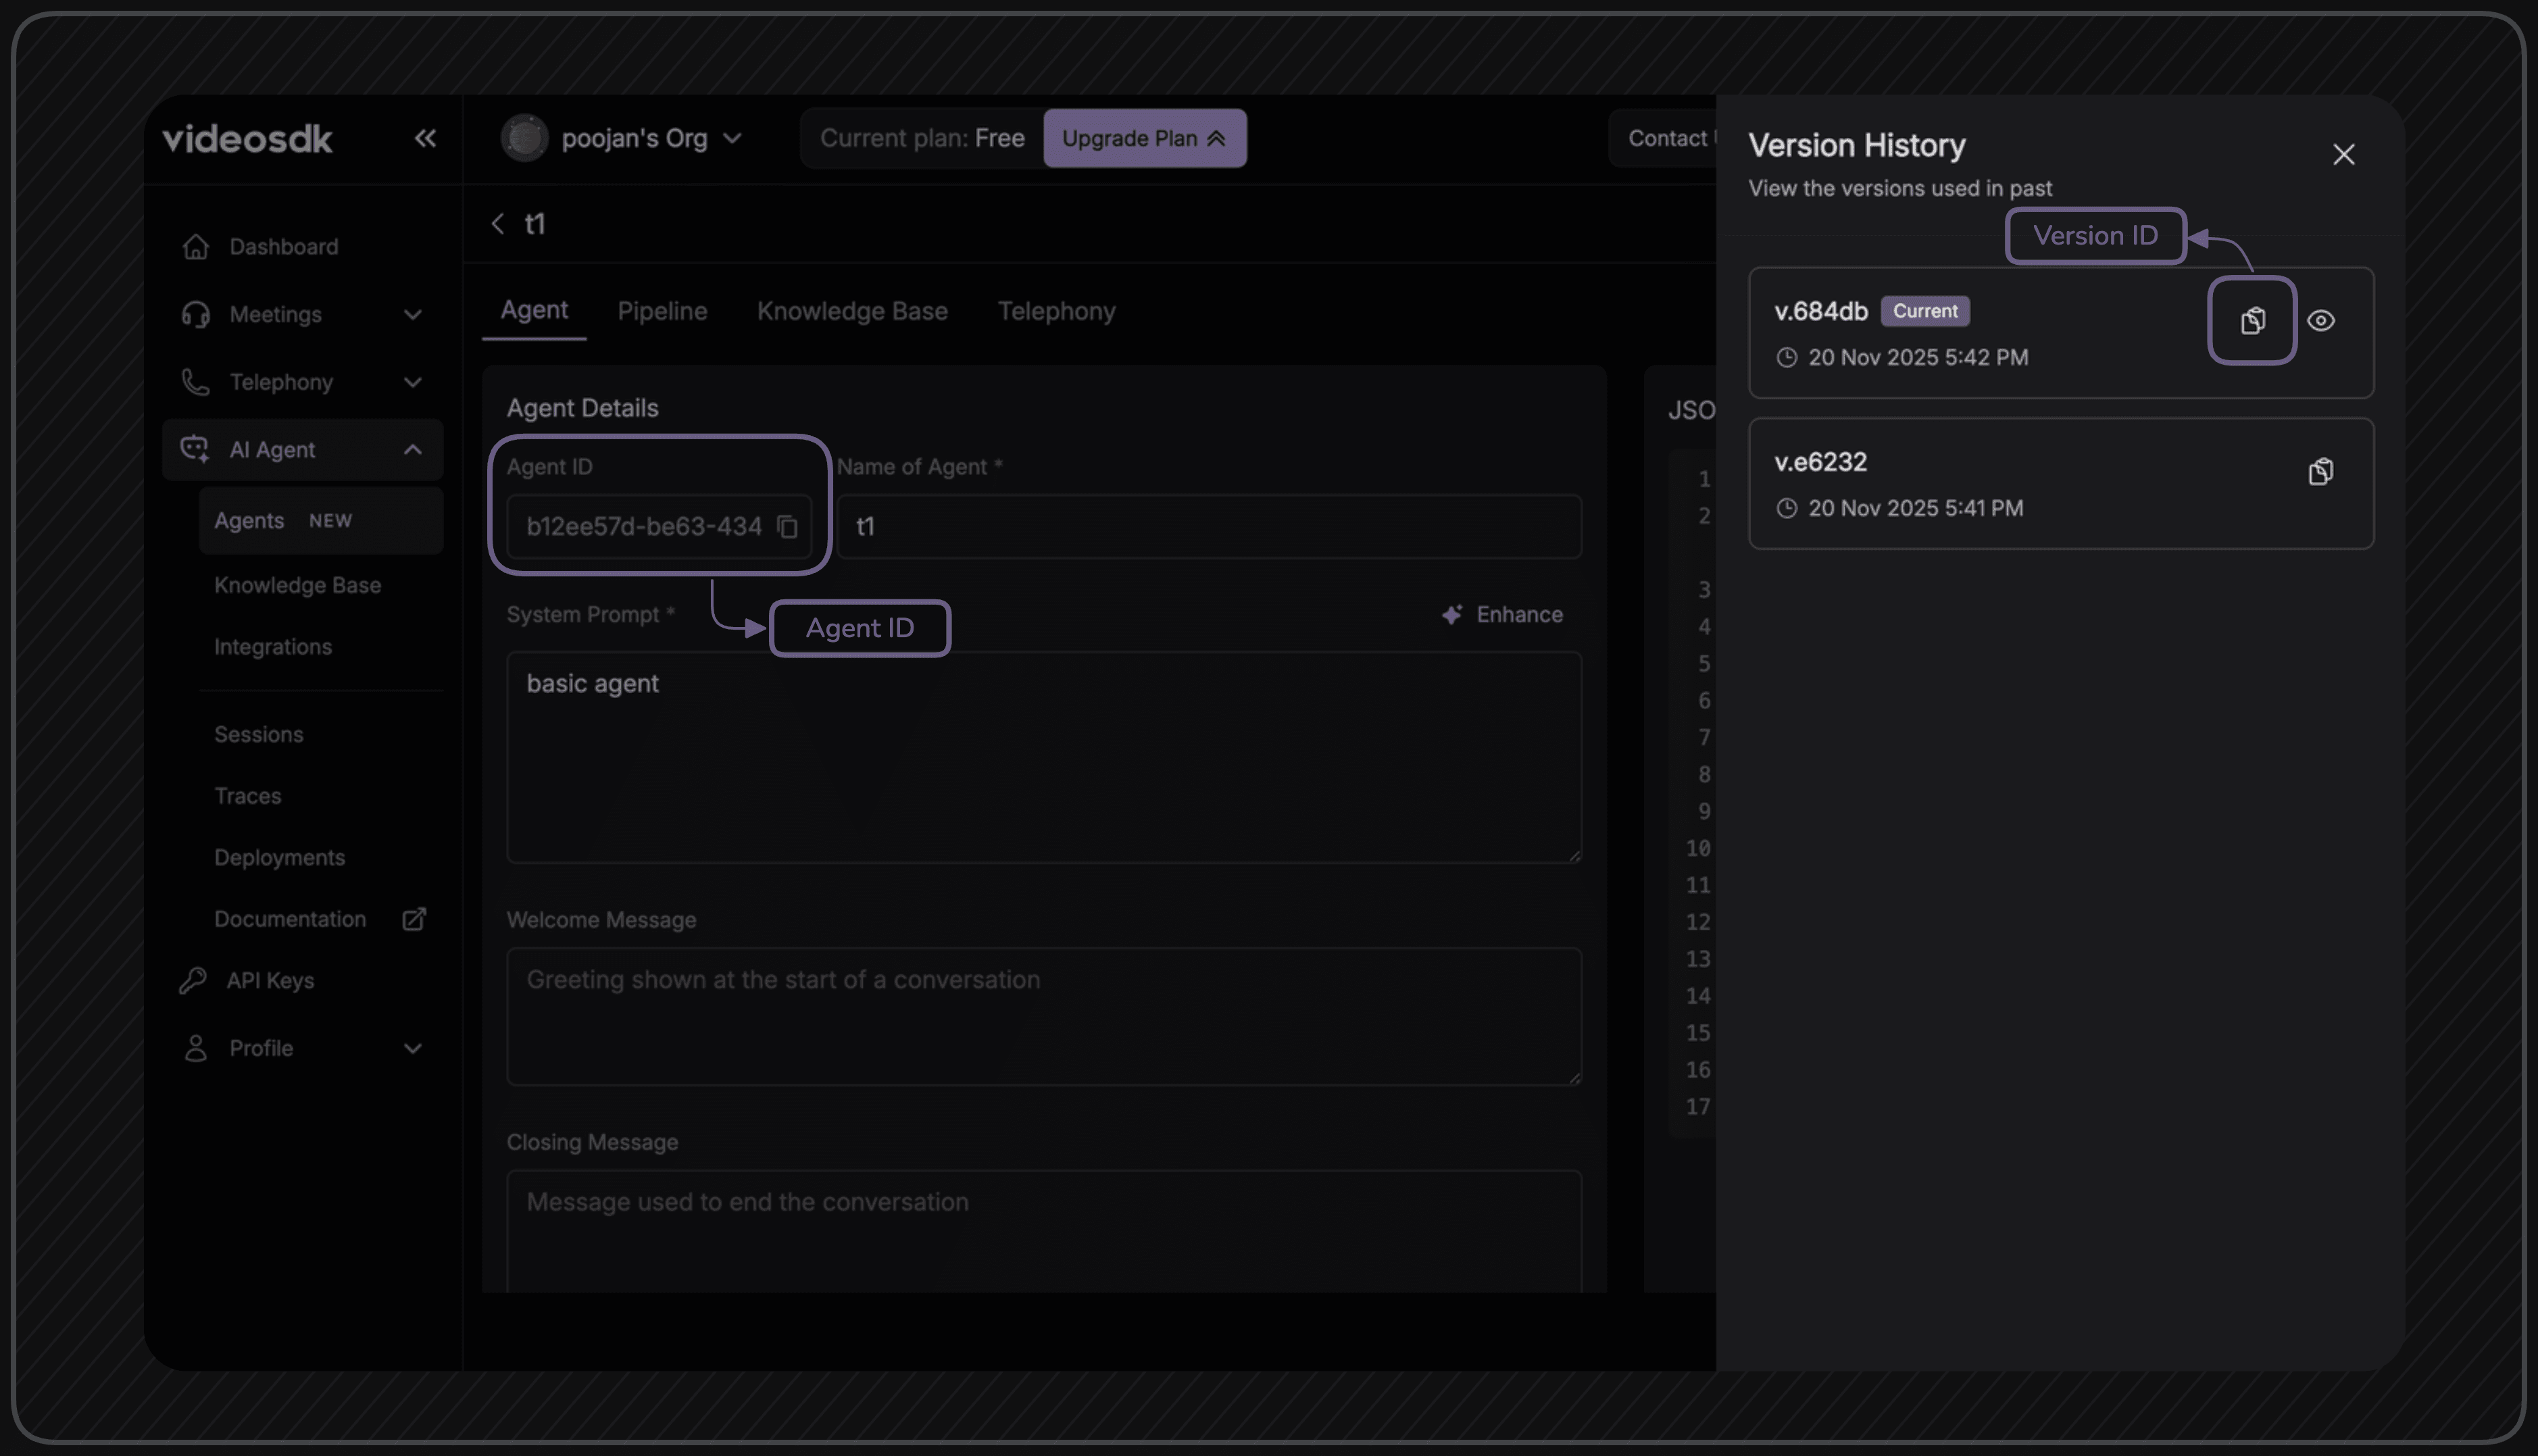
Step 2: Get Agent and Version ID
Once your agent is created, you need to get its agentId and versionId to connect it to your frontend application.
-
After creating your agent, go to the agent's page and find the JSON editor on the right side. Copy the
agentId. -
To get the
versionId, click on the 3 dots beside the Deploy button and click on "Version History". Copy the version ID via the copy button of the version you want.
Step 4: Setup Environment Variables
Copy the .env.example file to .env.
cp .env.example .env
Update the .env file with your credentials. The AGENT_ID is the identifier for the Low-Code agent you deployed from the VideoSDK Dashboard.
AUTH_TOKEN=your_videosdk_auth_token
AGENT_ID=your_agent_id
MEETING_ID=your_meeting_id
VERSION_ID=your_verison_id
You can obtain your AUTH_TOKEN and AGENT_ID from the VideoSDK Dashboard under your Agent Cloud deployment. MEETING_ID is optional — if left blank, the app will create a new meeting automatically.
Step 5: Run the Sample App
Bingo, it's time to push the launch button.
Android:
npm run android
# or
yarn android
iOS:
npm run ios
# or
yarn ios
Once running, join the meeting, click the Connect Agent button to send your deployed agent into the meeting room. You'll see the live transcription as you speak, and the agent will respond in real time.
Troubleshooting
Common Issues:
-
Agent not joining:
- Check that the
agentIdandversionIdin yourconstants.jsare correctly set. - Verify your VideoSDK token is valid and has the necessary permissions.
- Check that the
-
Audio not working:
- Check device permissions for microphone access.
-
"Failed to connect agent" error:
- Verify your
agentIdandversionIdare correct. - Check the debug console for any network errors.
- Verify your
-
React Native build issues:
- Ensure you are running a compatible Node.js version.
- For Android: Clean the build using
cd android && ./gradlew clean && cd ..and retry. - For iOS: Try clearing Cocoapods cache and reinstalling pods:
cd ios && rm -rf Pods Podfile.lock && pod cache clean --all && pod install && cd .. - Delete
node_modulesandpackage-lock.json/yarn.lockand runnpm install/yarn installagain.
Got a Question? ![]() Ask us on discord
Ask us on discord

