Version Control, Branching, and Deployment
VideoSDK incorporates environment isolation and Git-like configuration tracking directly within your workspace. This ensures you can confidently edit system parameters, review change logs, isolate staging setups, and execute canary deployments without impacting active customer calls.
1. Committing Configurations
To save milestone of your current agent config version, use the built-in commit flow:
- Click the Commit changes button located in the top-right header toolbar.
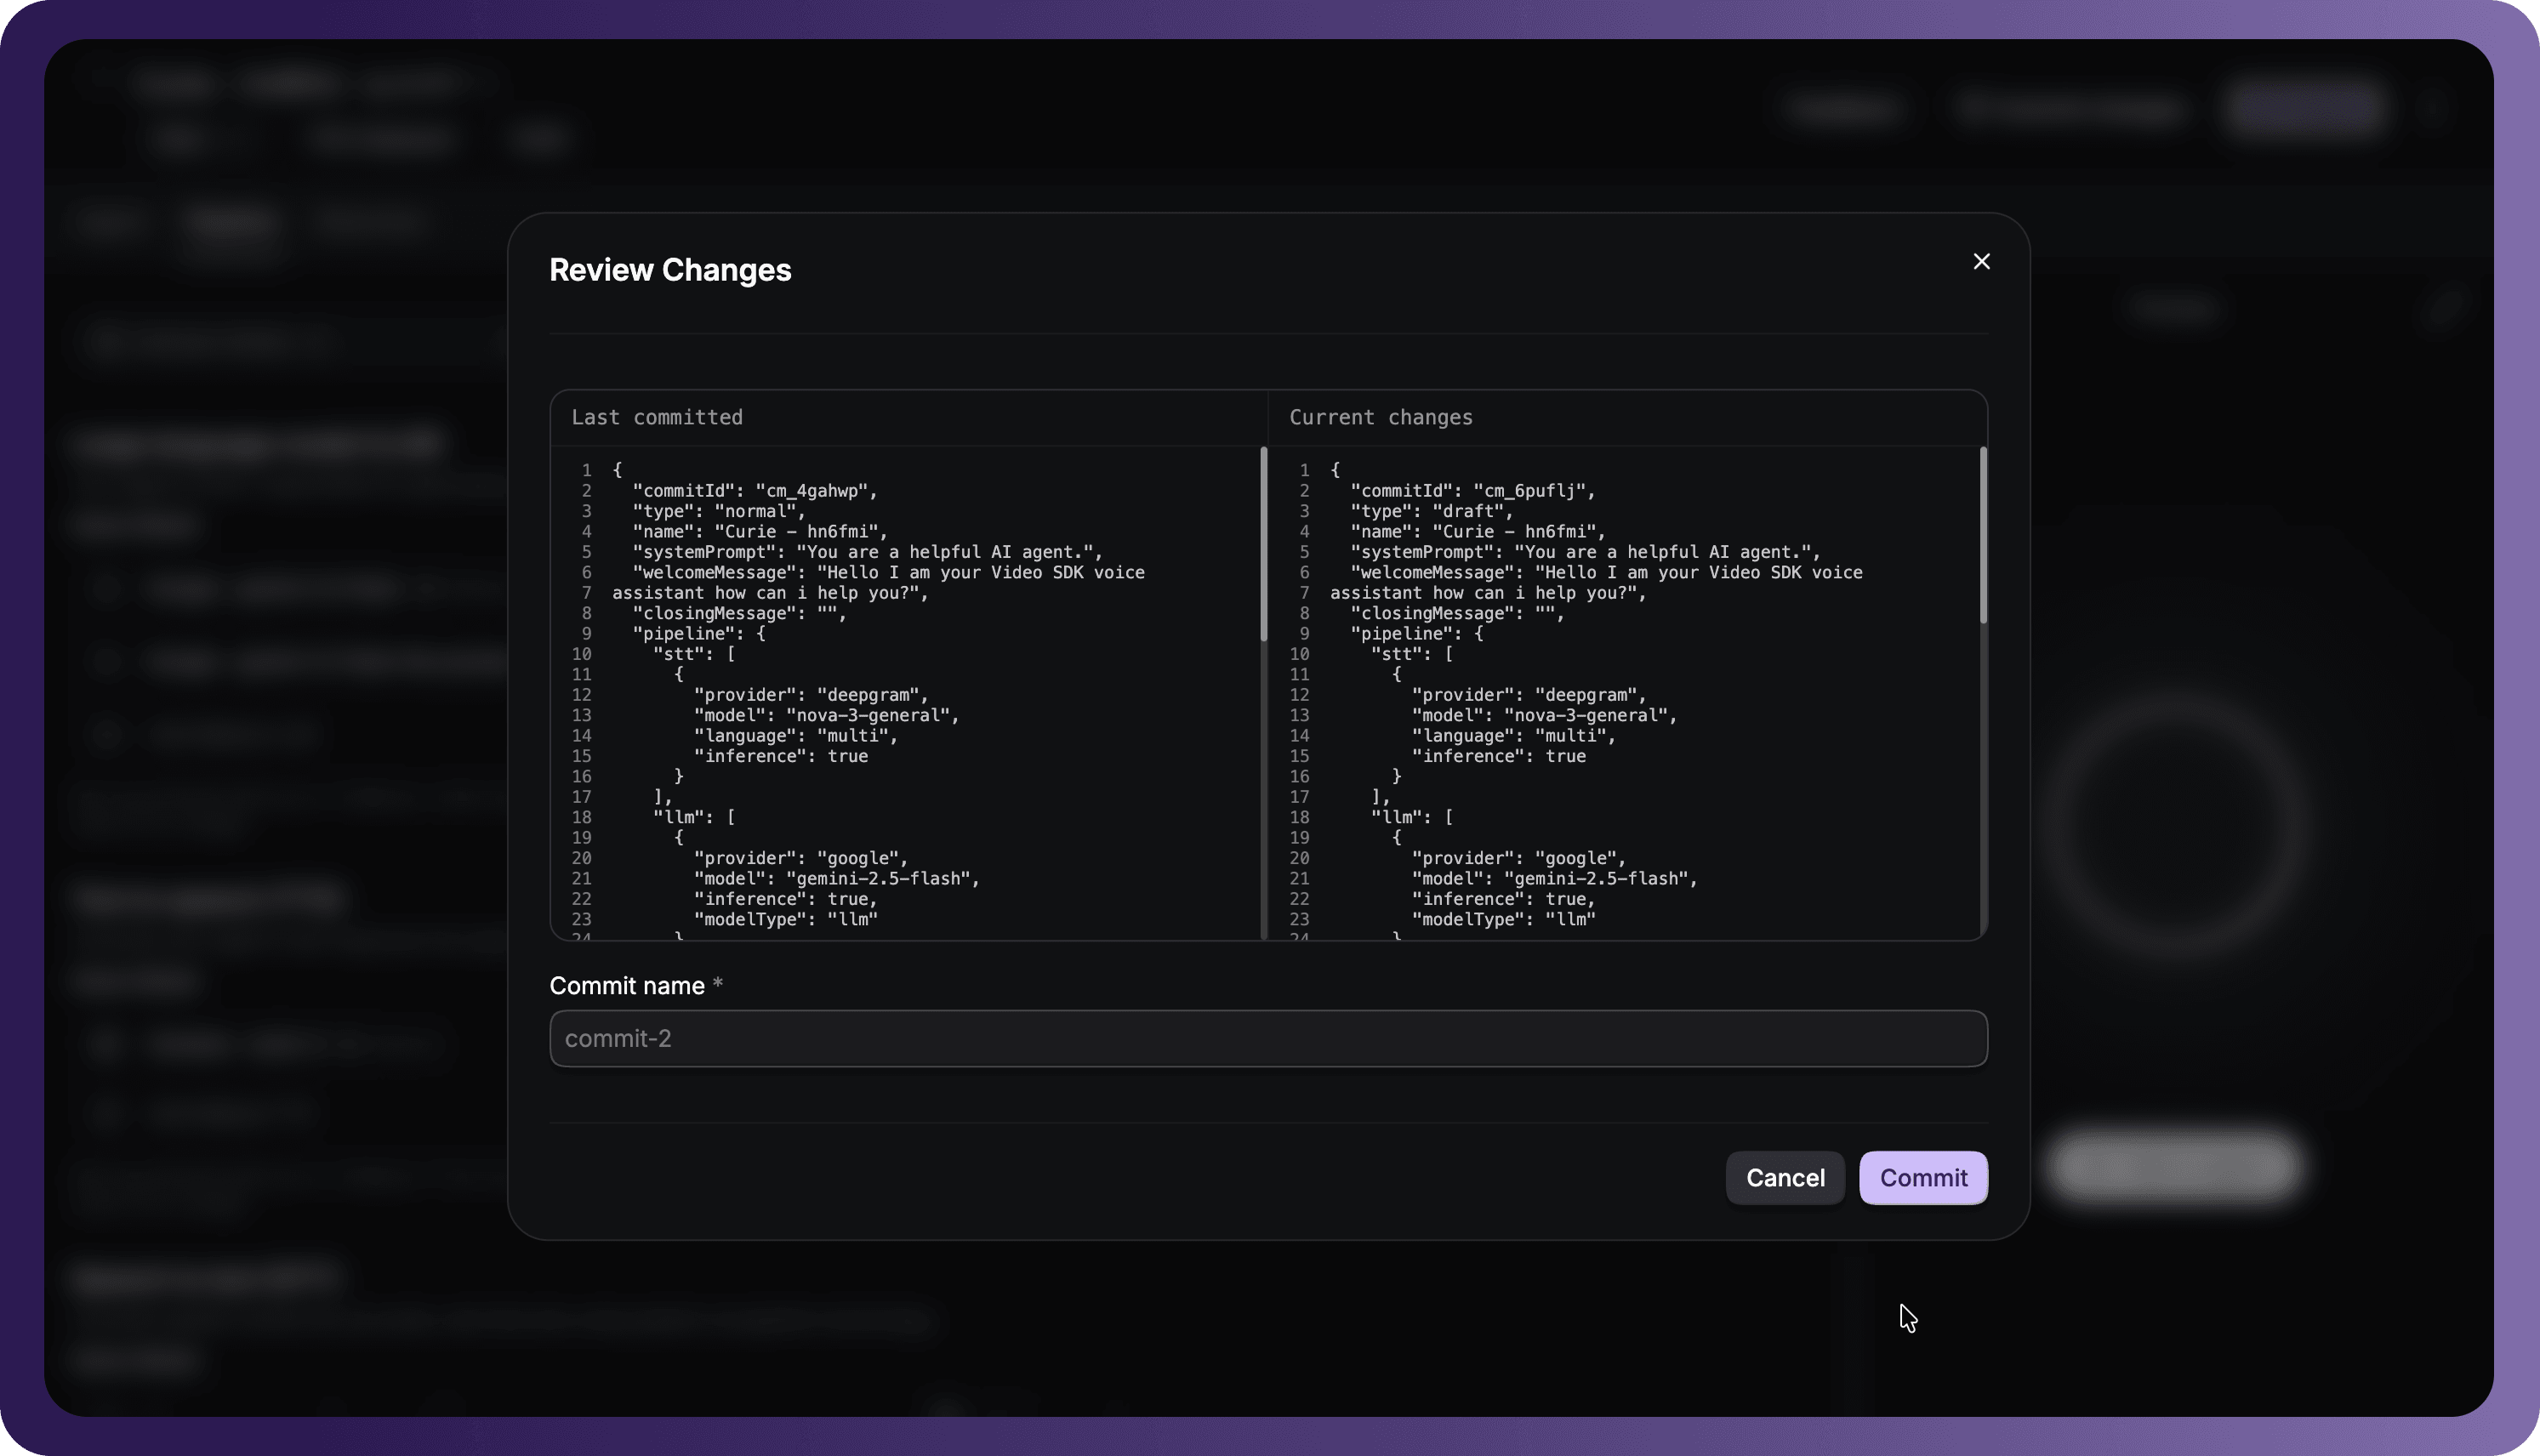
- The Review Changes pop-up will appear. This presents a side-by-side JSON diff utility:
- Last committed: Displays the parameter structure of your last saved snapshot.
- Current changes: Highlights modified lines in your active draft (such as system prompts, custom variables, or model parameters).
- Input a descriptive Commit name (e.g.,
update-system-promptorcommit-2) to log your adjustments. - Click Commit to record the snapshot.
2. Managing Environments & Reverting Commits
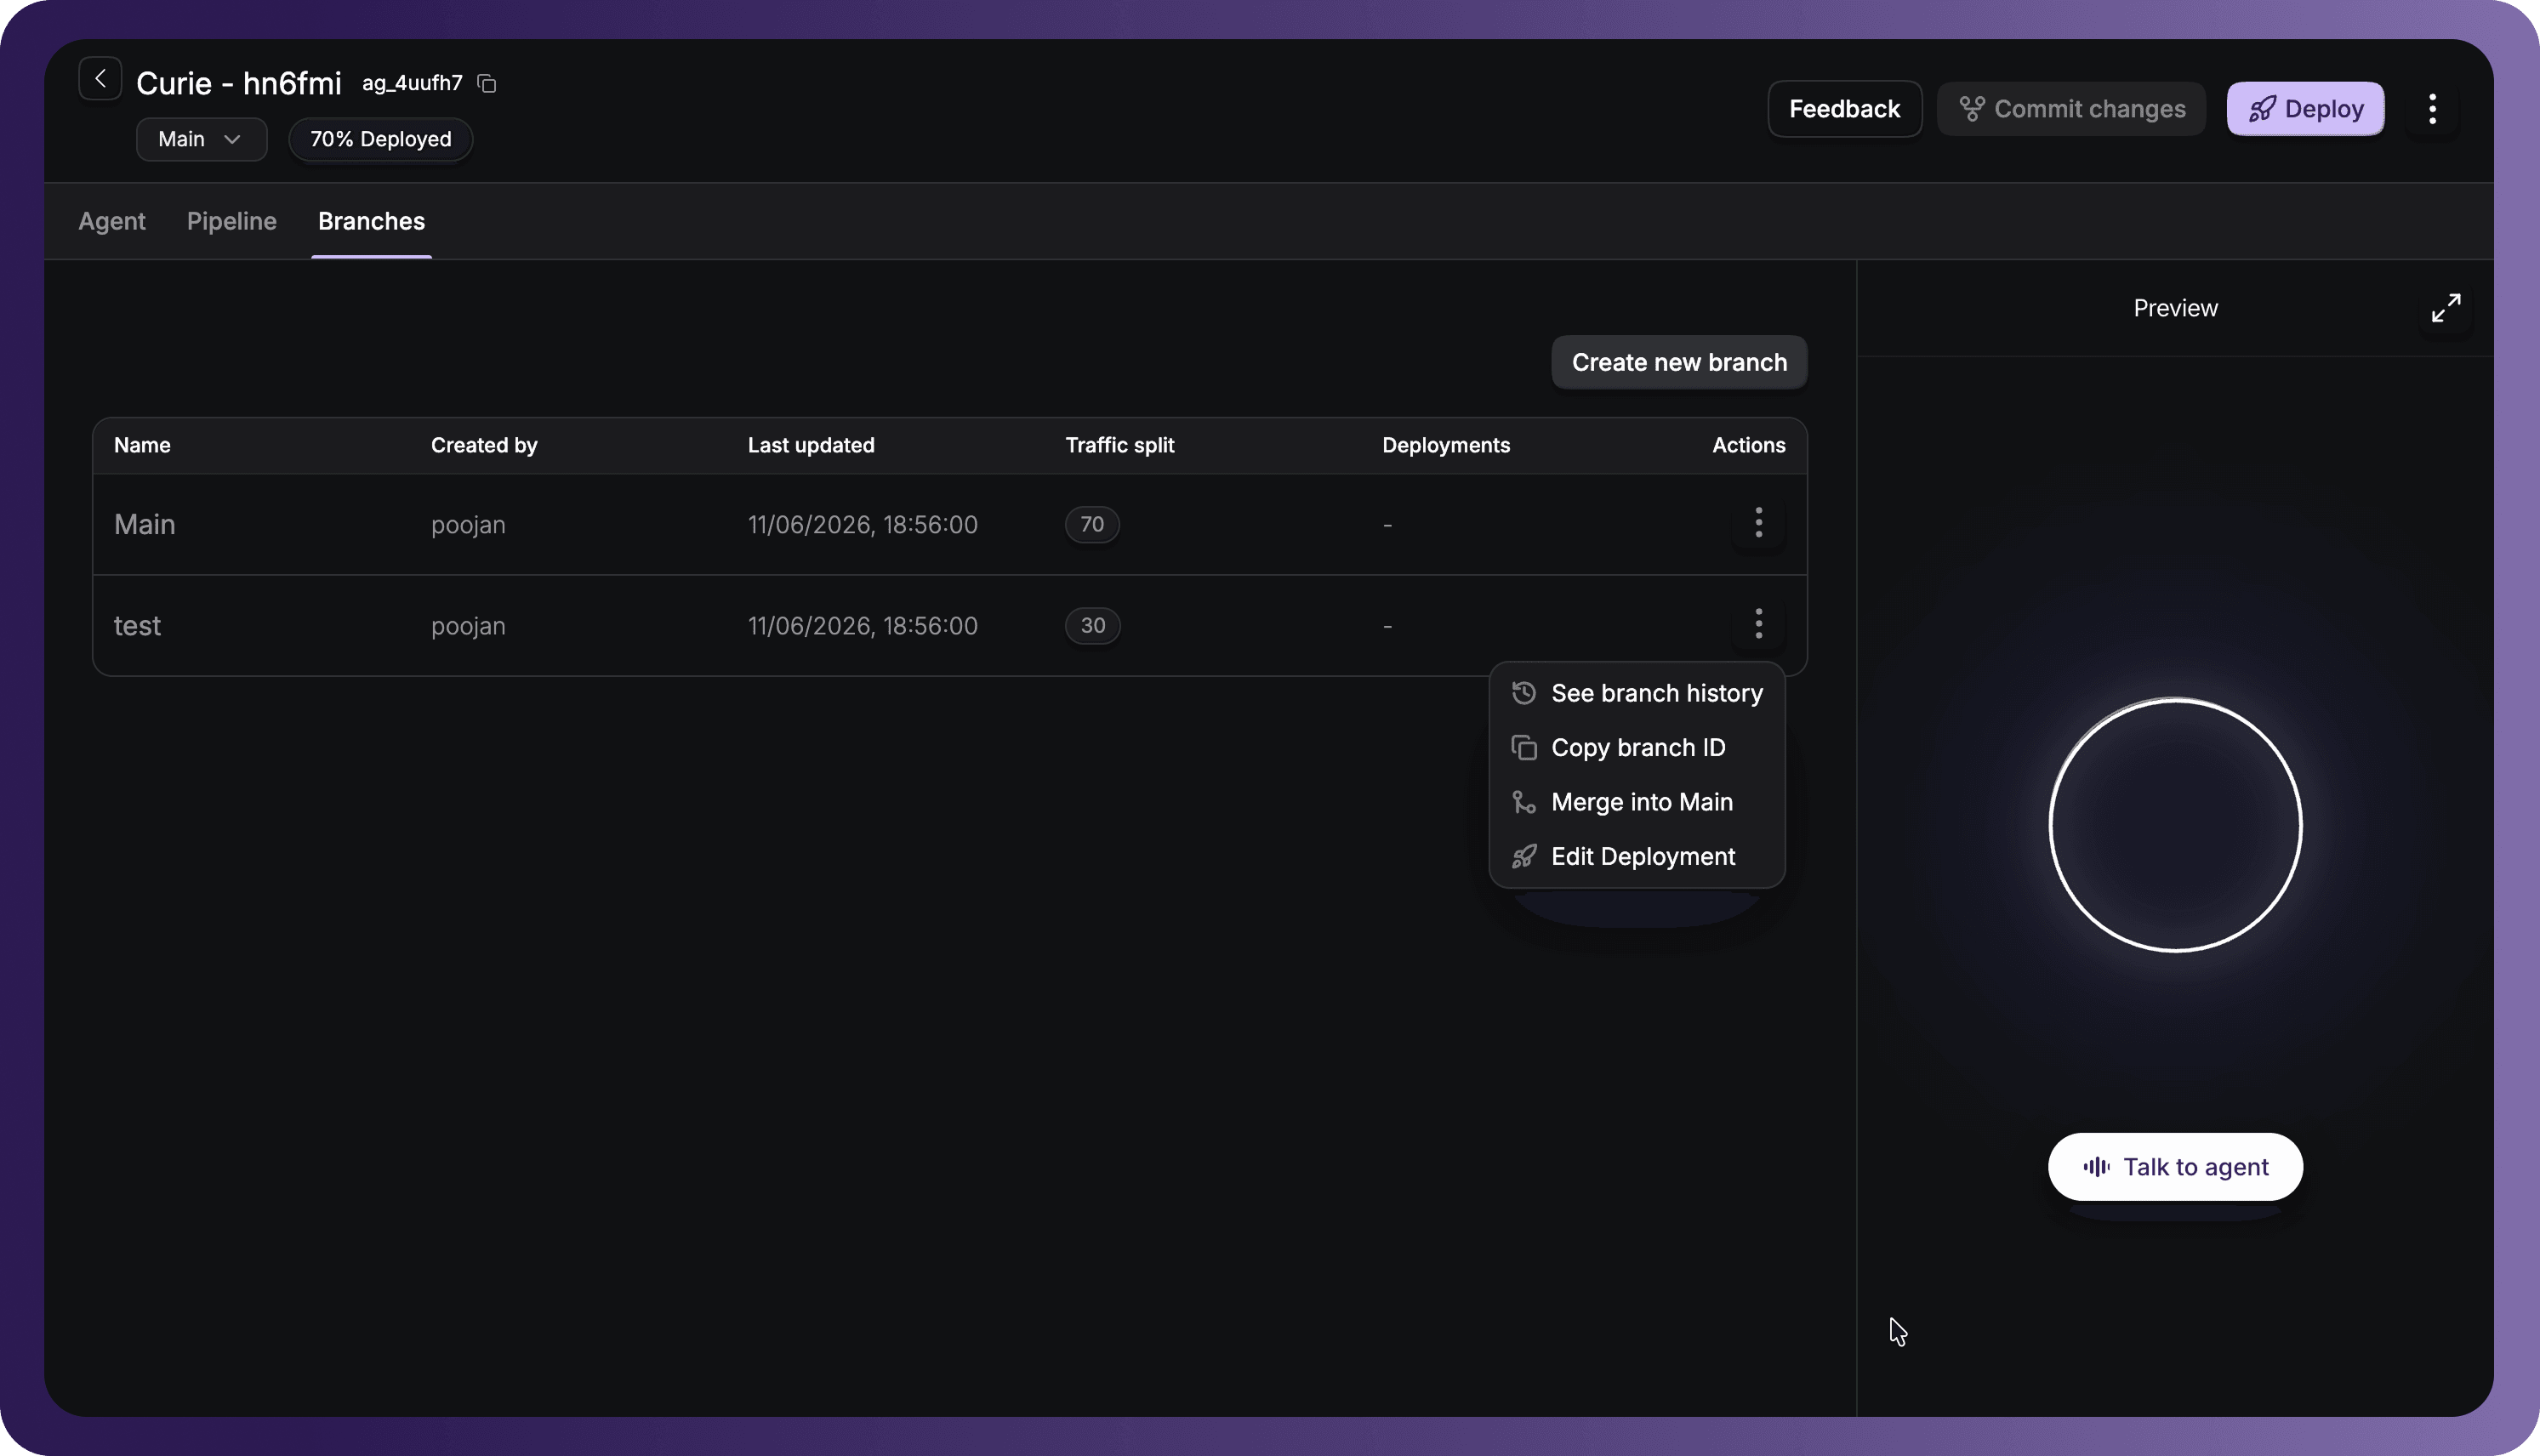
Using the Branches tab, you can isolate testing configurations and manage multi-stage deployment lifecycles.
- Create a Branch: Click Create new branch to spawn independent sandboxes (such as
testorstaging) alongside your default production branch (Main). - Access Branch Actions: Click the three-dots menu on any branch to access localized actions:
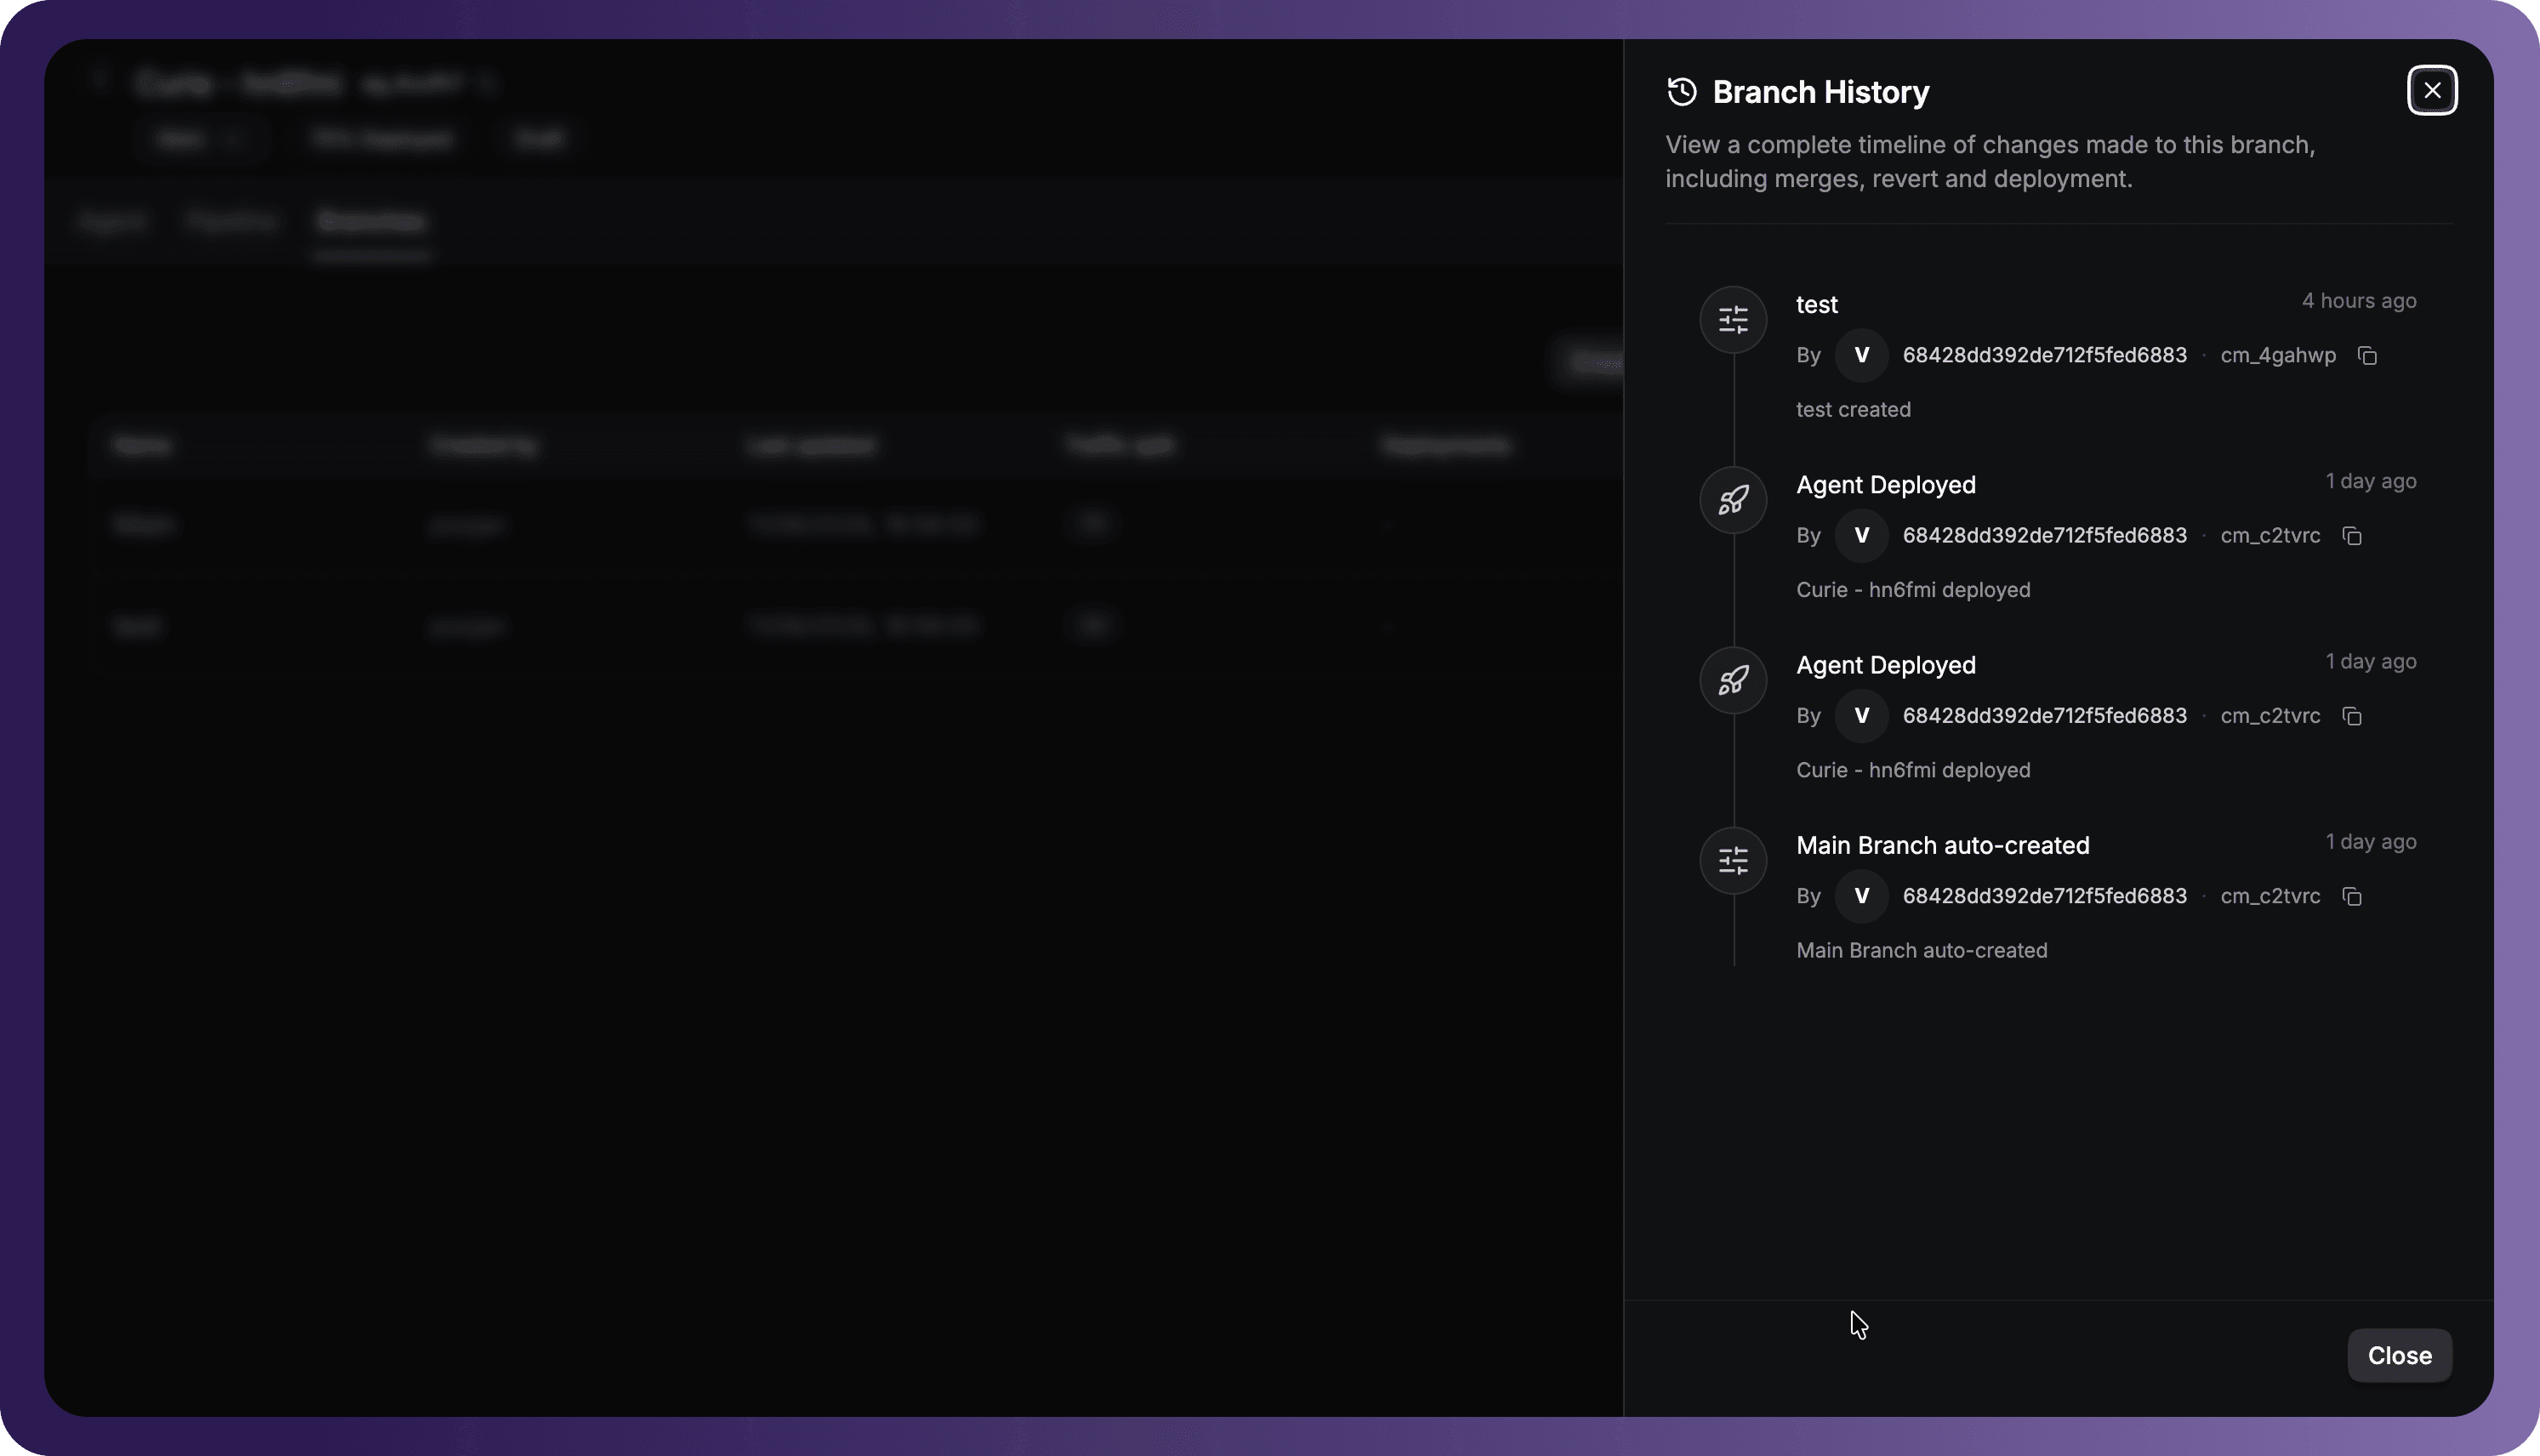
- See branch history: Displays a chronological timeline of commits, deployment timestamps, author tags, and commit descriptions.
- Copy branch ID: Copy the specific identifier used when targeting environments programmatically.
- Merge into Main: Sync validated sandbox changes directly back into your primary environment.
- Edit Deployment: Modify compute resources and traffic routing rates for that specific branch.
How to Revert to a Prior Commit Version
If you need to restore your agent configuration to an earlier point in time, you can execute a roll-back via your commit history:
- Navigate to the Branches tab.
- Click the three-dots menu next to the branch you want to modify and select See branch history.
- In the Branch History timeline drawer, locate and click on the specific commit version you wish to revert to.
- A Version History comparison pop-up will open, showcasing a JSON diff between your last committed state and the historical payload.
- Review the changes, then click the Revert button in the bottom right corner to restore your configurations to that selected version.
3. Pushing Live (Deployment Setup)
When ready to transition your commits into active infrastructure, configure your compute profile and deploy your agent:
- Click the Deploy button in the top-right header.
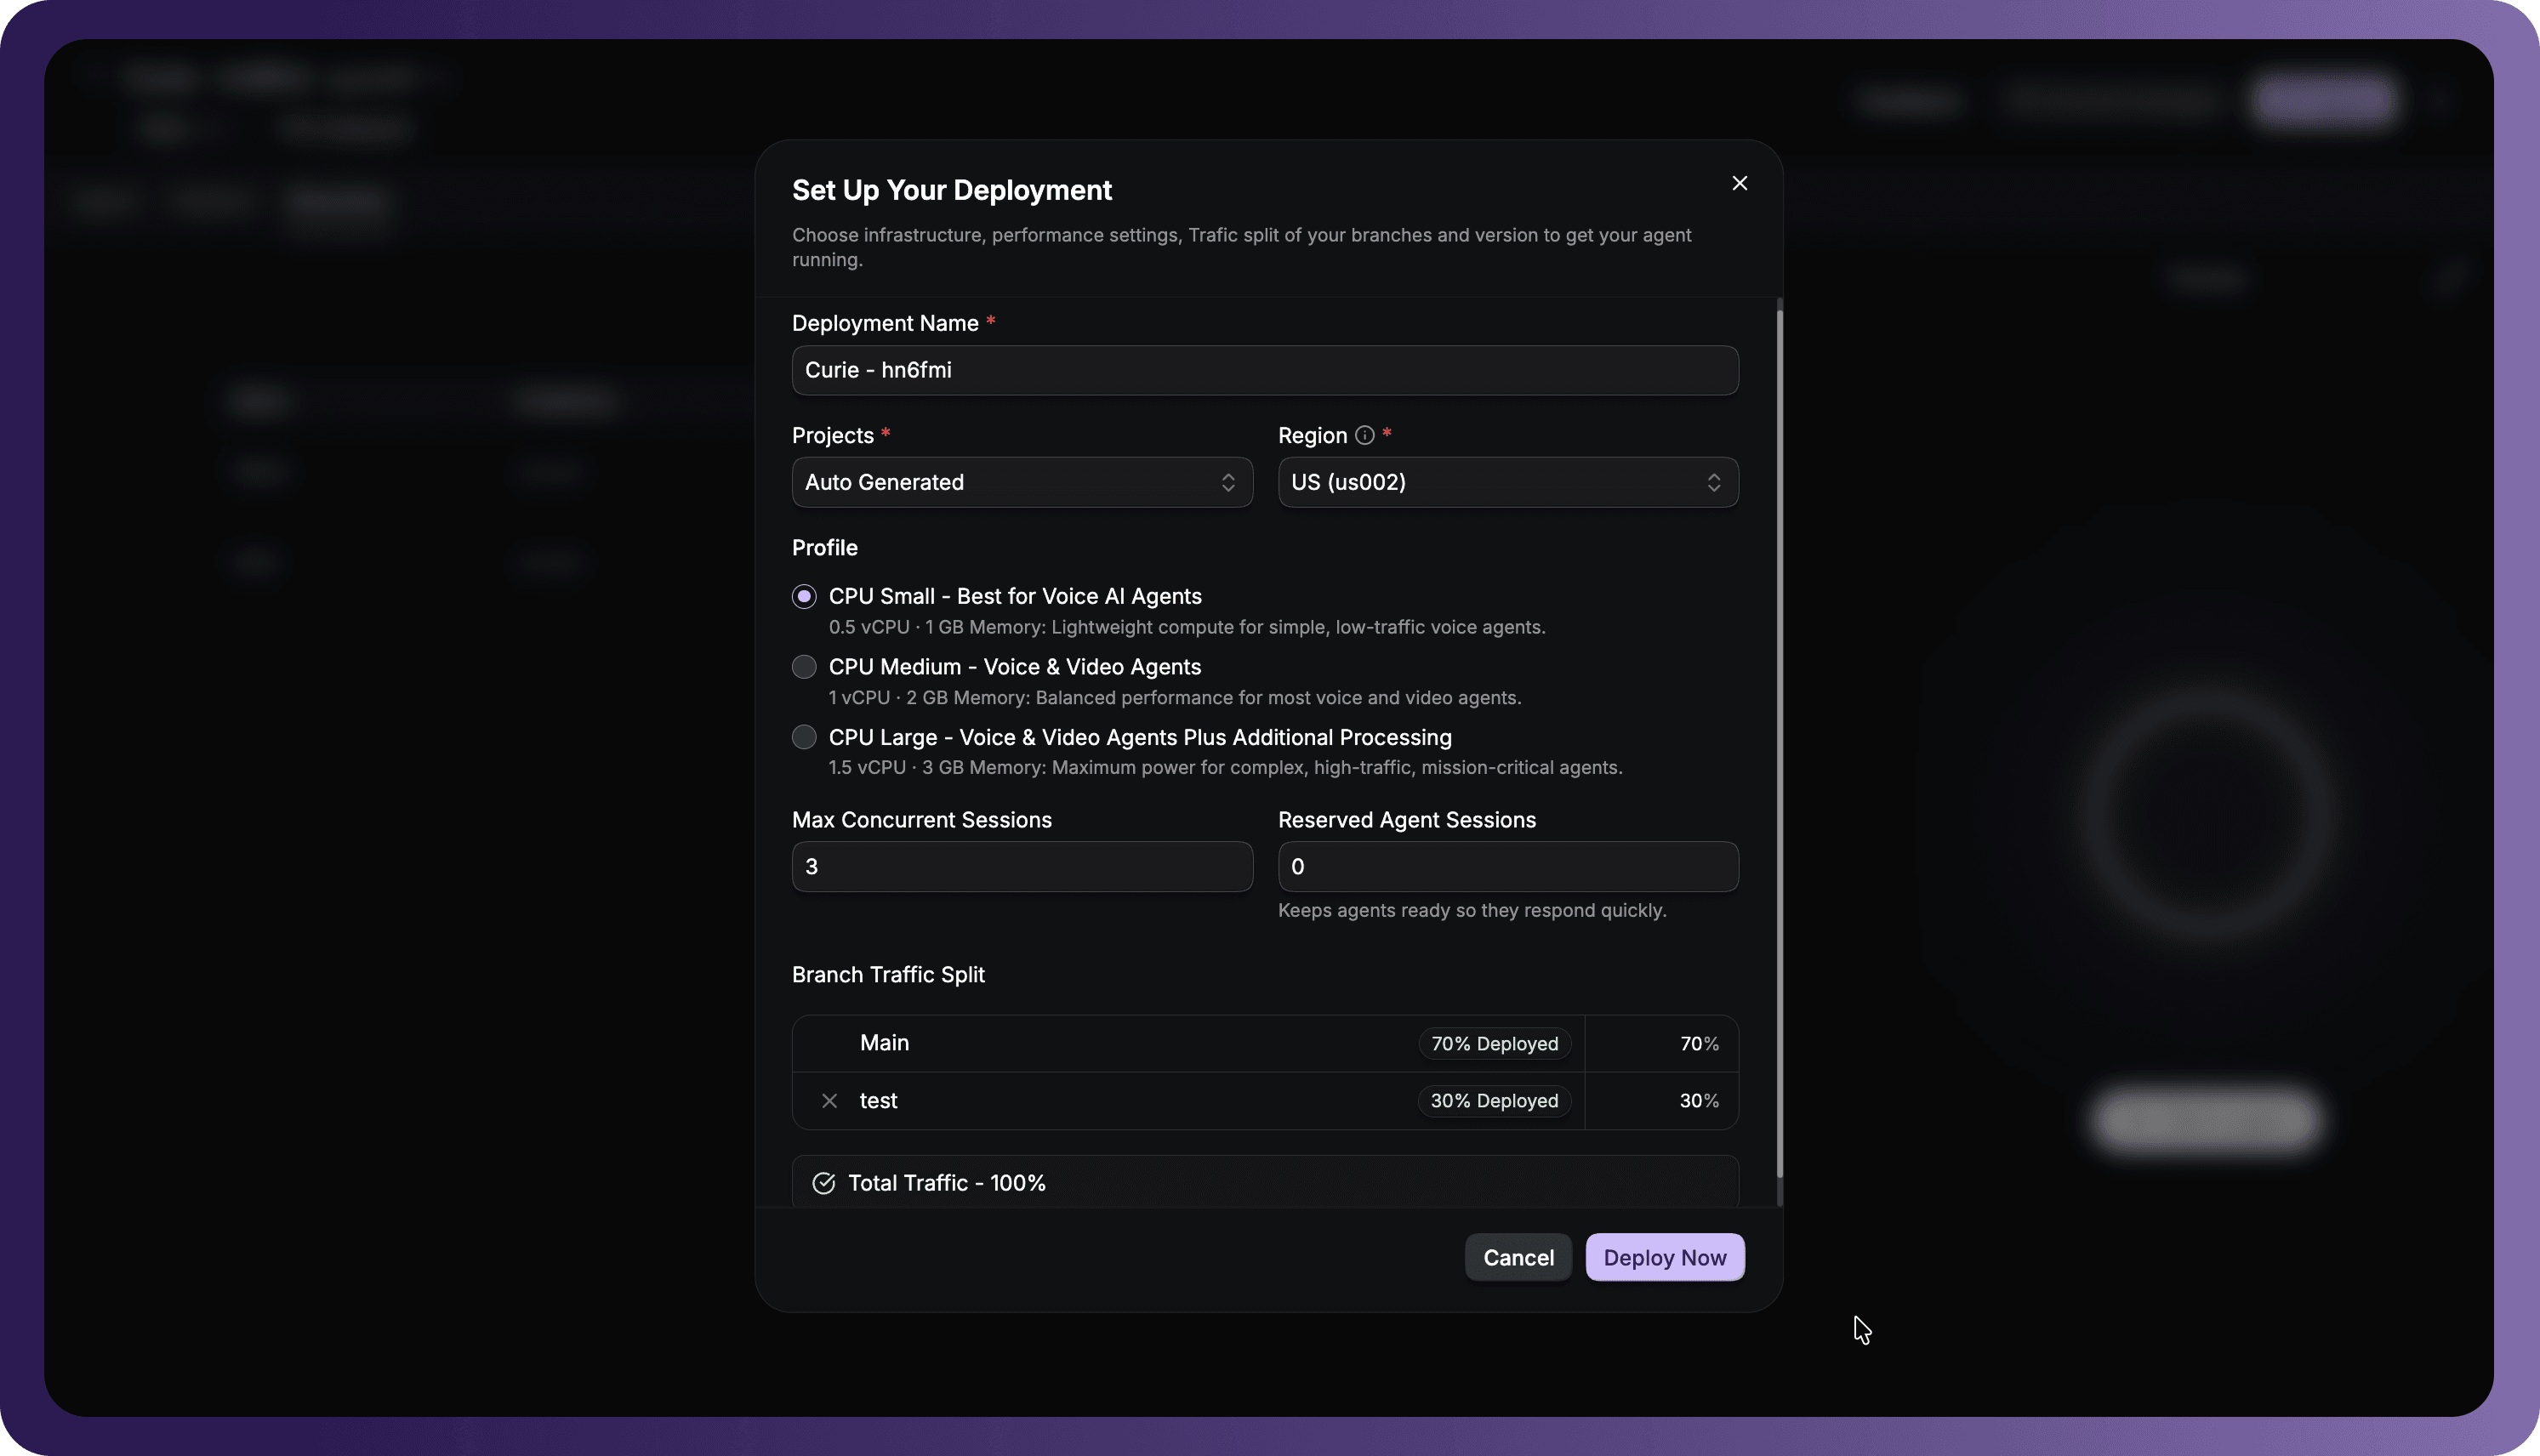
- The Set Up Your Deployment pop-up will appear. Configure the following parameters:
Deployment Profile Settings
- Deployment Name: Choose a name to identify this release instance.
- Projects & Region: Select your active project space and deployment region (e.g., US (us002)) to locate hosting resources near your callers.
- Profile: Choose a dedicated hardware resource size based on your calling volume:
- CPU Small (0.5 vCPU • 1 GB Memory): Ideal for lightweight, low-traffic voice agents.
- CPU Medium (1 vCPU • 2 GB Memory): Balanced compute for standard voice and video integrations.
- CPU Large (1.5 vCPU • 3 GB Memory): High-tier compute designed for high-traffic, mission-critical operations.
- Concurrent & Warm Sessions:
- Max Concurrent Sessions: Define the maximum number of simultaneous phone calls your deployment can process.
- Reserved Agent Sessions: Set your allocation of warm, pre-initialized agent instances to reduce call greeting latency.
Branch Traffic Split
If you have multiple branches active (such as Main and test), you can assign percentage-based routing weights:
- For example, route 70% of live incoming calls to the stable
Mainbranch and 30% to your newly committedtestbranch to complete canary tests. - Ensure your total traffic allocation equals 100%.
- Click Deploy Now to spin up your production environment containers.
Got a Question? ![]() Ask us on discord
Ask us on discord

