Configure Recording Storage
-
This feature allows you to configure storage provider for your meeting recordings.
-
You can configure multiple storage provider with multiple API Keys.
-
Currently, we support
AWS S3,Azure BlobandGCP Cloud Storage. We will add support for other storage provider soon !!
Prerequisites
- An active VideoSDK Developer Account
Aws S3,Azure Blob StorageorGCP Cloud StorageCredentials
How to setup ?
Step 1 : Select Api Key
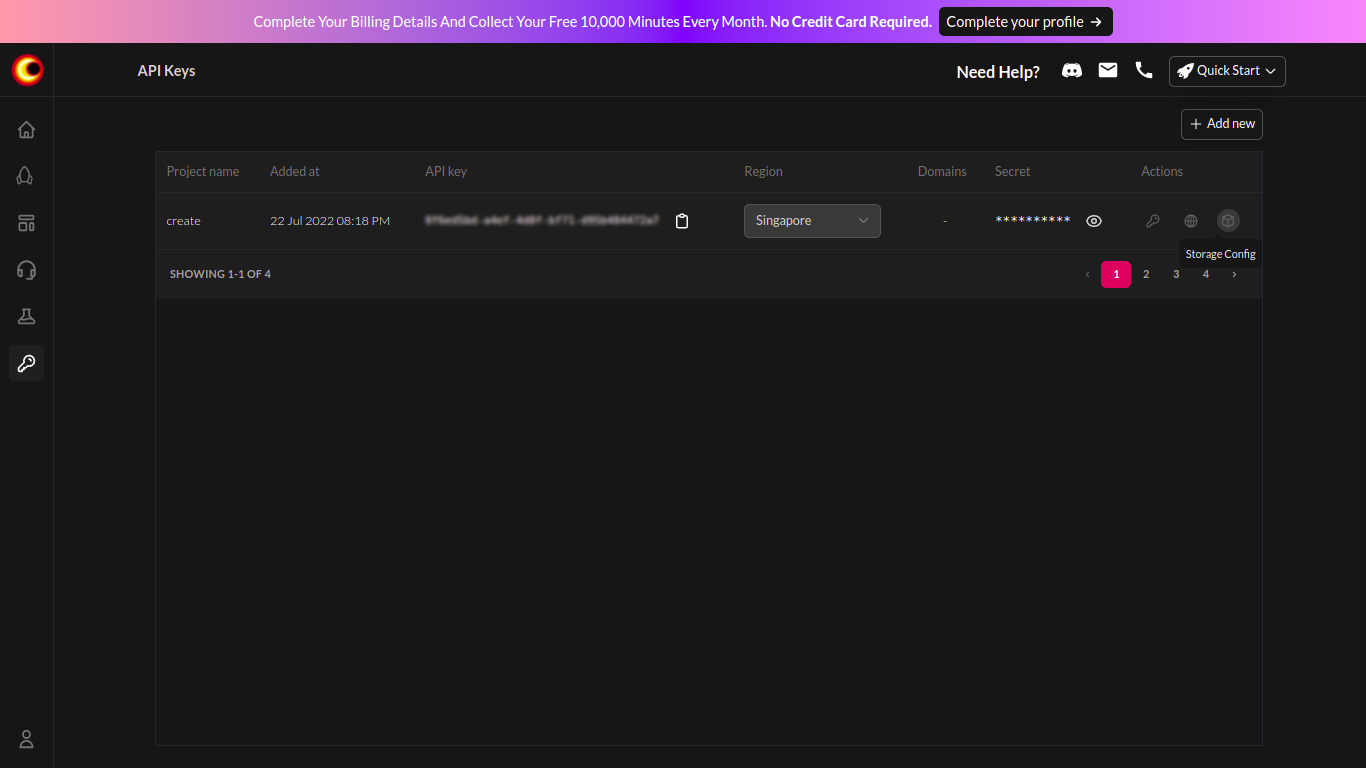
- Go to VideoSDK Dashboard.
- Select API Key for which, you want to set storage configuration.
- Then click on
Storage ConfigIcon in Actions.
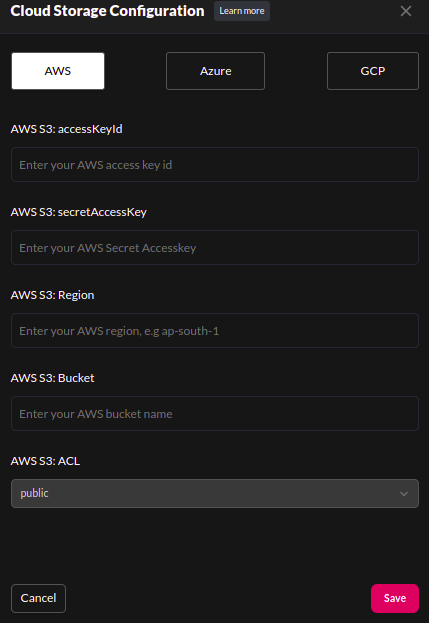
Step 2 : Choose Cloud Storage Provider
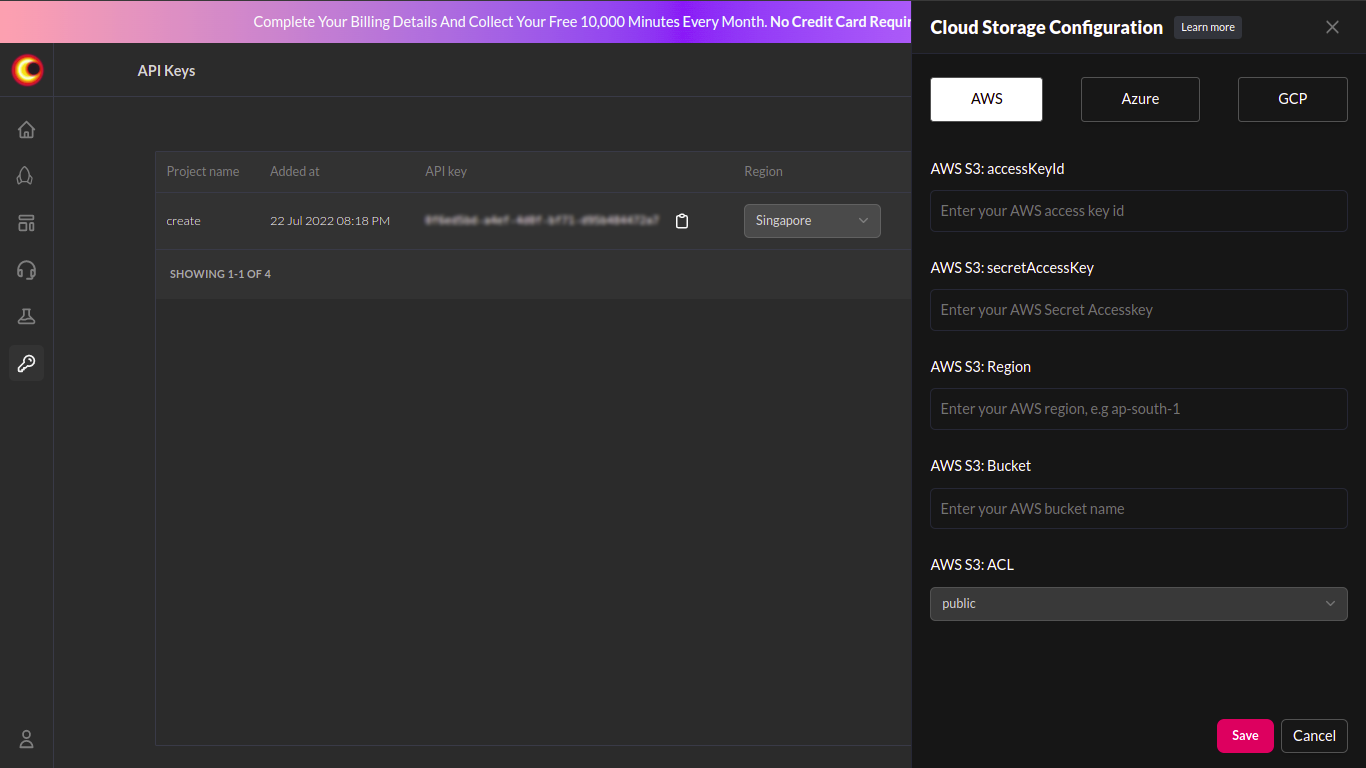
- As you can see in the image, there are 3 Cloud Storage Provider (
Aws,Azure,GCP). - You can select a Cloud Storage Provider as per your requirements.
Step 3 : Configure Bucket or Container
For Aws S3 Storage
-
You will need AWS S3 Bucket. Learn to create S3 Bucket.
-
As you can see in the image, you will need enter
accessKeyId,secretAccessKey,region,bucket, andACLto setup for Aws S3 Storage. -
Click on
Savebutton.
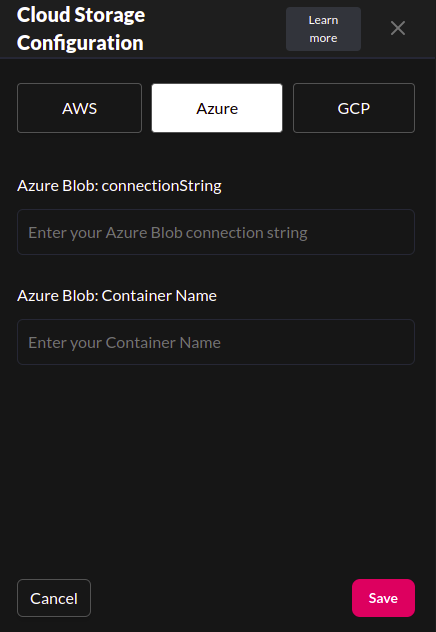
For Azure Blob Storage:
-
You will need Azure Blob Container. Learn to create Blob Container.
-
As you can see in the image, you will need to enter
connectionStringandcontainerNameto setup for Azure Blob. -
Click on
Savebutton.
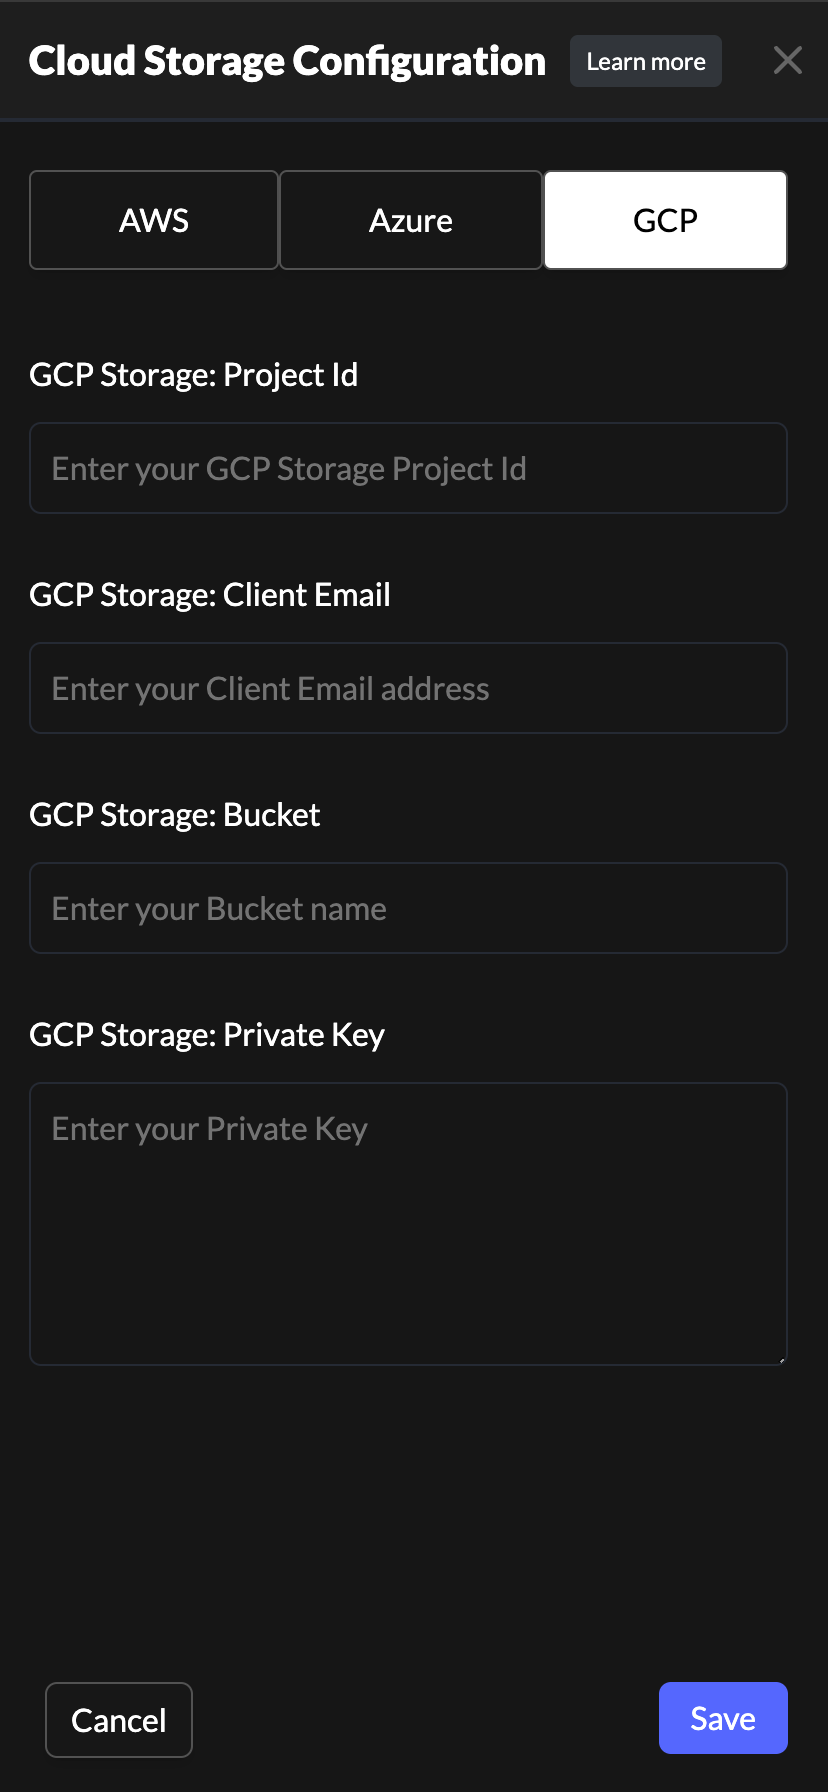
For Google Cloud Storage:
-
You will need Google Cloud Storage Bucket. Learn to create Google Cloud Storage Bucket.
-
After creation, click on the ︙ button in the upper right corner and select
Project settings. -
Under
IAM and Admin, selectService Accounts. In the service account list, click on the ︙ button for the account just added or created before, and selectManage keys. -
Click
ADD KEY > Create new key. SelectJSONin the pop-up box and clickCREATE. A json file is downloaded with the name formatprojectId-xxxxxxxx.json. -
Open the downloaded json file, which looks like the following example:
{
  "type": "service_account",
  "project_id": "videosdk-12345",
  "private_key_id": "yourprivateidkeyyourprivateidkeyyourprivateidkey",
  "private_key": "-----BEGIN PRIVATE KEY-----\nThisisYourPrivateKeyThisisYourPrivateKeyThisisYourPrivateKey\nThisisYourPrivateKey\nThisisYourPrivateKey\nThisisYourPrivateKey\n-----END PRIVATE KEY-----\n",
  "client_email": "xxxx-xxxx@videosdk-12345.iam.gserviceaccount.com",
  "client_id": "123456789012345678901",
  "auth_uri": "https://accounts.google.com/o/oauth2/auth",
  "token_uri": "https://oauth2.googleapis.com/token",
  "auth_provider_x509_cert_url": "https://www.googleapis.com/oauth2/v1/certs",
  "client_x509_cert_url": "https://www.googleapis.com/robot/v1/metadata/x509/videosdk%40videosdk-404307.iam.gserviceaccount.com",
  "universe_domain": "googleapis.com"
}
-
As you can see in the image, you will need to enter
Project Id,Client Email,Bucket,Private Keyto setup for Google Cloud Storage Bucket. You can retrieve these details from the json file. -
Click on
Savebutton.
Step 4 : Test
- It's time to test !!
- Create Room with token generated with the API Key, you have configured for.
- Start meeting with the roomId created and Start Recording !!
- Then, you can see that recording will be available in your Bucket or Container.
- Only a single Recording Storage Config can be possible for a particular Api Key at a time.
- In order to add new Recording Configuration, first you need to delete current configuration.
Got a Question? ![]() Ask us on discord
Ask us on discord

