Generate API Token
Use Generate Token to create a temporary authentication token for a selected API key. Configure the token using the guided options or edit its supported claims in JSON.
Dashboard-generated tokens are intended for development and testing. In production, keep the API key and secret on a trusted backend and use the VideoSDK Server SDK to generate signed authentication tokens. A client joining a room should receive only its participant token. See Authentication & Tokens.
Open the Token Generator
- Sign in to the VideoSDK Dashboard.
- Select RTC and go to API Keys.
- Find the API key that will be used to generate the token.
- Select the key icon in the Actions column.
The Generate API Token dialog opens for the selected API key.
Configure the Token
Choose between Token Config for guided configuration and JSON Editor for advanced configuration.
- Token Config
- JSON Editor
Use Token Config to select the token's expiry and optional role.
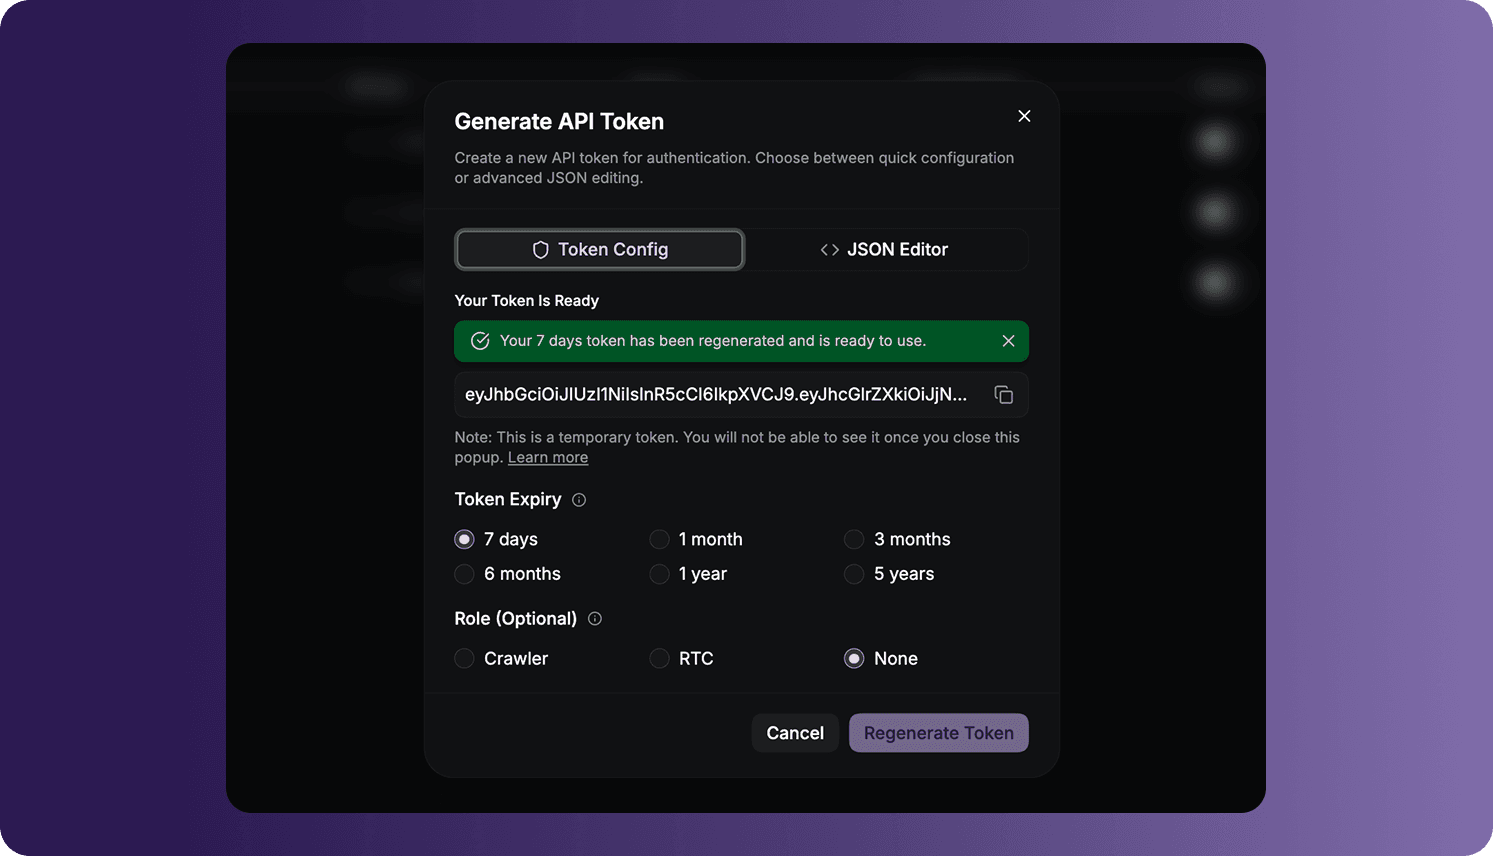
Token Expiry
Select how long the generated token should remain valid:
- 7 days
- 1 month
- 3 months
- 6 months
- 1 year
- 5 years
Role
The optional role controls how the token is intended to be used:
| Role | Intended use |
|---|---|
| Crawler | Accessing the v2 API. A token with this role cannot be used to run a meeting or room. |
| RTC | Running a meeting or room. A token with this role cannot be used with server-side APIs. |
| None | Does not assign either of the specialized optional roles. |
Use JSON Editor when you need to configure the token through supported JSON claims instead of the guided controls.
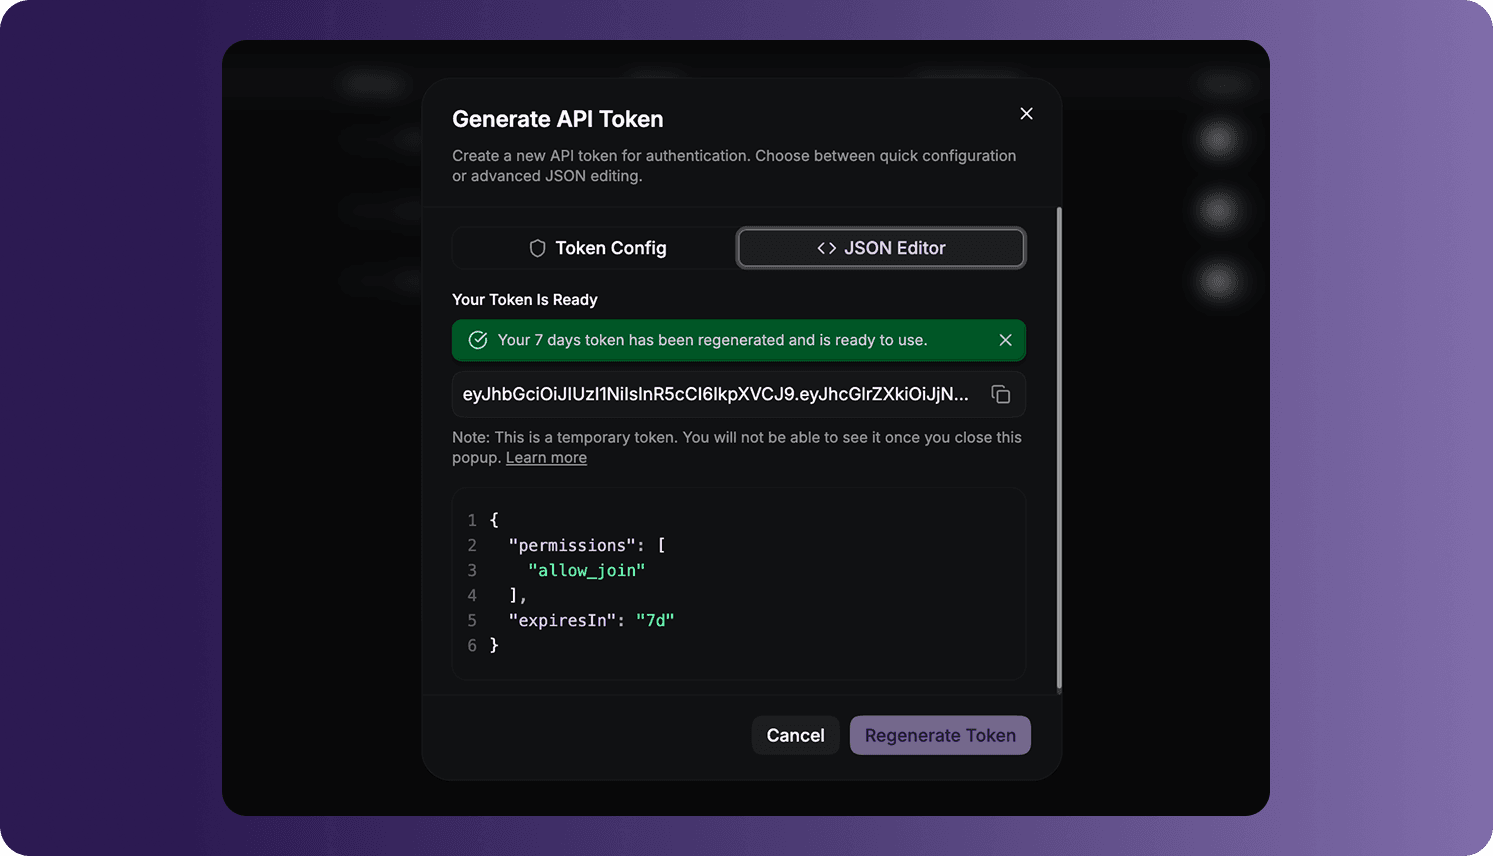
The editor can include configuration such as:
- permissions: The actions permitted by the token, such as
allow_join. - expiresIn: The token lifetime, such as
7d. - roles: An optional role list, such as
rtc.
For example:
{
  "permissions": [
    "allow_join"
  ],
  "expiresIn": "7d",
  "roles": [
    "rtc"
  ]
}
Make sure the JSON is valid and contains only supported token configuration before regenerating the token.
Apply Configuration Changes
Changing the expiry, role, or JSON configuration does not modify the token that is currently displayed. Select Regenerate Token after every configuration change to generate a token containing the updated values.
After regeneration, the confirmation message identifies the selected expiry and role when applicable.
Copy the Token
When Your Token Is Ready appears:
- Select the copy icon beside the generated token.
- Store the token securely.
- Use the token only in the application or service for which it was generated.
The generated token is temporary and cannot be viewed again after the dialog is closed. Select Cancel or close the dialog only after copying the token you need.
Generated tokens grant access according to their configuration. Do not expose them in client-side source code, public repositories, screenshots, or logs.
Frequently Asked Questions
Why does my token still have the previous expiry or role?
Selecting a different expiry or role only changes the pending configuration. Select Regenerate Token, then copy and use the newly displayed token.
What should I do if I closed the dialog before copying the token?
The previously displayed token cannot be revealed again from the dialog. Open Generate Token, confirm the required configuration, select Regenerate Token, and copy the newly generated token before closing the dialog.
Got a Question?  Ask us on discord

