Quick Start for Conference in Angular 2
VideoSDK empowers you to seamlessly integrate the video calling feature into your Angular 2 application within minutes.
In this quickstart, you'll explore the group calling feature of VideoSDK. Follow the step-by-step guide to integrate it within your application.
Prerequisites
Before proceeding, ensure that your development environment meets the following requirements:
- Video SDK Developer Account (Not having one, follow Video SDK Dashboard)
- Have Node and NPM installed on your device.
One should have a VideoSDK account to generate token. Visit VideoSDK dashboard to generate token
Getting Started with the Code!
Follow the steps to create the environment necessary to add video calls into your app. You can also find the code sample for quickstart here.
Install Video SDK
Import VideoSDK using the <script> tag or Install it using the following npm command. Make sure you are in your app directory before you run this command.
- <script>
- npm
- yarn
<html>
  <head>
    ....
  </head>
  <body>
    .....
    <script src="https://sdk.videosdk.live/js-sdk/0.1.6/videosdk.js"></script>
  </body>
</html>
npm install @videosdk.live/js-sdk
yarn add @videosdk.live/js-sdk
Structure of the project
Your project structure should look like this.
  root
   ├── node_modules
   ├── src
   │    ├── app
   │        ├── join-screen
   │             ├── join-screen.component.html
   │             ├── join-screen.component.ts
   │         ├── top-bar
   │             ├── top-bar.component.html
   │             ├── top-bar.component.ts
   │    ├── app-routing.module.ts // Default
   │    ├── app.component.html // Default
   │    ├── app.component.ts // Default
   │    ├── app.module.ts // Default
   │    ├── meeting.service.ts
   │    ├── enviroments
   │        ├── enviroment.ts
   │    ├── styles.css // Default
   │    ├── index.html // Default
You will be working on the following files:
- enviroment.ts: Responsible for storing the token.
- meeting.service.ts: Responsible for handling API calls such as generating a unique meetingId, validating a meetingId and a token.
- join-screen.component.html: Responsible for creating a basic UI for the joinScreen functionality.
- top-bar.component.html: Responsible for creating a basic topbar with webcam, mic and leave meeting buttons.
- app.component.html: Responsible for rendering components such as
Joinscreen,TopbarandParticipantGrid. - join-screen.component.ts: Responsible for handling the logic and functionality related to the
join-screen.component.htmltemplate. - top-bar.component.ts : Responsible for handling the logic and functionality related to the
top-bar.component.htmltemplate. - app.component.ts: Handles various meeting and participant-related events, including
joinMeetingandcreateMeeting. Additionally, responsible for rendering components such asjoin-screen,top-bar, andparticipantGrid.
Step 1: Get started with Meeting.service.ts
Prior to moving on, you must create an API request to generate a unique meetingId. You will need an authentication token, which you can create either through the videosdk-rtc-api-server-examples or directly from the VideoSDK Dashboard for developers.
Configure the token in the enviroment.ts file, which you can obtain from the VideoSDK Dashbord.
// We will use Auth token to generate a meetingId and connect to it
export const environment = {
  token: "YOUR_TOKEN_HERE",
};
import { Injectable } from "@angular/core";
import { HttpClient, HttpHeaders } from "@angular/common/http";
import { Observable } from "rxjs";
import { map } from "rxjs/operators";
import { environment } from "src/enviroments/enviroment";

@Injectable({
  providedIn: "root",
})
export class MeetingService {
  private authToken = environment.token;

  constructor(private http: HttpClient) {}

  createMeeting(): Observable<string> {
    const apiUrl = "https://api.videosdk.live/v2/rooms";
    const headers = new HttpHeaders({
      authorization: this.authToken,
      "Content-Type": "application/json",
    });

    return this.http
      .post<{ roomId: string }>(apiUrl, {}, { headers })
      .pipe(map((response) => response.roomId));
  }

  validateMeeting(meetingId: string): Observable<boolean> {
    const url = `https://api.videosdk.live/v2/rooms/validate/${meetingId}`;
    const headers = new HttpHeaders({
      authorization: this.authToken,
      "Content-Type": "application/json",
    });

    return this.http
      .get<{ roomId: string }>(url, {
        headers,
      })
      .pipe(map((response) => response.roomId === meetingId));
  }

  ngOnInit() {}
}
- Once the meeting service is successfully created, import it into the
app.module.tsfile.
import { CUSTOM_ELEMENTS_SCHEMA, NgModule } from "@angular/core";
import { BrowserModule } from "@angular/platform-browser";
import { AppRoutingModule } from "./app-routing.module";
import { AppComponent } from "./app.component";
import { JoinScreenComponent } from "./join-screen/join-screen.component";
import { TopBarComponent } from "./top-bar/top-bar.component";
import { MeetingService } from "./meeting.service";
import { HttpClientModule } from "@angular/common/http";
import { FormsModule } from "@angular/forms";

@NgModule({
  schemas: [CUSTOM_ELEMENTS_SCHEMA],
  declarations: [AppComponent, JoinScreenComponent, TopBarComponent],
  imports: [BrowserModule, AppRoutingModule, HttpClientModule, FormsModule],
  providers: [MeetingService],
  bootstrap: [AppComponent],
})
export class AppModule {}
Step 2: Design the user interface (UI)
Create an HTML file that will render the join-screen and top-bar components.
- First, Create the UI for the
joinScreenfunctionality..
<div id="joinPage" class="main-bg" style="display: flex">
  <div style="display: flex; flex-direction: column">
    <h3>Angular 2 quickstart with Videosdk</h3>
    <form name="myForm" style="display: flex">
      <button (click)="fireCreateMeeting()">Create a meeting</button>
      <p
        style="
          margin-left: 8px;
          margin-right: 8px;
          font-size: 14px;
          margin-top: 2px;
          margin-bottom: 0px;
        "
      >
        OR
      </p>
      <input
        name="meetingId"
        type="text"
        placeholder="Enter meeting id"
        [(ngModel)]="meetingId"
      />

      <button (click)="fireValidateMeeting()" style="margin-left: 8px">
        Join a meeting
      </button>
    </form>
  </div>
</div>
Output

- Next, Create the
topBarUI.
<div
  style="height: 70px; background-color: lightgray"
  ng-controller="myController"
  ng-show="showMeetingScreen"
  id="top-bar"
>
  <div class="top-bar-div">
    <div>
      <p style="margin-top: 0px; margin-bottom: 0px; font-weight: 700">
        MeetingId: {{meetingId}}
      </p>
    </div>
    <div style="display: flex; align-items: center; margin-top: 8px">
      <button style="cursor: pointer" ng-click="toggleWebcam()">
        Toggle Webcam
      </button>
      <button style="margin-left: 4px; cursor: pointer" ng-click="toggleMic()">
        Toggle Mic
      </button>
      <button class="leave-btn" ng-click="leaveMeeting()">Leave Meeting</button>
    </div>
  </div>
</div>
Output

- Finally, assemble the components by creating the
app.component.htmlfile and incorporating the previously created components into it. Additionally, create themeeting-containerhere.
<div *ngIf="showJoinScreen">
  <!-- join-screen Start -->
  <app-join-screen></app-join-screen>
  <!-- join-screen End -->
</div>
<div *ngIf="showMeetingScreen">
  <!-- topbar Start -->
  <app-top-bar></app-top-bar>
  <!-- topbar End -->

  <!-- Meeting Container -->
  <div
    style="
      display: flex;
      flex-direction: column;
      overflow-y: auto;
      max-height: calc(100vh - 85px);
    "
  >
    <div class="container">
      <div
        #participantGridContainer
        id="participant-grid-container"
        class="row"
      ></div>
    </div>
  </div>
</div>

<router-outlet></router-outlet>
Step 3: Implement Join Screen
Subsequently, implement the createMeeting and validateMeeting function sin app.component.ts to call the respective APIs.
import { Component, ElementRef, Renderer2, ViewChild } from "@angular/core";
import { VideoSDK } from "@videosdk.live/js-sdk";
import { environment } from "./../enviroments/enviroment";
import { MeetingService } from "./meeting.service";

@Component({
  selector: "app-root",
  templateUrl: "./app.component.html",
  styleUrls: ["./app.component.css"],
})
export class AppComponent {
  title = "videosdk_angular_2_quickstart";

  meeting: any;
  participantName: string = "";
  meetingId: string = "";
  showJoinScreen: boolean = true;
  showMeetingScreen: boolean = false;
  showTopBar: boolean = false;

  constructor(
    private renderer: Renderer2,
    private meetingService: MeetingService
  ) {
    this.participantName = "Homi J. Bhabha";
  }

  createMeeting() {
    this.meetingService.createMeeting().subscribe(
      (roomId) => {
        this.meetingId = roomId;
        this.joinMeeting();
      },
      (error) => {
        console.error("Failed to create meeting:", error);
      }
    );
  }

  validateMeeting(meetingId: any) {
    this.meetingService.validateMeeting(meetingId).subscribe(
      (isValid) => {
        if (isValid) {
          this.meetingId = meetingId;
          this.joinMeeting();
        } else {
          alert("Invalid meeting id");
        }
      },
      (error) => {
        console.error("Failed to validate meeting:", error);
        // Handle the error
      }
    );
  }
}
- After creating the above functions, pass them to the
join-screencomponent as follows:
<div *ngIf="showJoinScreen">
  <app-join-screen
    (validateMeeting)="validateMeeting($event)"
    (createMeeting)="createMeeting()"
  ></app-join-screen>
</div>
- Next in the
join-screen.component.tsfile, run the function.
import { Component, EventEmitter, Input, Output } from "@angular/core";

@Component({
  selector: "app-join-screen",
  templateUrl: "./join-screen.component.html",
  styleUrls: ["./join-screen.component.css"],
})
export class JoinScreenComponent {
  @Output() createMeeting = new EventEmitter();
  @Output() validateMeeting = new EventEmitter<string>();
  @Input() meetingId: string = "";

  fireValidateMeeting() {
    this.validateMeeting.emit(this.meetingId);
  }

  fireCreateMeeting() {
    this.createMeeting.emit();
  }

  constructor() {}

  ngOnInit() {}
}
Step 4: Initialize meeting
Following that, initialize the meeting using the initMeeting() function and proceed to join the meeting.
// Initialize meeting
 async initMeeting() {
    VideoSDK.config(environment.token);

    this.meeting = VideoSDK.initMeeting({
      meetingId: this.meetingId, // required
      name: this.participantName, // required
      micEnabled: true, // optional, default: true
      webcamEnabled: true, // optional, default: true
    });
  }

  joinMeeting() {
    this.initMeeting();
    this.meeting.join();

    this.handleMeetingEvents(this.meeting);
    const showJoinScreenMessage = this.renderer.createElement("div");

    this.renderer.setAttribute(
      showJoinScreenMessage,
      "id",
      "show-join-screen-message"
    );
    this.renderer.setProperty(
      showJoinScreenMessage,
      "innerHTML",
      "Please wait to join meeting..."
    );
    this.renderer.setStyle(showJoinScreenMessage, "color", "black");
    this.renderer.setStyle(showJoinScreenMessage, "fontSize", "20px");
    this.renderer.setStyle(showJoinScreenMessage, "fontWeight", "bold");
    this.renderer.setStyle(showJoinScreenMessage, "marginTop", "20px");
    this.renderer.setStyle(showJoinScreenMessage, "marginLeft", "20px");
    this.renderer.appendChild(document.body, showJoinScreenMessage);
  }

 // for handle meeting events
  handleMeetingEvents(meeting: any) {}
Output
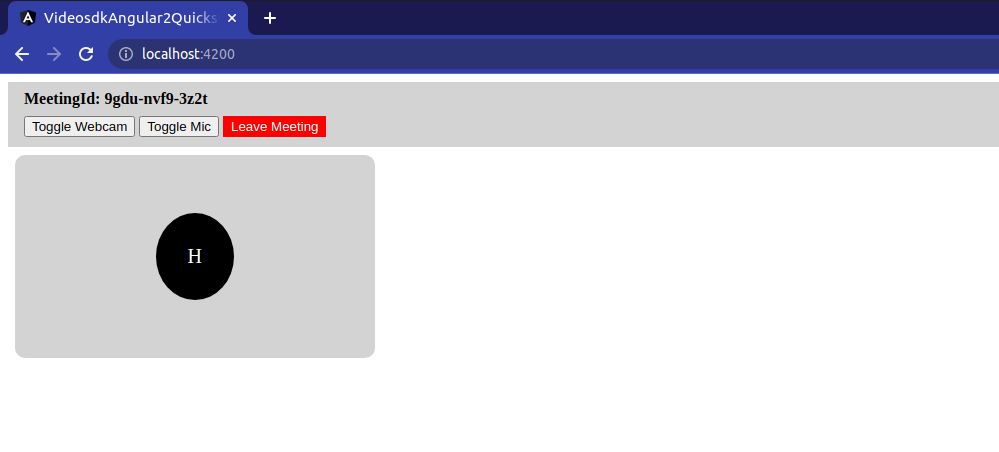
Step 5: Handle Meeting Events
Once the meeting is successfully initialized, create the participant grid and manage events such as meeting-joined, meeting-left, and participant events.
export class AppComponent {
  handleMeetingEvents(meeting: any) {
    this.localParticipant = meeting.localParticipant;
    this.participants = meeting.participants;

    if (meeting) {
      this.showJoinScreen = false;
      this.showMeetingScreen = true;
    }

    // meeting joined event
    meeting.on("meeting-joined", () => {
      var showJoinScreenMessage = document.getElementById(
        "show-join-screen-message"
      );
      this.renderer.removeChild(document.body, showJoinScreenMessage);
      const { participantMediaElement } = this.participantGridGenerator(
        this.meeting.localParticipant
      );
      this.showTopBar = true;

      meeting.localParticipant.on("stream-enabled", (stream: any) => {
        console.log("Stream Enabled: ");
        this.handleStreamEnabled(
          stream,
          meeting.localParticipant,
          true,
          participantMediaElement
        );
      });
      meeting.localParticipant.on("stream-disabled", (stream: any) => {
        console.log("Stream Disabled: ");
        this.handleStreamDisabled(
          stream,
          meeting.localParticipant,
          true,
          participantMediaElement
        );
      });
    });

    // meeting left event
    meeting.on("meeting-left", () => {
      while (this.participantGridContainer.nativeElement.firstChild) {
        this.participantGridContainer.nativeElement.removeChild(
          this.participantGridContainer.nativeElement.firstChild
        );
      }
      this.showMeetingScreen = false;
      this.showJoinScreen = true;
    });

    //remote participant events
    // participant joined
    meeting.on("participant-joined", (participant) => {
      console.log("New Participant Joined: ", participant.id);

      participant.on("stream-enabled", (stream) => {
        //...
      });
      participant.on("stream-disabled", (stream) => {
        //...
      });
    });

    // participant left
    meeting.on("participant-left", (participant) => {
      //...
    });
  }
}
Step 6: Create Media Elements
In this step, Create a function to generate audio and video elements for displaying both local and remote participants. Set the corresponding media track based on whether it's a video or audio stream.
export class AppComponent {
  isWebcamOn: boolean = true;
  isMicOn: boolean = true;
  // creating video element
  createVideoElement(
    stream: any,
    participant: any,
    participantMediaElement: any
  ) {
    const video = this.renderer.createElement("video");
    const mediaStream = new MediaStream();
    mediaStream.addTrack(stream.track);
    this.renderer.setAttribute(video, "id", `v-${participant.id}`);
    this.renderer.setAttribute(video, "autoplay", "true");
    this.renderer.setAttribute(video, "playsinline", "true");
    this.renderer.setAttribute(video, "muted", "true");
    this.renderer.setAttribute(
      video,
      "style",
      "width: 100%; height: 100%;position: absolute;top: 0;left: 0;object-fit: cover;"
    );
    this.renderer.setProperty(video, "srcObject", mediaStream);
    const videoElement = this.renderer.createElement("div");
    this.renderer.setAttribute(
      videoElement,
      "id",
      `video-container-${participant.id}`
    );

    this.renderer.setAttribute(
      videoElement,
      "style",
      "width: 100%; height: 100%;"
    );
    this.renderer.setStyle(videoElement, "position", "relative");
    this.renderer.appendChild(participantMediaElement, videoElement);
    this.renderer.appendChild(videoElement, video);
    const cornerDisplayName = this.renderer.createElement("div");
    this.renderer.setAttribute(
      cornerDisplayName,
      "id",
      `name-container-${participant.id}`
    );
    this.renderer.setStyle(cornerDisplayName, "position", "absolute");
    this.renderer.setStyle(cornerDisplayName, "bottom", "16px");
    this.renderer.setStyle(cornerDisplayName, "left", "16px");
    this.renderer.setStyle(cornerDisplayName, "color", "white");
    this.renderer.setStyle(
      cornerDisplayName,
      "backgroundColor",
      "rgba(0, 0, 0, 0.5)"
    );
    this.renderer.setStyle(cornerDisplayName, "padding", "2px");
    this.renderer.setStyle(cornerDisplayName, "borderRadius", "2px");
    this.renderer.setStyle(cornerDisplayName, "fontSize", "12px");
    this.renderer.setStyle(cornerDisplayName, "fontWeight", "bold");
    this.renderer.setStyle(cornerDisplayName, "zIndex", "1");
    this.renderer.setStyle(cornerDisplayName, "padding", "4px");
    cornerDisplayName.innerHTML =
      participant.displayName.length > 15
        ? participant.displayName.substring(0, 15) + "..."
        : participant.displayName;
    this.renderer.appendChild(videoElement, cornerDisplayName);
  }

  // creating audio element
  createAudioElement(
    stream: any,
    participant: any,
    participantMediaElement: any
  ) {
    const audio = this.renderer.createElement("audio");
    const mediaStream = new MediaStream();
    mediaStream.addTrack(stream.track);
    this.renderer.setAttribute(audio, "id", `audio-${participant.id}`);
    this.renderer.setAttribute(audio, "autoplay", "true");
    this.renderer.setAttribute(audio, "playsinline", "true");
    this.renderer.setAttribute(audio, "muted", "true");
    this.renderer.setProperty(audio, "srcObject", mediaStream);

    const audioElement = this.renderer.createElement("div");
    this.renderer.setAttribute(
      audioElement,
      "id",
      `audio-container-${participant.id}`
    );
    this.renderer.appendChild(participantMediaElement, audioElement);
    this.renderer.appendChild(audioElement, audio);
  }

  // creating name element
  createNameElemeent(participant: any) {
    var nameElement = this.renderer.createElement("div");
    this.renderer.setAttribute(
      nameElement,
      "id",
      `name-container-${participant.id}`
    );
    nameElement.innerHTML = participant.displayName.charAt(0).toUpperCase();
    this.renderer.setStyle(nameElement, "backgroundColor", "black");
    this.renderer.setStyle(nameElement, "color", "white");
    this.renderer.setStyle(nameElement, "textAlign", "center");
    this.renderer.setStyle(nameElement, "padding", "32px");
    this.renderer.setStyle(nameElement, "borderRadius", "100%");
    this.renderer.setStyle(nameElement, "fontSize", "20px");
    return nameElement;
  }

  // handle streams
  handleStreamEnabled(
    stream: any,
    participant: any,
    isLocal: any,
    participantMediaElement: any
  ) {
    if (stream.kind == "video") {
      var nameElement = document.getElementById(
        `name-container-${participant.id}`
      );
      participantMediaElement.removeChild(nameElement);
      this.createVideoElement(stream, participant, participantMediaElement);
    }
    if (!isLocal) {
      if (stream.kind == "audio") {
        this.createAudioElement(stream, participant, participantMediaElement);
      }
    }
  }

  handleStreamDisabled(
    stream: any,
    participant: any,
    isLocal: any,
    participantMediaElement: any
  ) {
    if (stream.kind == "video") {
      var videoElement = document.getElementById(
        `video-container-${participant.id}`
      );

      var nameElement = this.createNameElemeent(participant);
      this.renderer.removeChild(participantMediaElement, videoElement);
      this.renderer.appendChild(participantMediaElement, nameElement);
    }
    if (!isLocal) {
      if (stream.kind == "audio") {
        var audioElement = document.getElementById(
          `audio-container-${participant.id}`
        );
        this.renderer.removeChild(participantMediaElement, audioElement);
      }
    }
  }

  // generate participant grid
  participantGridGenerator(participant: any) {
    var participantGridItem = this.renderer.createElement("div");
    this.renderer.setStyle(participantGridItem, "backgroundColor", "lightgrey");
    this.renderer.setStyle(participantGridItem, "borderRadius", "10px");
    this.renderer.setStyle(participantGridItem, "aspectRatio", 16 / 9);
    this.renderer.setStyle(participantGridItem, "width", "360px");
    this.renderer.setStyle(participantGridItem, "marginTop", "8px");
    this.renderer.setStyle(participantGridItem, "display", "flex");
    this.renderer.setStyle(participantGridItem, "alignItems", "center");
    this.renderer.setStyle(participantGridItem, "justifyContent", "center");
    this.renderer.setStyle(participantGridItem, "overflow", "hidden");

    this.renderer.setAttribute(
      participantGridItem,
      "id",
      `participant-grid-item-${participant.id}`
    );

    this.renderer.setAttribute(participantGridItem, "class", "col-4");

    var participantMediaElement = this.renderer.createElement("div");
    this.renderer.setAttribute(
      participantMediaElement,
      "id",
      `participant-media-container-${participant.id}`
    );
    this.renderer.setStyle(participantMediaElement, "position", "relative");
    this.renderer.setStyle(participantMediaElement, "width", "100%");
    this.renderer.setStyle(participantMediaElement, "height", "100%");
    this.renderer.setStyle(participantMediaElement, "display", "flex");
    this.renderer.setStyle(participantMediaElement, "alignItems", "center");
    this.renderer.setStyle(participantMediaElement, "justifyContent", "center");

    var nameElement = this.createNameElemeent(participant);
    this.renderer.appendChild(
      this.participantGridContainer.nativeElement,
      participantGridItem
    );
    this.renderer.appendChild(participantGridItem, participantMediaElement);
    this.renderer.appendChild(participantMediaElement, nameElement);

    var getParticipantMediaElement = document.getElementById(
      `participant-media-container-${participant.id}`
    );

    return {
      getParticipantMediaElement,
    };
  }
}
Step 7: Handle participant events
Thereafter, implement the events related to the participants and the stream.
Following are the events to be executed in this step:
-
participant-joined: When a remote participant joins, this event will trigger. In the event callback, create video and audio elements previously defined for rendering their video and audio streams. -
participant-left: When a remote participant leaves, this event will trigger. In the event callback, remove the corresponding video and audio elements. -
stream-enabled: This event manages the media track of a specific participant by associating it with the appropriate video or audio element. -
stream-disabled: This event manages the media track of a specific participant, when they toggle their camera or mic by associating it with the appropriate video or audio element.
// participant joined
//remote participant
meeting.on("participant-joined", (participant: any) => {
  console.log("New Participant Joined: ", participant.id);

  var { getParticipantMediaElement } =
    this.participantGridGenerator(participant);
  participant.setQuality("high");
  participant.on("stream-enabled", (stream: any) => {
    this.handleStreamEnabled(
      stream,
      participant,
      false,
      getParticipantMediaElement
    );
  });
  participant.on("stream-disabled", (stream: any) => {
    this.handleStreamDisabled(
      stream,
      participant,
      false,
      getParticipantMediaElement
    );
  });
});

// participants left
meeting.on("participant-left", (participant: any) => {
  console.log("Participant Left: ", participant.id);
  var participantGridItem = document.getElementById(
    `participant-grid-item-${participant.id}`
  );
  this.participantGridContainer.nativeElement.removeChild(participantGridItem);
});
Output
Step 8: Implement Controls
Next, implement meeting functionalities such as toggleMic, toggleWebcam and leave meeting function in app.component.ts to call the respective APIs.
export class AppComponent {
  //..
  toogleWebcam() {
    if (this.isWebcamOn) {
      this.meeting.disableWebcam();
    } else {
      this.meeting.enableWebcam();
    }
    this.isWebcamOn = !this.isWebcamOn;
  }

  toogleMic() {
    if (this.isMicOn) {
      this.meeting.muteMic();
    } else {
      this.meeting.unmuteMic();
    }
    this.isMicOn = !this.isMicOn;
  }

  leaveMeeting() {
    this.meeting.leave();
    this.showMeetingScreen = false;
    this.showJoinScreen = true;
  }
}
- After creating the above function, pass it to the
top-barcomponent as follows:
<app-top-bar
  [meetingId]="meetingId"
  [showTopBar]="showTopBar"
  (toogleWebcam)="toogleWebcam()"
  (toogleMic)="toogleMic()"
  (leaveMeeting)="leaveMeeting()"
></app-top-bar>
- Next in the
top-bar.component.tsfile, run this function:
import { Component, EventEmitter, Input, Output } from "@angular/core";

@Component({
  selector: "app-top-bar",
  templateUrl: "./top-bar.component.html",
})
export class TopBarComponent {
  @Input() showTopBar: boolean = false;
  @Output() toogleWebcam = new EventEmitter();
  @Output() toogleMic = new EventEmitter();
  @Output() leaveMeeting = new EventEmitter();
  @Input() meetingId: string = "";

  constructor() {}

  fireToggleWebcam() {
    this.toogleWebcam.emit();
  }

  fireToggleMic() {
    this.toogleMic.emit();
  }

  fireLeaveMeeting() {
    this.leaveMeeting.emit();
  }
}
Run your code
Once you have completed all the steps mentioned above, run your application using the code block below.
ng serve
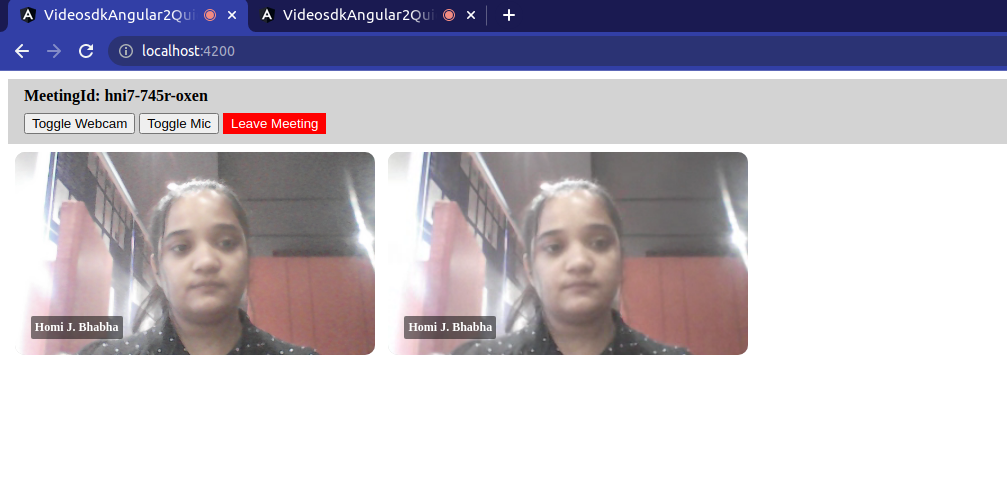
Final Output
You have completed the implementation of a customized video calling app in Angular 2 using VideoSDK. To explore more features, go through Basic and Advanced features.
You can checkout the complete quick start example here.
Got a Question? ![]() Ask us on discord
Ask us on discord

