Quick Start for Interactive Live Streaming in React Native
VideoSDK enables you to embed the video calling feature into your React Native application in minutes.
In this quickstart, we are going to explore interactive live streaming feature of Video SDK. We will go through step by step guide of integrating video calling with React Native Video SDK.
Prerequisites
Before proceeding, ensure that your development environment meets the following requirements:
- Video SDK Developer Account (Not having one, follow Video SDK Dashboard)
- Basic understanding of React Native
- Node.js v12+
- NPM v6+ (comes installed with newer Node versions)
- Android Studio or Xcode installed
One should have a VideoSDK account to generate token. Visit VideoSDK dashboard to generate token
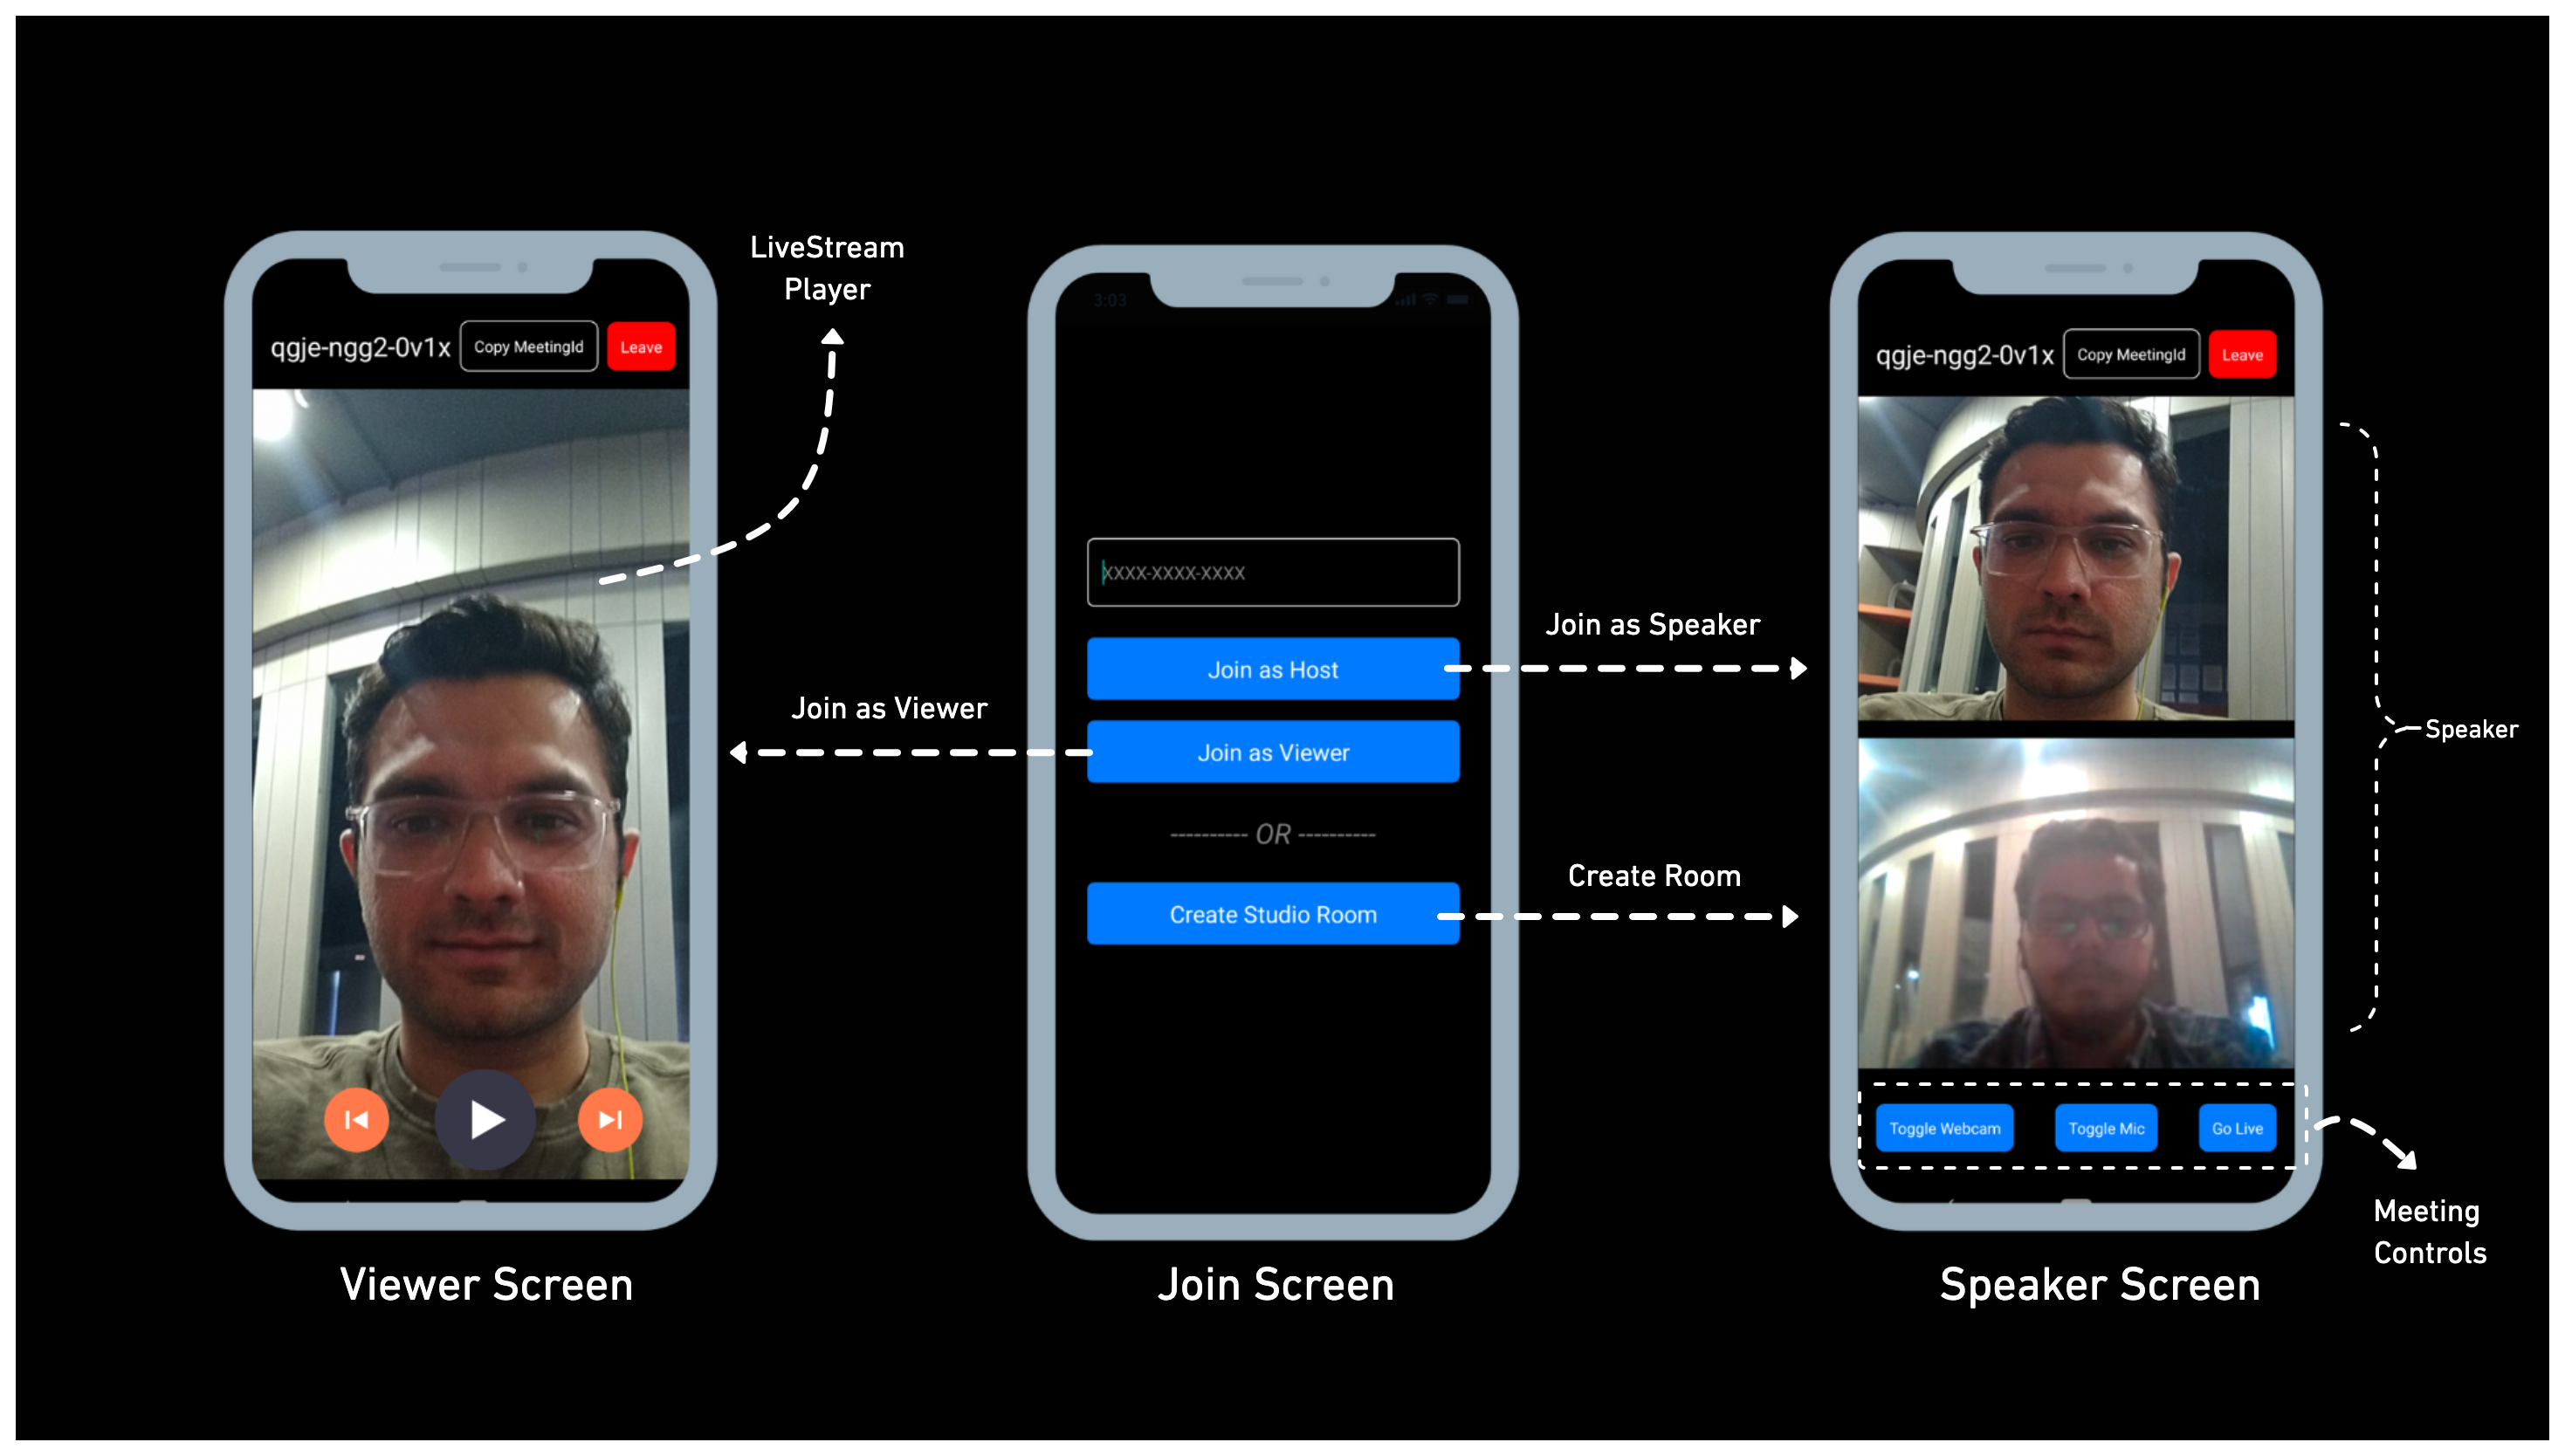
App Architecture
This App will contain two screen :
-
Join Screen: This screen allows SPEAKER to create studio or join predefined studio and SIGNALLING_ONLY to join predefined studio. -
Speaker Screen: This screen basically contain speaker list and some studio controls such as Enable / Disable Mic & Camera and Leave studio. -
Viewer Screen: This screen basically contain live stream player in which viewer will play stream.
Getting Started with the Code!
Create App
Create new react-native app by applying below commands.
npx react-native init AppName
For react-native setup, you can follow Official Docs.
VideoSDK Installation
Install the VideoSDK by following the below command. Do make sure you should be in your project directory before you run this command.
- NPM
- Yarn
npm install "@videosdk.live/react-native-sdk" "@videosdk.live/react-native-incallmanager"
yarn add "@videosdk.live/react-native-sdk" "@videosdk.live/react-native-incallmanager"
Project Structure
  root
   ├── node_modules
   ├── android
   ├── ios
   ├── App.js
   ├── api.js
   ├── index.js
Project Configuration
Android Setup
- Add required permission in AndroidManifest.xml file.
<manifest
  xmlns:android="http://schemas.android.com/apk/res/android"
  package="com.cool.app"
>
    <!-- Give all the required permissions to app -->
    <uses-permission android:name="android.permission.INTERNET" />
    <uses-permission android:name="android.permission.ACCESS_NETWORK_STATE" />
    <!-- Needed to communicate with already-paired Bluetooth devices. (Legacy up to Android 11) -->
    <uses-permission
        android:name="android.permission.BLUETOOTH"
        android:maxSdkVersion="30" />
    <uses-permission
        android:name="android.permission.BLUETOOTH_ADMIN"
        android:maxSdkVersion="30" />

    <!-- Needed to communicate with already-paired Bluetooth devices. (Android 12 upwards)-->
    <uses-permission android:name="android.permission.BLUETOOTH_CONNECT" />

    <uses-permission android:name="android.permission.CAMERA" />
    <uses-permission android:name="android.permission.MODIFY_AUDIO_SETTINGS" />
    <uses-permission android:name="android.permission.RECORD_AUDIO" />
    <uses-permission android:name="android.permission.SYSTEM_ALERT_WINDOW" />
    <uses-permission android:name="android.permission.FOREGROUND_SERVICE"/>
    <uses-permission android:name="android.permission.WAKE_LOCK" />

    <application>
   <meta-data
      android:name="live.videosdk.rnfgservice.notification_channel_name"
      android:value="Meeting Notification"
     />
    <meta-data
    android:name="live.videosdk.rnfgservice.notification_channel_description"
    android:value="Whenever meeting started notification will appear."
    />
    <meta-data
    android:name="live.videosdk.rnfgservice.notification_color"
    android:resource="@color/red"
    />
    <service android:name="live.videosdk.rnfgservice.ForegroundService" android:foregroundServiceType="mediaProjection"></service>
    <service android:name="live.videosdk.rnfgservice.ForegroundServiceTask"></service>
  </application>
</manifest>
- Update colors.xml for internal dependencies
<resources>
  <item name="red" type="color">
    #FC0303
  </item>
  <integer-array name="androidcolors">
    <item>@color/red</item>
  </integer-array>
</resources>
- Linking VideoSDK Dependencies.
  dependencies {
   implementation project(':rnwebrtc')
   implementation project(':rnfgservice')
  }
include ':rnwebrtc'
project(':rnwebrtc').projectDir = new File(rootProject.projectDir, '../node_modules/@videosdk.live/react-native-webrtc/android')

include ':rnfgservice'
project(':rnfgservice').projectDir = new File(rootProject.projectDir, '../node_modules/@videosdk.live/react-native-foreground-service/android')
import live.videosdk.rnwebrtc.WebRTCModulePackage;
import live.videosdk.rnfgservice.ForegroundServicePackage;

public class MainApplication extends Application implements ReactApplication {
  private static List<ReactPackage> getPackages() {
      @SuppressWarnings("UnnecessaryLocalVariable")
      List<ReactPackage> packages = new PackageList(this).getPackages();
      // Packages that cannot be autolinked yet can be added manually here, for example:

      packages.add(new ForegroundServicePackage());
      packages.add(new WebRTCModulePackage());

      return packages;
  }
}
/* This one fixes a weird WebRTC runtime problem on some devices. */
android.enableDexingArtifactTransform.desugaring=false
- Add below line in the proguard-rules.pro (optional: if you are using Proguard)
-keep class org.webrtc.** { *; }
- In the
build.gradlefile, update the minimum OS/SDK version to23.
buildscript {
  ext {
      minSdkVersion = 23
  }
}
iOS Setup
- IMPORTANT: Make sure you are using CocoaPods 1.10 or higher.
To update CocoaPods you simply install the gem again
$ sudo gem install cocoapods
- Manual linking (if react-native-incall-manager is not linked automatically)
- Select
Your_Xcode_Project/TARGETS/BuildSettings, in Header Search Paths, add"$(SRCROOT)/../node_modules/@videosdk.live/react-native-incall-manager/ios/RNInCallManager"
- Change path of
react-native-webrtc
pod ‘react-native-webrtc’, :path => ‘../node_modules/@videosdk.live/react-native-webrtc’
- Change your platform version
You have change platform field of podfile to 12.0 or above it, as react-native-webrtc doesn’t support iOS < 12 platform :ios, ‘12.0’
- Install pods
After updating the version, you have to install pods.
Pod install
- Declare permissions in Info.plist :
Add following lines to info.plist (project folder/ios/projectname/info.plist):
<key>NSCameraUsageDescription</key>
<string>Camera permission description</string>
<key>NSMicrophoneUsageDescription</key>
<string>Microphone permission description</string>
Register Service
Register VideoSDK services in root index.js file for initialization service.
import { AppRegistry } from "react-native";
import App from "./App";
import { name as appName } from "./app.json";
import { register } from "@videosdk.live/react-native-sdk";

register();

AppRegistry.registerComponent(appName, () => App);
Step 1: Get started with API.js
Before jumping to anything else, we have write API to generate unique meetingId. You will require auth token, you can generate it using either by using videosdk-rtc-api-server-examples or generate it from the Video SDK Dashboard for developer.
//Auth token we will use to generate a meeting and connect to it
export const authToken = "<Generated-from-dashbaord>";
// API call to create meeting
export const createMeeting = async ({ token }) => {
  const res = await fetch(`https://api.videosdk.live/v2/rooms`, {
    method: "POST",
    headers: {
      authorization: `${authToken}`,
      "Content-Type": "application/json",
    },
    body: JSON.stringify({}),
  });
  //Destructuring the roomId from the response
  const { roomId } = await res.json();
  return roomId;
};
Step 2: Wireframe App.js with all the components
To build up wireframe of App.js, we are going to use Video SDK Hooks and Context Providers. Video SDK provideos MeetingProvider, MeetingConsumer, useMeeting and useParticipant hooks. Let's understand each of them.
First we will explore Context Provider and Consumer. Context is primarily used when some data needs to be accessible by many components at different nesting levels.
- MeetingProvider: It is Context Provider. It accepts value
configandtokenas props. The Provider component accepts a value prop to be passed to consuming components that are descendants of this Provider. One Provider can be connected to many consumers. Providers can be nested to override values deeper within the tree. - MeetingConsumer: It is Context Consumer. All consumers that are descendants of a Provider will re-render whenever the Provider’s value prop changes.
- useMeeting: It is meeting react hook API for meeting. It includes all the information related to meeting such as join, leave, enable/disable mic or webcam etc.
- useParticipant: It is participant hook API. useParticipant hook is responsible to handle all the events and props related to one particular participant such as name, webcamStream, micStream etc.
Meeting Context helps to listen on all the changes when participant joines meeting or changes mic or camera etc.
Let's get started with change couple of lines of code in App.js
import React, { useState, useMemo, useRef, useEffect } from "react";
import {
  SafeAreaView,
  TouchableOpacity,
  Text,
  TextInput,
  View,
  FlatList,
  Clipboard,
} from "react-native";
import {
  MeetingProvider,
  useMeeting,
  useParticipant,
  MediaStream,
  RTCView,
  Constants,
} from "@videosdk.live/react-native-sdk";
import { createMeeting, authToken } from "./api";

// Responsible for either schedule new meeting or to join existing meeting as a host or as a viewer.
function JoinScreen({ getMeetingAndToken, setMode }) {
  return null;
}

// Responsible for managing participant video stream
function ParticipantView(props) {
  return null;
}

// Responsible for managing meeting controls such as toggle mic / webcam and leave
function Controls() {
  return null;
}

// Responsible for Speaker side view, which contains Meeting Controls(toggle mic/webcam & leave) and Participant list
function SpeakerView() {
  return null;
}

// Responsible for Viewer side view, which contains video player for streaming HLS and managing HLS state (HLS_STARTED, HLS_STOPPING, HLS_STARTING, etc.)
function ViewerView() {
  return null;
}

// Responsible for managing two view (Speaker & Viewer) based on provided mode (`SEND_AND_RECV` & `SIGNALLING_ONLY`)
function Container(props) {
  return null;
}

function App() {
  const [meetingId, setMeetingId] = useState(null);

  //State to handle the mode of the participant i.e. CONFERNCE or SIGNALLING_ONLY
  const [mode, setMode] = useState("SEND_AND_RECV");

  //Getting MeetingId from the API we created earlier
  const getMeetingAndToken = async (id) => {
    const meetingId =
      id == null ? await createMeeting({ token: authToken }) : id;
    setMeetingId(meetingId);
  };

  return authToken && meetingId ? (
    <MeetingProvider
      config={{
        meetingId,
        micEnabled: true,
        webcamEnabled: true,
        name: "C.V. Raman",
        //These will be the mode of the participant SEND_AND_RECV or SIGNALLING_ONLY
        mode: mode,
      }}
      token={authToken}
    >
      <Container />
    </MeetingProvider>
  ) : (
    <JoinScreen getMeetingAndToken={getMeetingAndToken} setMode={setMode} />
  );
}

export default App;
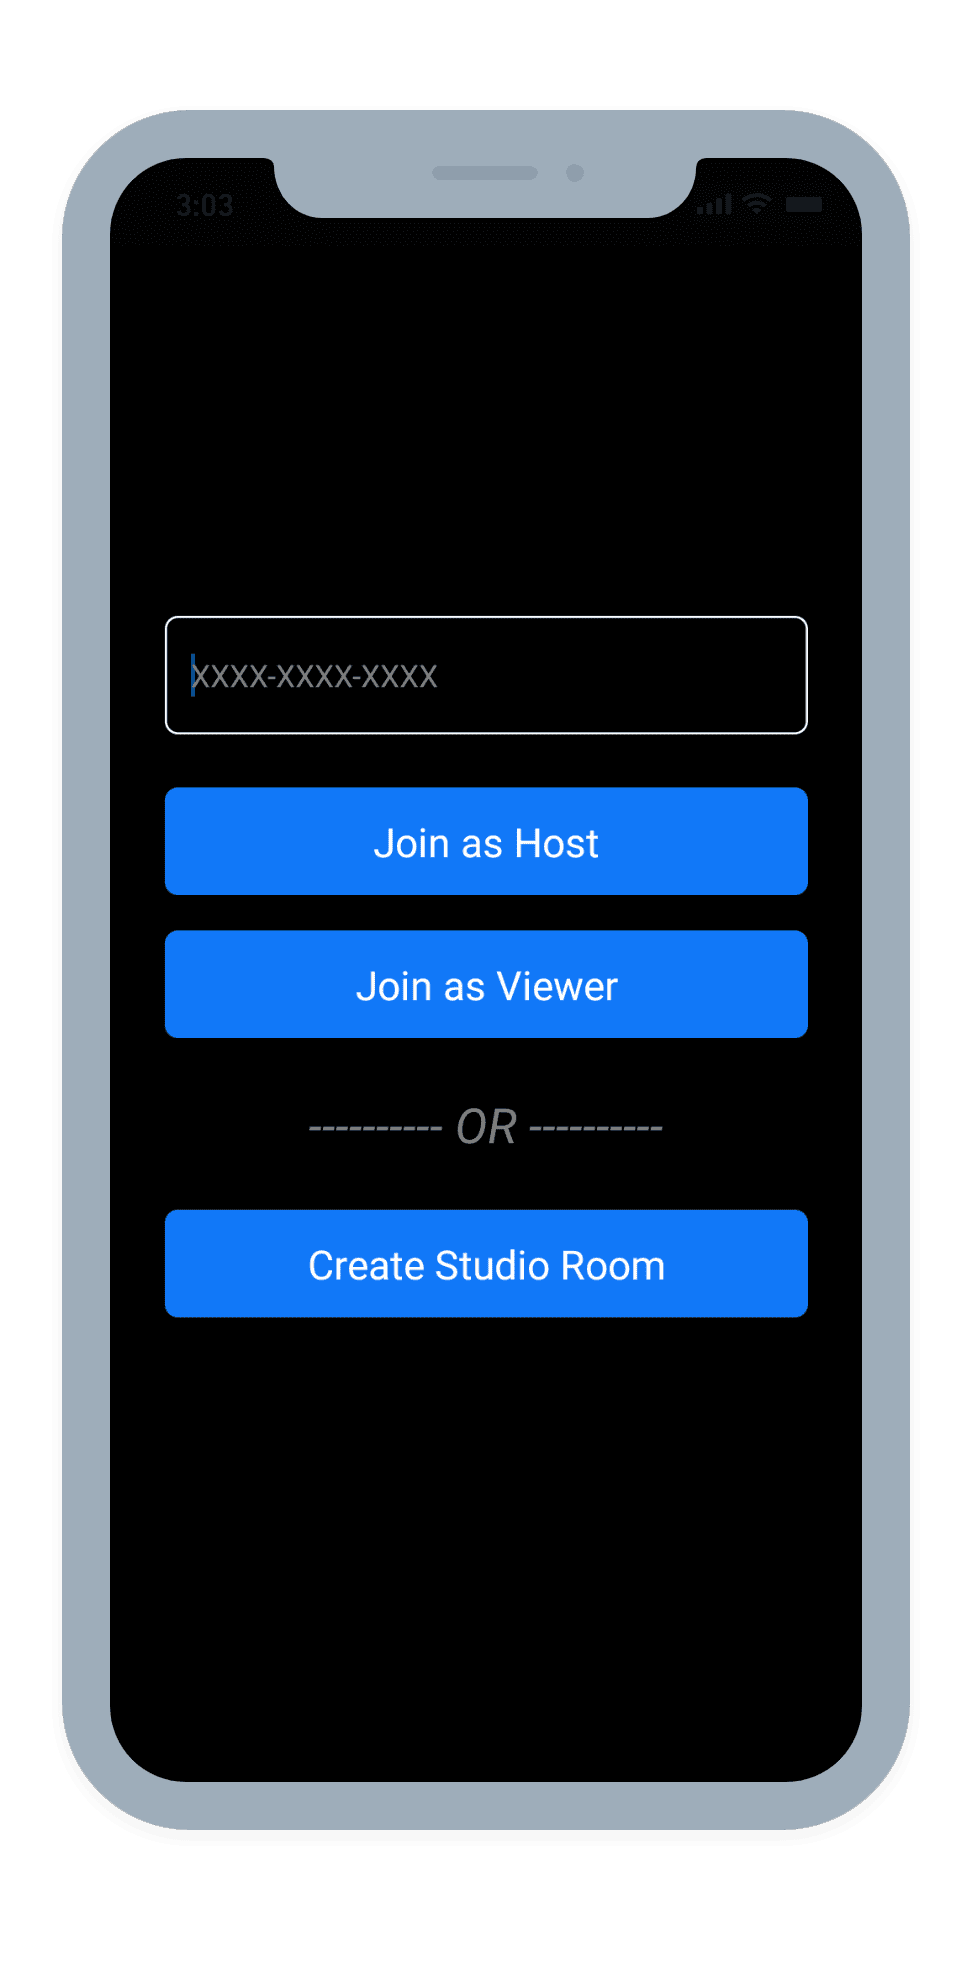
Step 3: Implement Join Screen
Join screen will work as medium to either schedule new meeting or to join existing meeting as a host or as a viewer.
These will have 3 buttons:
1. Join as Host: When this button is clicked, the person will join the entered meetingId as HOST.
2. Join as Viewer: When this button is clicked, the person will join the entered meetingId as SIGNALLING_ONLY.
3. Create Studio Room: When this button is clicked, the person will join a new meeting as HOST.
function JoinScreen({ getMeetingAndToken, setMode }) {
  const [meetingVal, setMeetingVal] = useState("");

  const JoinButton = ({ value, onPress }) => {
    return (
      <TouchableOpacity
        style={{
          backgroundColor: "#1178F8",
          padding: 12,
          marginVertical: 8,
          borderRadius: 6,
        }}
        onPress={onPress}
      >
        <Text style={{ color: "white", alignSelf: "center", fontSize: 18 }}>
          {value}
        </Text>
      </TouchableOpacity>
    );
  };
  return (
    <SafeAreaView
      style={{
        flex: 1,
        backgroundColor: "black",
        justifyContent: "center",
        paddingHorizontal: 6 * 10,
      }}
    >
      <TextInput
        value={meetingVal}
        onChangeText={setMeetingVal}
        placeholder={"XXXX-XXXX-XXXX"}
        placeholderTextColor={"grey"}
        style={{
          padding: 12,
          borderWidth: 1,
          borderColor: "white",
          borderRadius: 6,
          color: "white",
          marginBottom: 16,
        }}
      />
      <JoinButton
        onPress={() => {
          getMeetingAndToken(meetingVal);
        }}
        value={"Join as Host"}
      />
      <JoinButton
        onPress={() => {
          setMode("SIGNALLING_ONLY");
          getMeetingAndToken(meetingVal);
        }}
        value={"Join as Viewer"}
      />
      <Text
        style={{
          alignSelf: "center",
          fontSize: 22,
          marginVertical: 16,
          fontStyle: "italic",
          color: "grey",
        }}
      >
        ---------- OR ----------
      </Text>

      <JoinButton
        onPress={() => {
          getMeetingAndToken();
        }}
        value={"Create Studio Room"}
      />
    </SafeAreaView>
  );
}
Output
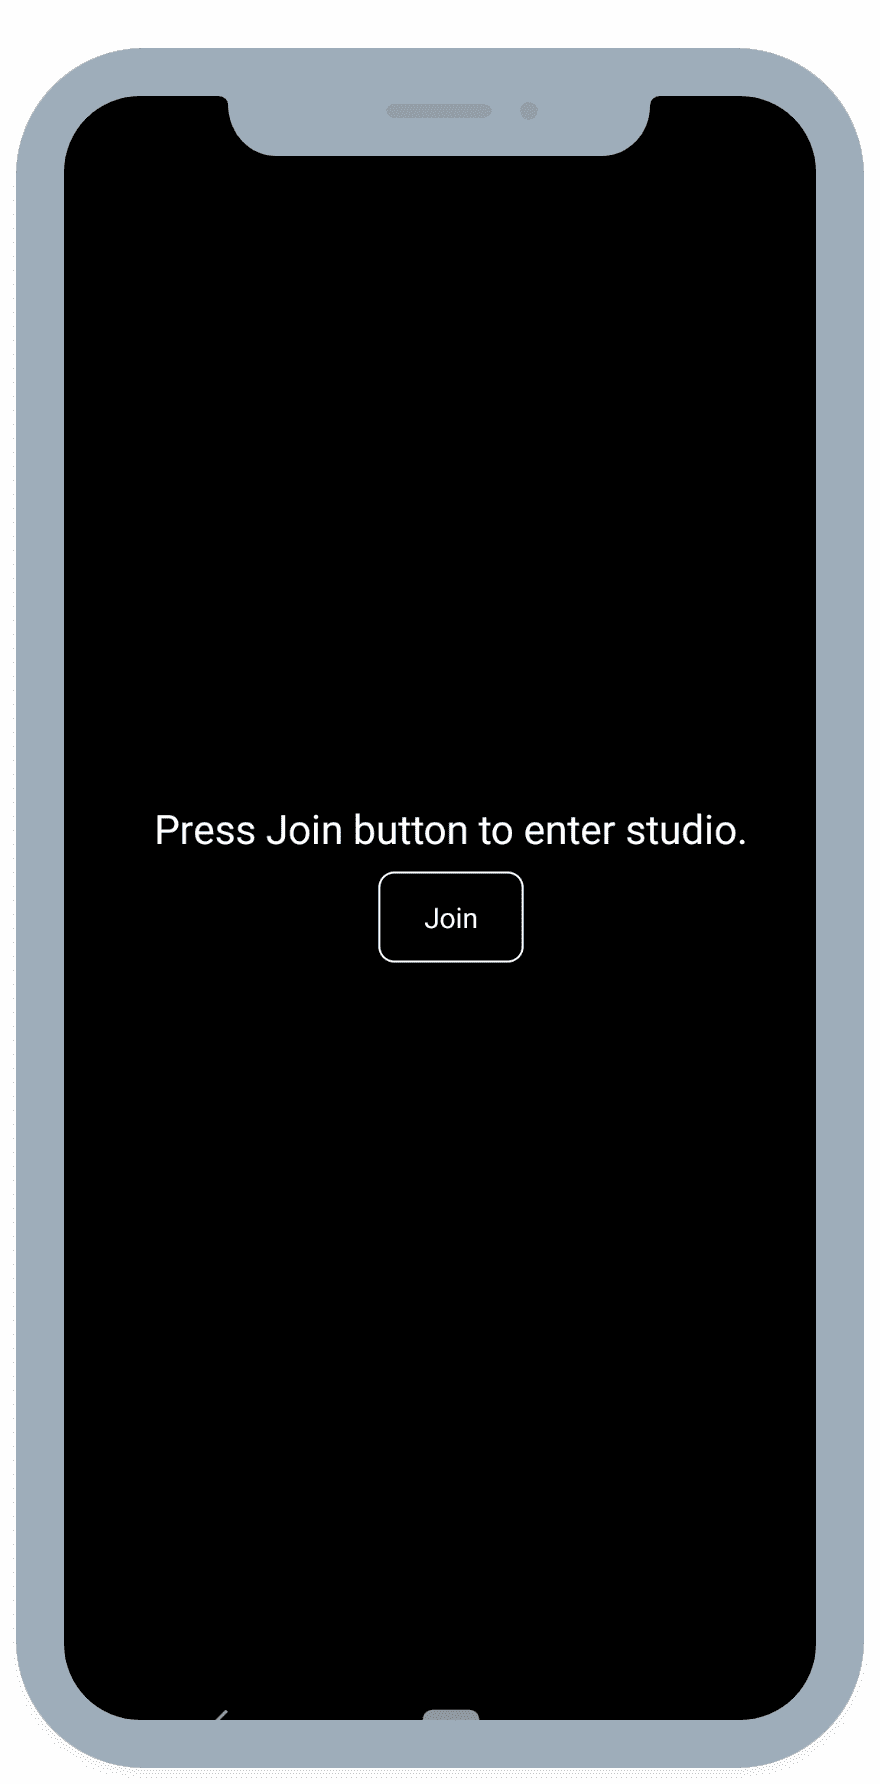
Step 4: Implement Container Component
Next step is to create a container that will manage Join screen, SpeakerView and ViewerView component based on mode.
We will check the mode of the localParticipant, if its SEND_AND_RECV we will show SpeakerView else we will show ViewerView.
function Container() {
  const { join, changeWebcam, localParticipant } = useMeeting({
    onError: (error) => {
      console.log(error.message);
    },
  });

  return (
    <View style={{ flex: 1 }}>
      {localParticipant?.mode == Constants.modes.SEND_AND_RECV ? (
        <SpeakerView />
      ) : localParticipant?.mode == Constants.modes.SIGNALLING_ONLY ? (
        <ViewerView />
      ) : (
        <View
          style={{
            flex: 1,
            justifyContent: "center",
            alignItems: "center",
            backgroundColor: "black",
          }}
        >
          <Text style={{ fontSize: 20, color: "white" }}>
            Press Join button to enter studio.
          </Text>
          <Button
            btnStyle={{
              marginTop: 8,
              paddingHorizontal: 22,
              padding: 12,
              borderWidth: 1,
              borderColor: "white",
              borderRadius: 8,
            }}
            buttonText={"Join"}
            onPress={() => {
              join();
            }}
          />
        </View>
      )}
    </View>
  );
}

// Common Component which will also be used in Controls Component
const Button = ({ onPress, buttonText, backgroundColor, btnStyle }) => {
  return (
    <TouchableOpacity
      onPress={onPress}
      style={{
        ...btnStyle,
        backgroundColor: backgroundColor,
        padding: 10,
        borderRadius: 8,
      }}
    >
      <Text style={{ color: "white", fontSize: 12 }}>{buttonText}</Text>
    </TouchableOpacity>
  );
};
Output
Step 5: Implement SpeakerView
Next step is to create SpeakerView and Controls components to manage features such as join, leave, mute and unmute.
- We will get all the
participantsfromuseMeetinghook and filter them for the mode set toSEND_AND_RECVso only Speakers are shown on the screen.
function SpeakerView() {
  // Get the Participant Map and meetingId
  const { meetingId, participants } = useMeeting({});

  // For getting speaker participant, we will filter out `SEND_AND_RECV` mode participant
  const speakers = useMemo(() => {
    const speakerParticipants = [...participants.values()].filter(
      (participant) => {
        return participant.mode == Constants.modes.SEND_AND_RECV;
      }
    );
    return speakerParticipants;
  }, [participants]);

  return (
    <SafeAreaView style={{ backgroundColor: "black", flex: 1 }}>
      {/* Render Header for copy meetingId and leave meeting*/}
      <HeaderView />

      {/* Render Participant List */}
      {speakers.length > 0 ? (
        <FlatList
          data={speakers}
          renderItem={({ item }) => {
            return <ParticipantView participantId={item.id} />;
          }}
        />
      ) : null}

      {/* Render Controls */}
      <Controls />
    </SafeAreaView>
  );
}

function HeaderView() {
  const { meetingId, leave } = useMeeting();
  return (
    <View
      style={{
        flexDirection: "row",
        padding: 16,
        justifyContent: "space-evenly",
        alignItems: "center",
      }}
    >
      <Text style={{ fontSize: 24, color: "white" }}>{meetingId}</Text>
      <Button
        btnStyle={{
          borderWidth: 1,
          borderColor: "white",
        }}
        onPress={() => {
          Clipboard.setString(meetingId);
          alert("MeetingId copied successfully");
        }}
        buttonText={"Copy MeetingId"}
        backgroundColor={"transparent"}
      />
      <Button
        onPress={() => {
          leave();
        }}
        buttonText={"Leave"}
        backgroundColor={"#FF0000"}
      />
    </View>
  );
}

function Container(){
  ...

  const mMeeting = useMeeting({
    onMeetingJoined: () => {
      // We will pin the local participant if he joins in SEND_AND_RECV mode
      if (mMeetingRef.current.localParticipant.mode == "SEND_AND_RECV") {
        mMeetingRef.current.localParticipant.pin();
      }
    }
  });

  // We will create a ref to meeting object so that when used inside the
  // Callback functions, meeting state is maintained
  const mMeetingRef = useRef(mMeeting);
  useEffect(() => {
    mMeetingRef.current = mMeeting;
  }, [mMeeting]);

  return <>...</>;
}
- We will be creating the
ParticipantViewto show the participants media. For which, will be using thewebcamStreamfrom theuseParticipanthook to play the media of the participant.
function ParticipantView({ participantId }) {
  const { webcamStream, webcamOn } = useParticipant(participantId);
  return webcamOn && webcamStream ? (
    <RTCView
      streamURL={new MediaStream([webcamStream.track]).toURL()}
      objectFit={"cover"}
      style={{
        height: 300,
        marginVertical: 8,
        marginHorizontal: 8,
      }}
    />
  ) : (
    <View
      style={{
        backgroundColor: "grey",
        height: 300,
        justifyContent: "center",
        alignItems: "center",
        marginVertical: 8,
        marginHorizontal: 8,
      }}
    >
      <Text style={{ fontSize: 16 }}>NO MEDIA</Text>
    </View>
  );
}
- We will add the
Controlscomponent which will allow the speaker to toggle media and start / stop HLS.
function Controls() {
  const { toggleWebcam, toggleMic, startHls, stopHls, hlsState } = useMeeting(
    {}
  );

  const _handleHLS = async () => {
    if (!hlsState || hlsState === "HLS_STOPPED") {
      startHls({
        layout: {
          type: "SPOTLIGHT",
          priority: "PIN",
          gridSize: 4,
        },
        theme: "DARK",
        orientation: "portrait",
      });
    } else if (hlsState === "HLS_STARTED" || hlsState === "HLS_PLAYABLE") {
      stopHls();
    }
  };

  return (
    <View
      style={{
        padding: 24,
        flexDirection: "row",
        justifyContent: "space-between",
      }}
    >
      <Button
        onPress={() => {
          toggleWebcam();
        }}
        buttonText={"Toggle Webcam"}
        backgroundColor={"#1178F8"}
      />
      <Button
        onPress={() => {
          toggleMic();
        }}
        buttonText={"Toggle Mic"}
        backgroundColor={"#1178F8"}
      />
      {hlsState === "HLS_STARTED" ||
      hlsState === "HLS_STOPPING" ||
      hlsState === "HLS_STARTING" ||
      hlsState === "HLS_PLAYABLE" ? (
        <Button
          onPress={() => {
            _handleHLS();
          }}
          buttonText={
            hlsState === "HLS_STARTED"
              ? `Live Starting`
              : hlsState === "HLS_STOPPING"
              ? `Live Stopping`
              : hlsState === "HLS_PLAYABLE"
              ? `Stop Live`
              : `Loading...`
          }
          backgroundColor={"#FF5D5D"}
        />
      ) : (
        <Button
          onPress={() => {
            _handleHLS();
          }}
          buttonText={`Go Live`}
          backgroundColor={"#1178F8"}
        />
      )}
    </View>
  );
}
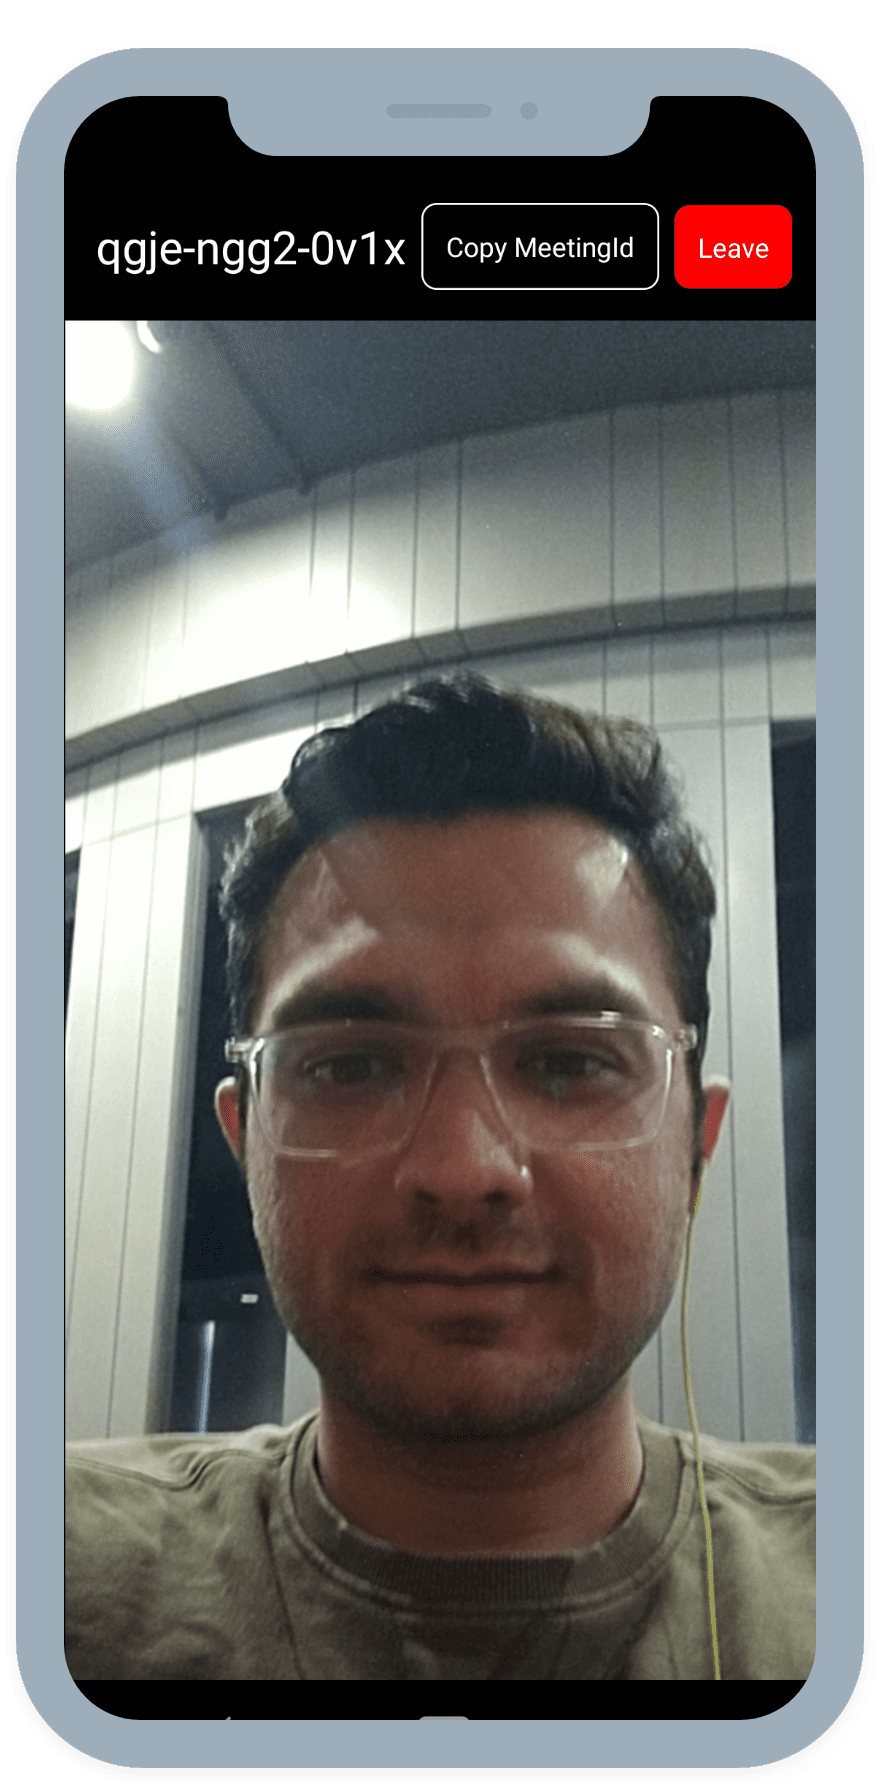
Output Of SpeakerView Component
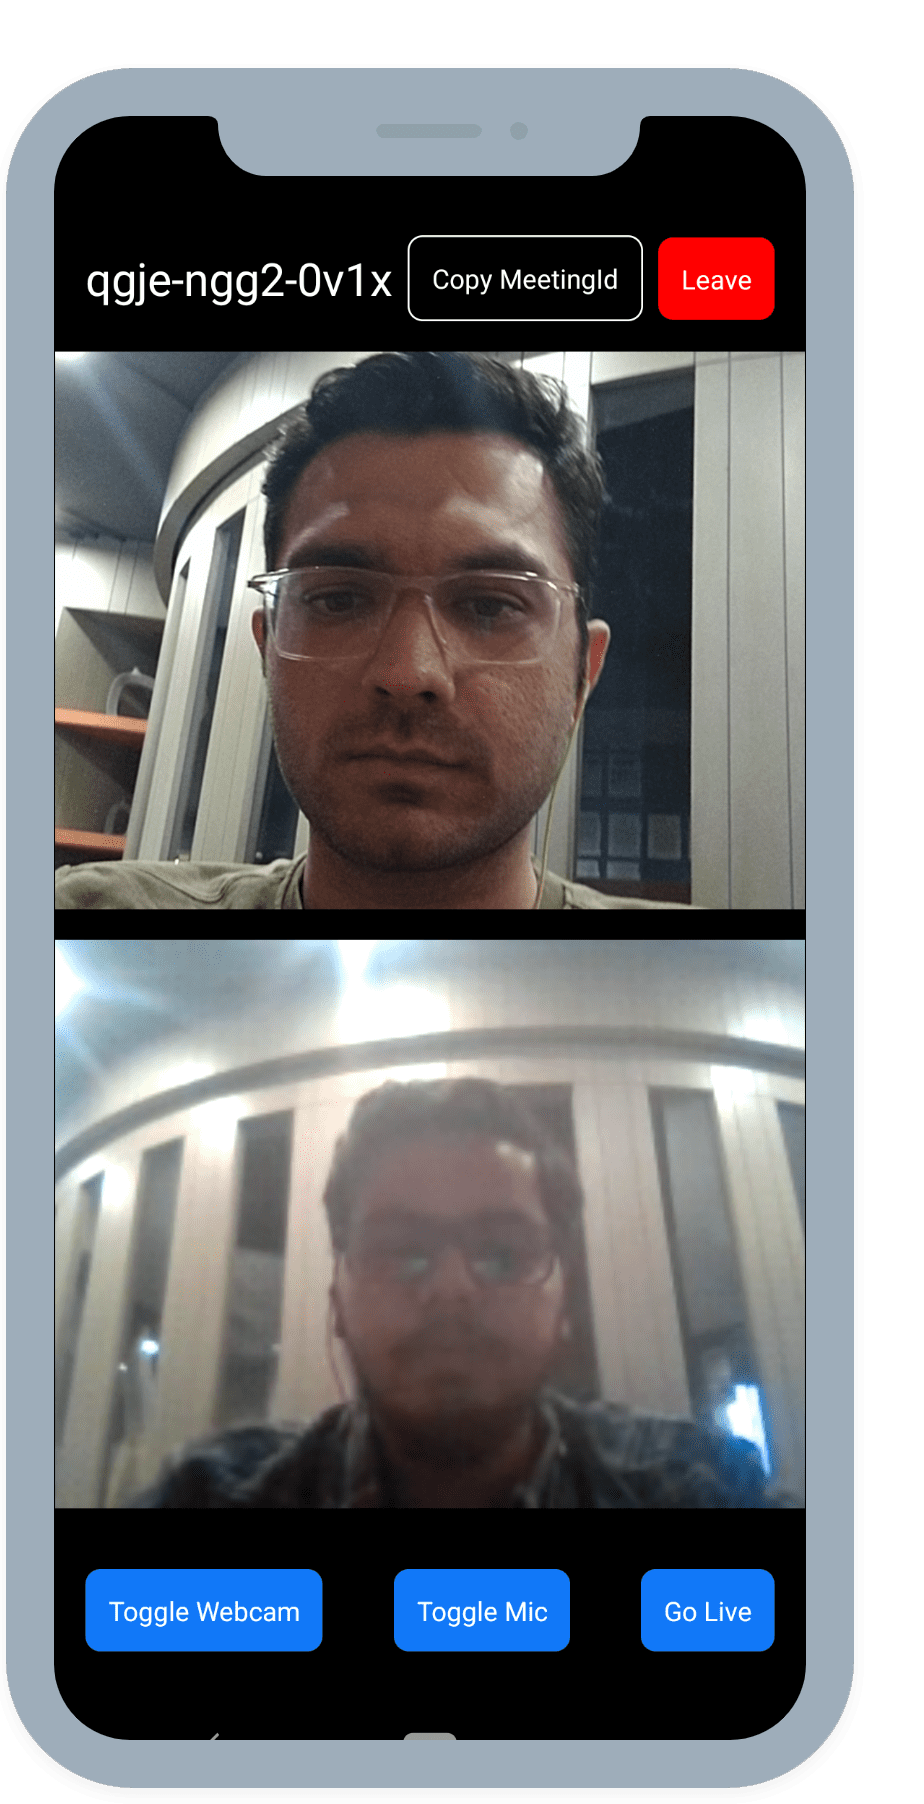
Step 6: Implement ViewerView
When HOST (SEND_AND_RECV mode participant) start the live streaming, viewer will be able to see the live streaming.
To implement player view, we are going to use react-native-video. It will be helpful to play HLS stream.
Let's first add this package.
- NPM
- Yarn
npm install react-native-video
yarn add react-native-video
With react-native-video installed, we will get the hlsUrls and isHlsPlayable from the useMeeting hook which will be used to play the HLS in the player.
downstreamUrl is now depecated. Use playbackHlsUrl or livestreamUrl in place of downstreamUrl
// imports react-native-video
import Video from "react-native-video";

function ViewerView({}) {
  const { hlsState, hlsUrls } = useMeeting();

  return (
    <SafeAreaView style={{ flex: 1, backgroundColor: "black" }}>
      {hlsState == "HLS_PLAYABLE" ? (
        <>
          {/* Render Header for copy meetingId and leave meeting*/}
          <HeaderView />

          {/* Render VideoPlayer that will play `playbackHlsUrl`*/}
          <Video
            controls={true}
            source={{
              uri: hlsUrls.playbackHlsUrl,
            }}
            resizeMode={"stretch"}
            style={{
              flex: 1,
              backgroundColor: "black",
            }}
            onError={(e) => console.log("error", e)}
          />
        </>
      ) : (
        <SafeAreaView
          style={{ flex: 1, justifyContent: "center", alignItems: "center" }}
        >
          <Text style={{ fontSize: 20, color: "white" }}>
            HLS is not started yet or is stopped
          </Text>
        </SafeAreaView>
      )}
    </SafeAreaView>
  );
}
Output of ViewerView Component
Stuck anywhere? Check out this example code on GitHub
Got a Question? ![]() Ask us on discord
Ask us on discord

