Developer Experience Guidelines - React Native
This section lists best practices for building apps with VideoSDK, from handling errors to managing resources and event subscriptions. Following them makes troubleshooting simpler and prevents common mistakes.
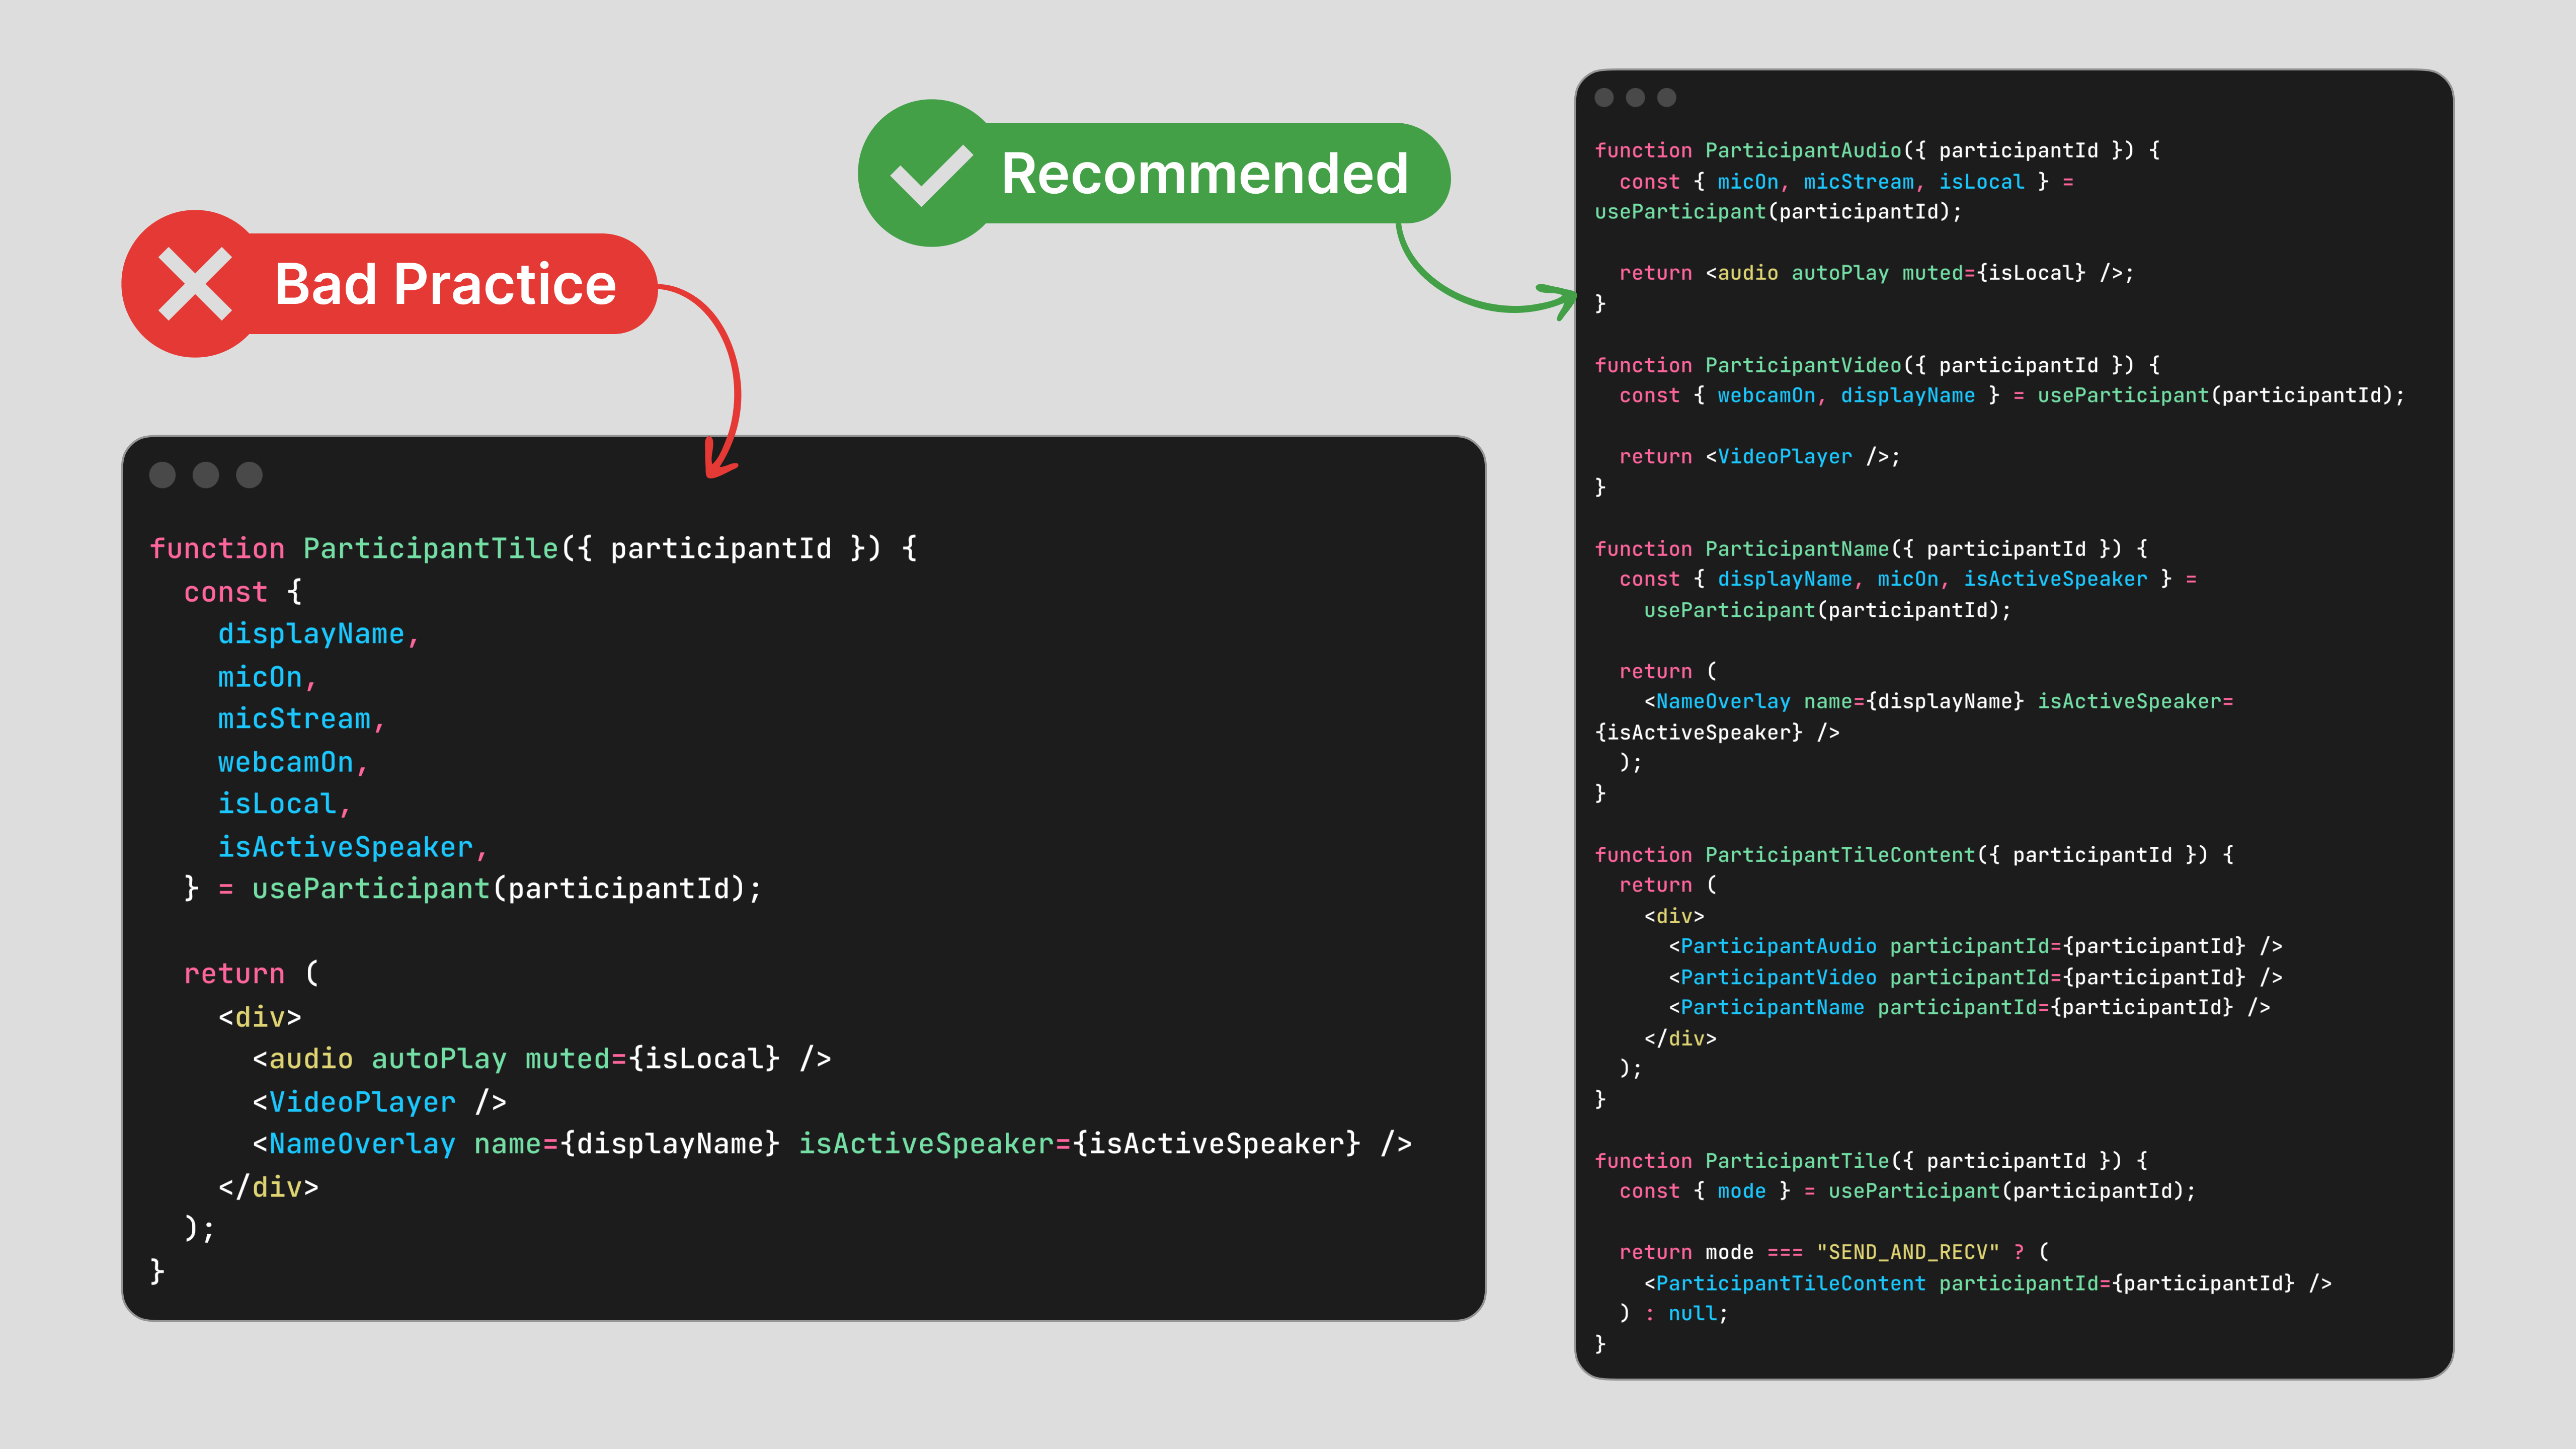
Avoid Unnecessary Re-renders
The React Native SDK re-renders a component only when the specific values it subscribes to change. To take advantage of this, avoid using useParticipant or useRoom high up in the tree, move them into the smallest component that actually needs that data, and destructure only the properties that component uses.
A few things to keep in mind:
- Split by concern : separate components for video (RTCView), audio, and participant metadata.
- Subscribe close to usage : avoid passing hook values down through multiple layers of
Viewcomponents. - Keep layout components stateless : no SDK hooks in wrapper or structure components.
Initiate Key Features After Room Join Event
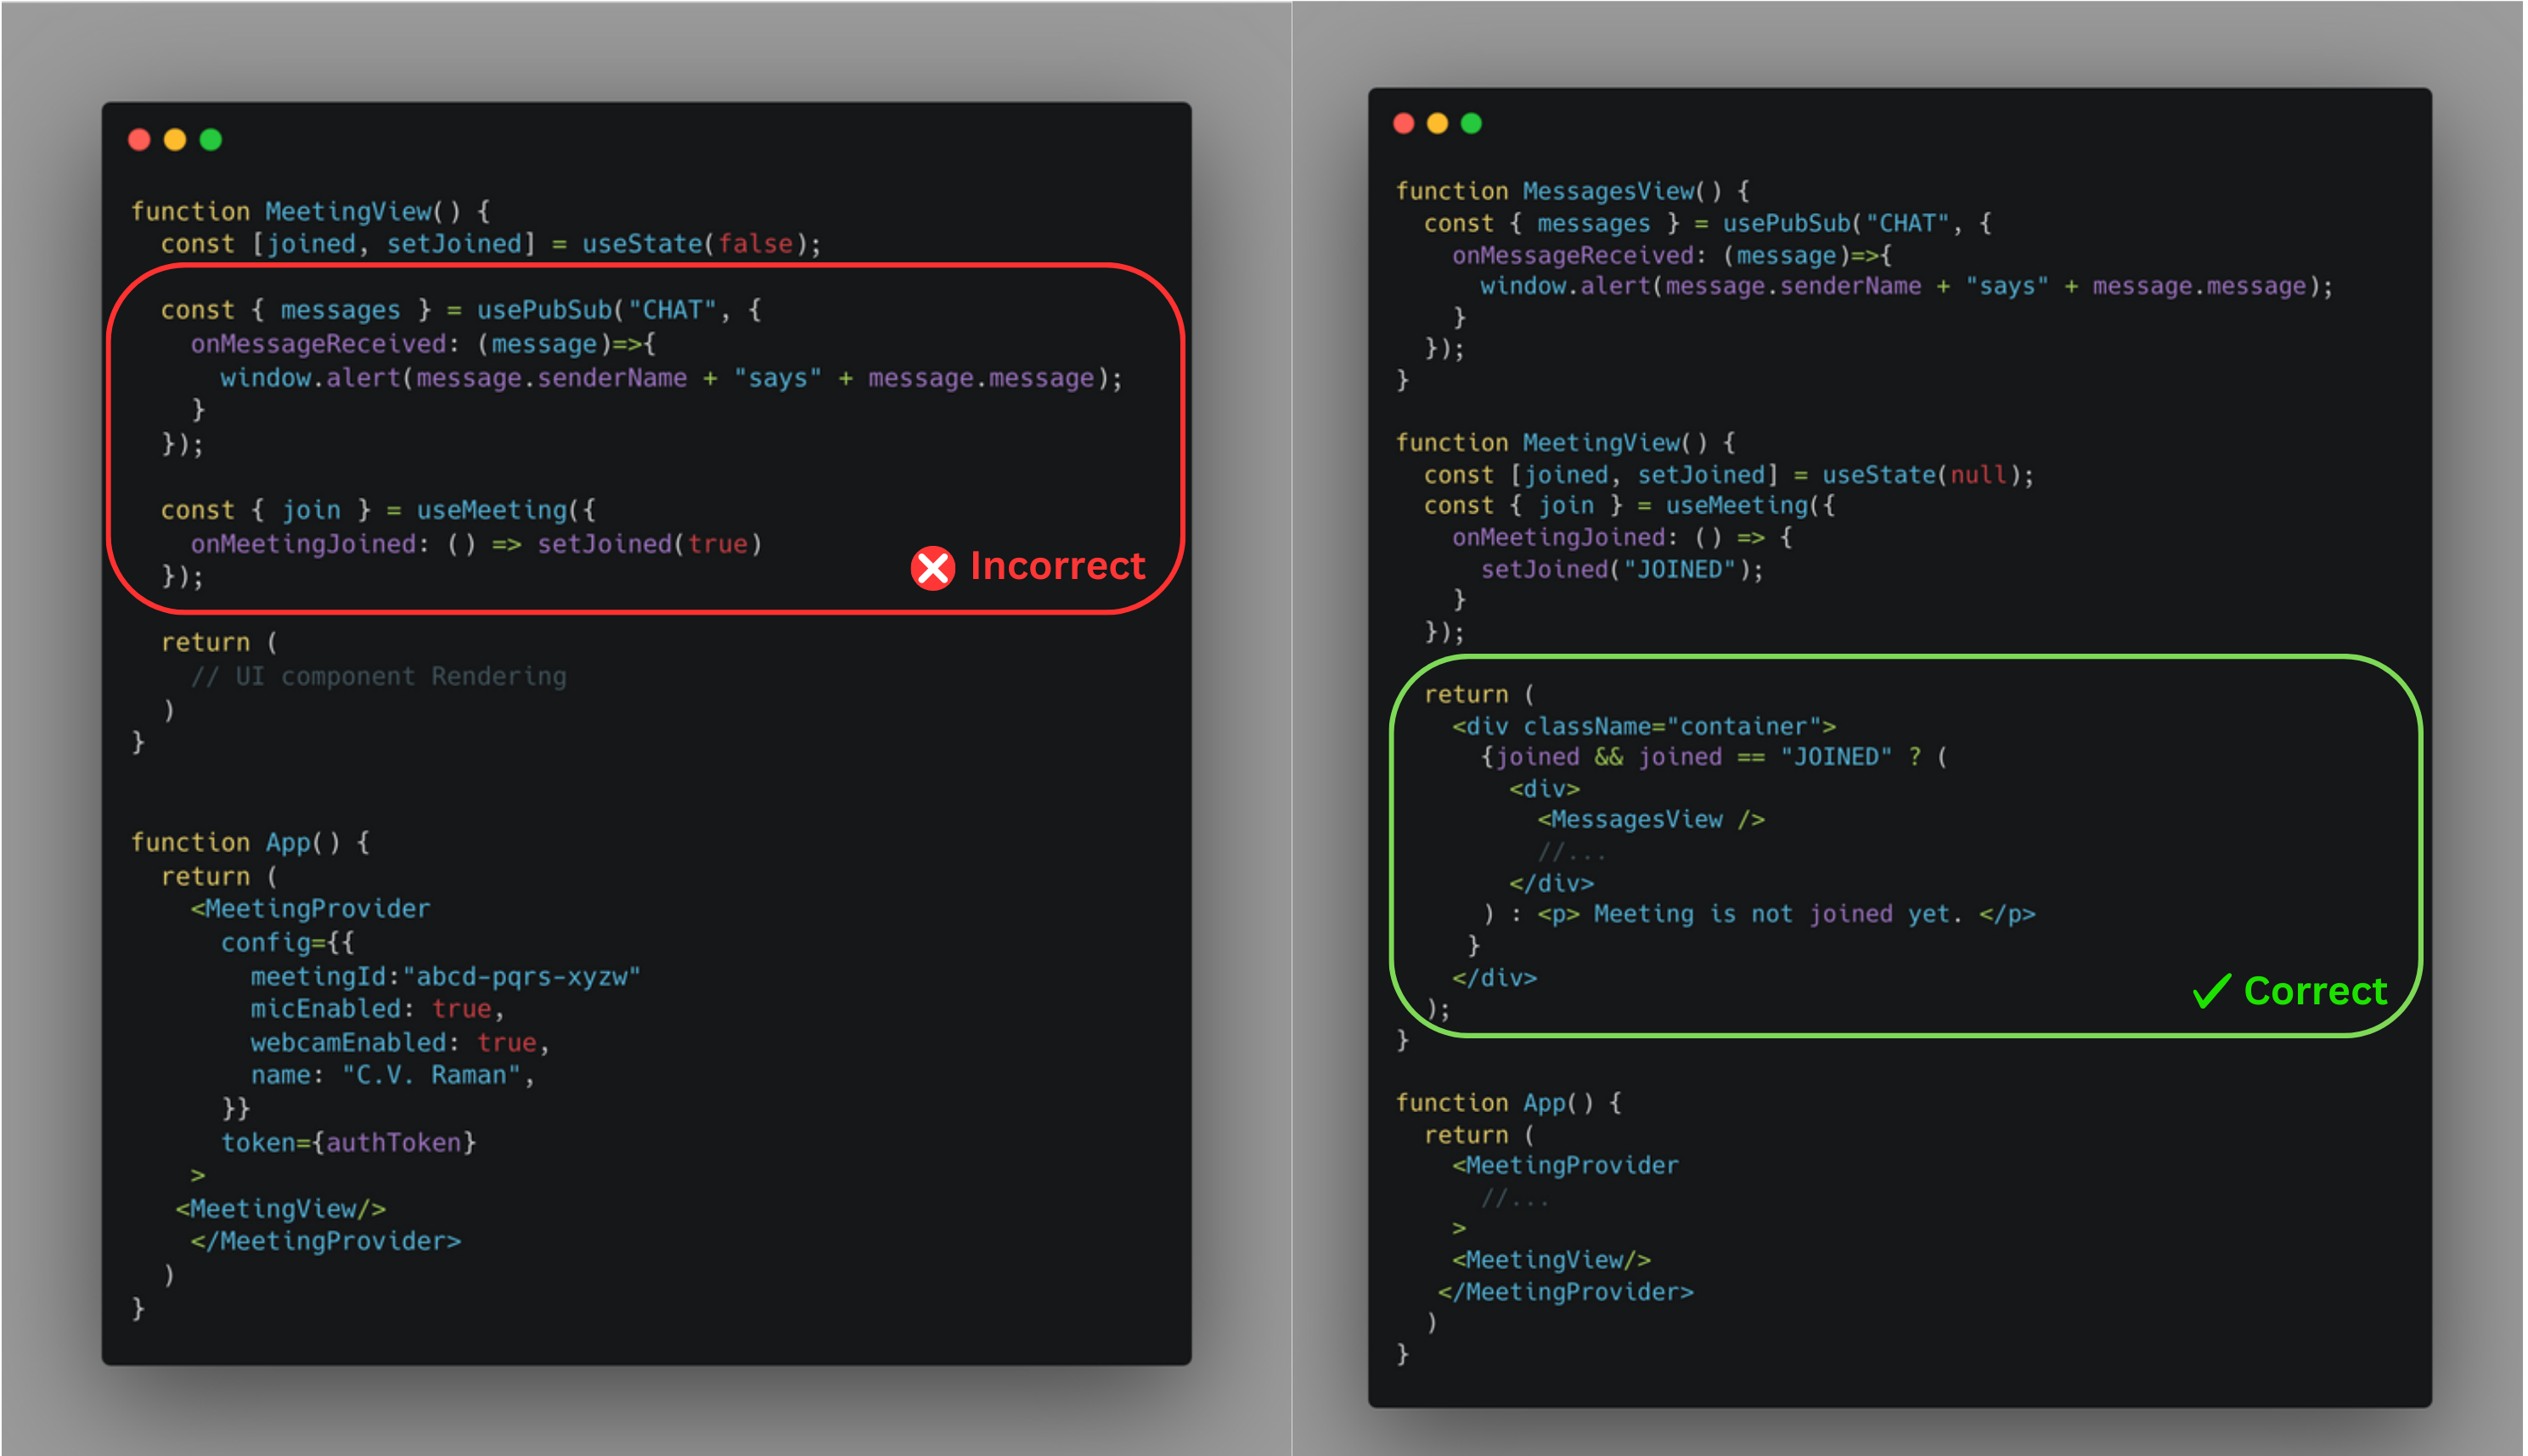
Start these features only after the onRoomJoined event has been triggered.
-
Trigger Key Actions After Joining the Room : Starting key actions after the
onRoomJoinedevent helps avoid errors. If your application uses any of the following features, or you want to perform any action as soon as the room joins, call them only after the room has started:Chat Subscription: To enable in-room chat functionality, subscribe to the chat topic after theonRoomJoinedevent is triggered. This ensures that messages are reliably received by participants.
-
Device Management: If you need users to use specific audio or video devices when the room is first joined, you can utilize the custom track. Pass thecameraIdto the createCameraVideoTrack() method for video, and themicrophoneIdto the createMicrophoneAudioTrack() method for audio. Once the track is created, provide it to theRoomProviderconfiguration ascustomCameraTrackorcustomMicrophoneTrack. These methods do not ask the user for camera and microphone access, on Android or iOS, so callrequestPermission()ofuseMediaDevice()before you create the tracks. -
Recording and Transcription: To automatically start recording or transcription as soon as the room begins, configure theautoStartConfigin thecreateRoomAPI. For detailed information, refer to the documentation here.
Dispose Custom Tracks When Necessary
Dispose of a custom track to release the camera or microphone it holds. In most scenarios, the SDK disposes of tracks for you. In the cases below, you need to dispose of custom tracks yourself:
-
When Enabling/Disabling the Camera on a Precall Screen:
- If your application includes a precall screen and you want to ensure that the device's camera is not used when the camera is disabled, you must dispose of the custom video track by calling its
stop()method. Otherwise, the device’s camera will continue to be used even when the camera is off. stop()does nothing once a room has published the track.- Additionally, remember to create a new track when the user enables the camera again. A stopped or released track is refused with
ERROR_INVALID_CUSTOM_VIDEO_TRACK(3029), and a stopped audio track withERROR_INVALID_CUSTOM_AUDIO_TRACK(3030). - If you don’t need to manage the camera's usage on the device level (i.e., you’re okay with the camera being used whether it’s enabled or disabled), you can skip this step.
- Here's how you can manage a custom track on a precall screen:
import { createCameraVideoTrack } from "@videosdk.live/react-native-sdk";let previewStream = null;async function togglePreviewCamera(selectedCameraId) {if (previewStream) {await previewStream.stop();previewStream = null;return;}previewStream = await createCameraVideoTrack({cameraId: selectedCameraId,});} - If your application includes a precall screen and you want to ensure that the device's camera is not used when the camera is disabled, you must dispose of the custom video track by calling its
Handle Promise Rejections from Async Methods
All VideoSDK methods are asynchronous and return a Promise. The promise resolves when the operation succeeds and rejects when the operation fails. Handle rejected promises based on your use case using try/catch with await or .catch() with promise chaining.
Some failures are reported only through the onError callback while the promise still resolves. For example, on Android most methods called after join() but before onRoomJoined, or while the room is reconnecting, report the error on onError. Handle errors both where you call the method and in onError, as shown in Listen for Error Events.
Using try/catch
const { enableCam } = useRoom();

const handleEnableWebcam = async () => {
  try {
    await enableCam();
  } catch (err) {
    console.error("enableCam failed:", err);
  }
};
Using .then().catch()
const { enableCam } = useRoom();

enableCam()
  .then(() => console.log("Webcam enabled"))
  .catch((err) => console.error("enableCam failed:", err));
When calling an SDK method from a UI event handler, make the callback async to use await:
<Button
  title="Enable Webcam"
  onPress={async () => {
    try {
      await enableCam();
    } catch (err) {
      console.error("enableCam failed:", err);
    }
  }}
/>
Listen for Error Events
Listen for onError on useRoom() so your app can tell users what went wrong and what to do next. Each error carries a code, a name and a message. See Error Codes for the full list.
useRoom({
  onError: ({ code, message }) => {
    console.log(code, message);
  },
});
Got a Question?  Ask us on discord

