Developer Experience Guidelines - React
This section provides best practices for creating a smooth and efficient development process when working with VideoSDK. From handling errors gracefully to managing resources and event subscriptions, these guidelines help developers build more reliable and maintainable applications. Following these practices can simplify troubleshooting, prevent common pitfalls, and improve overall application performance.
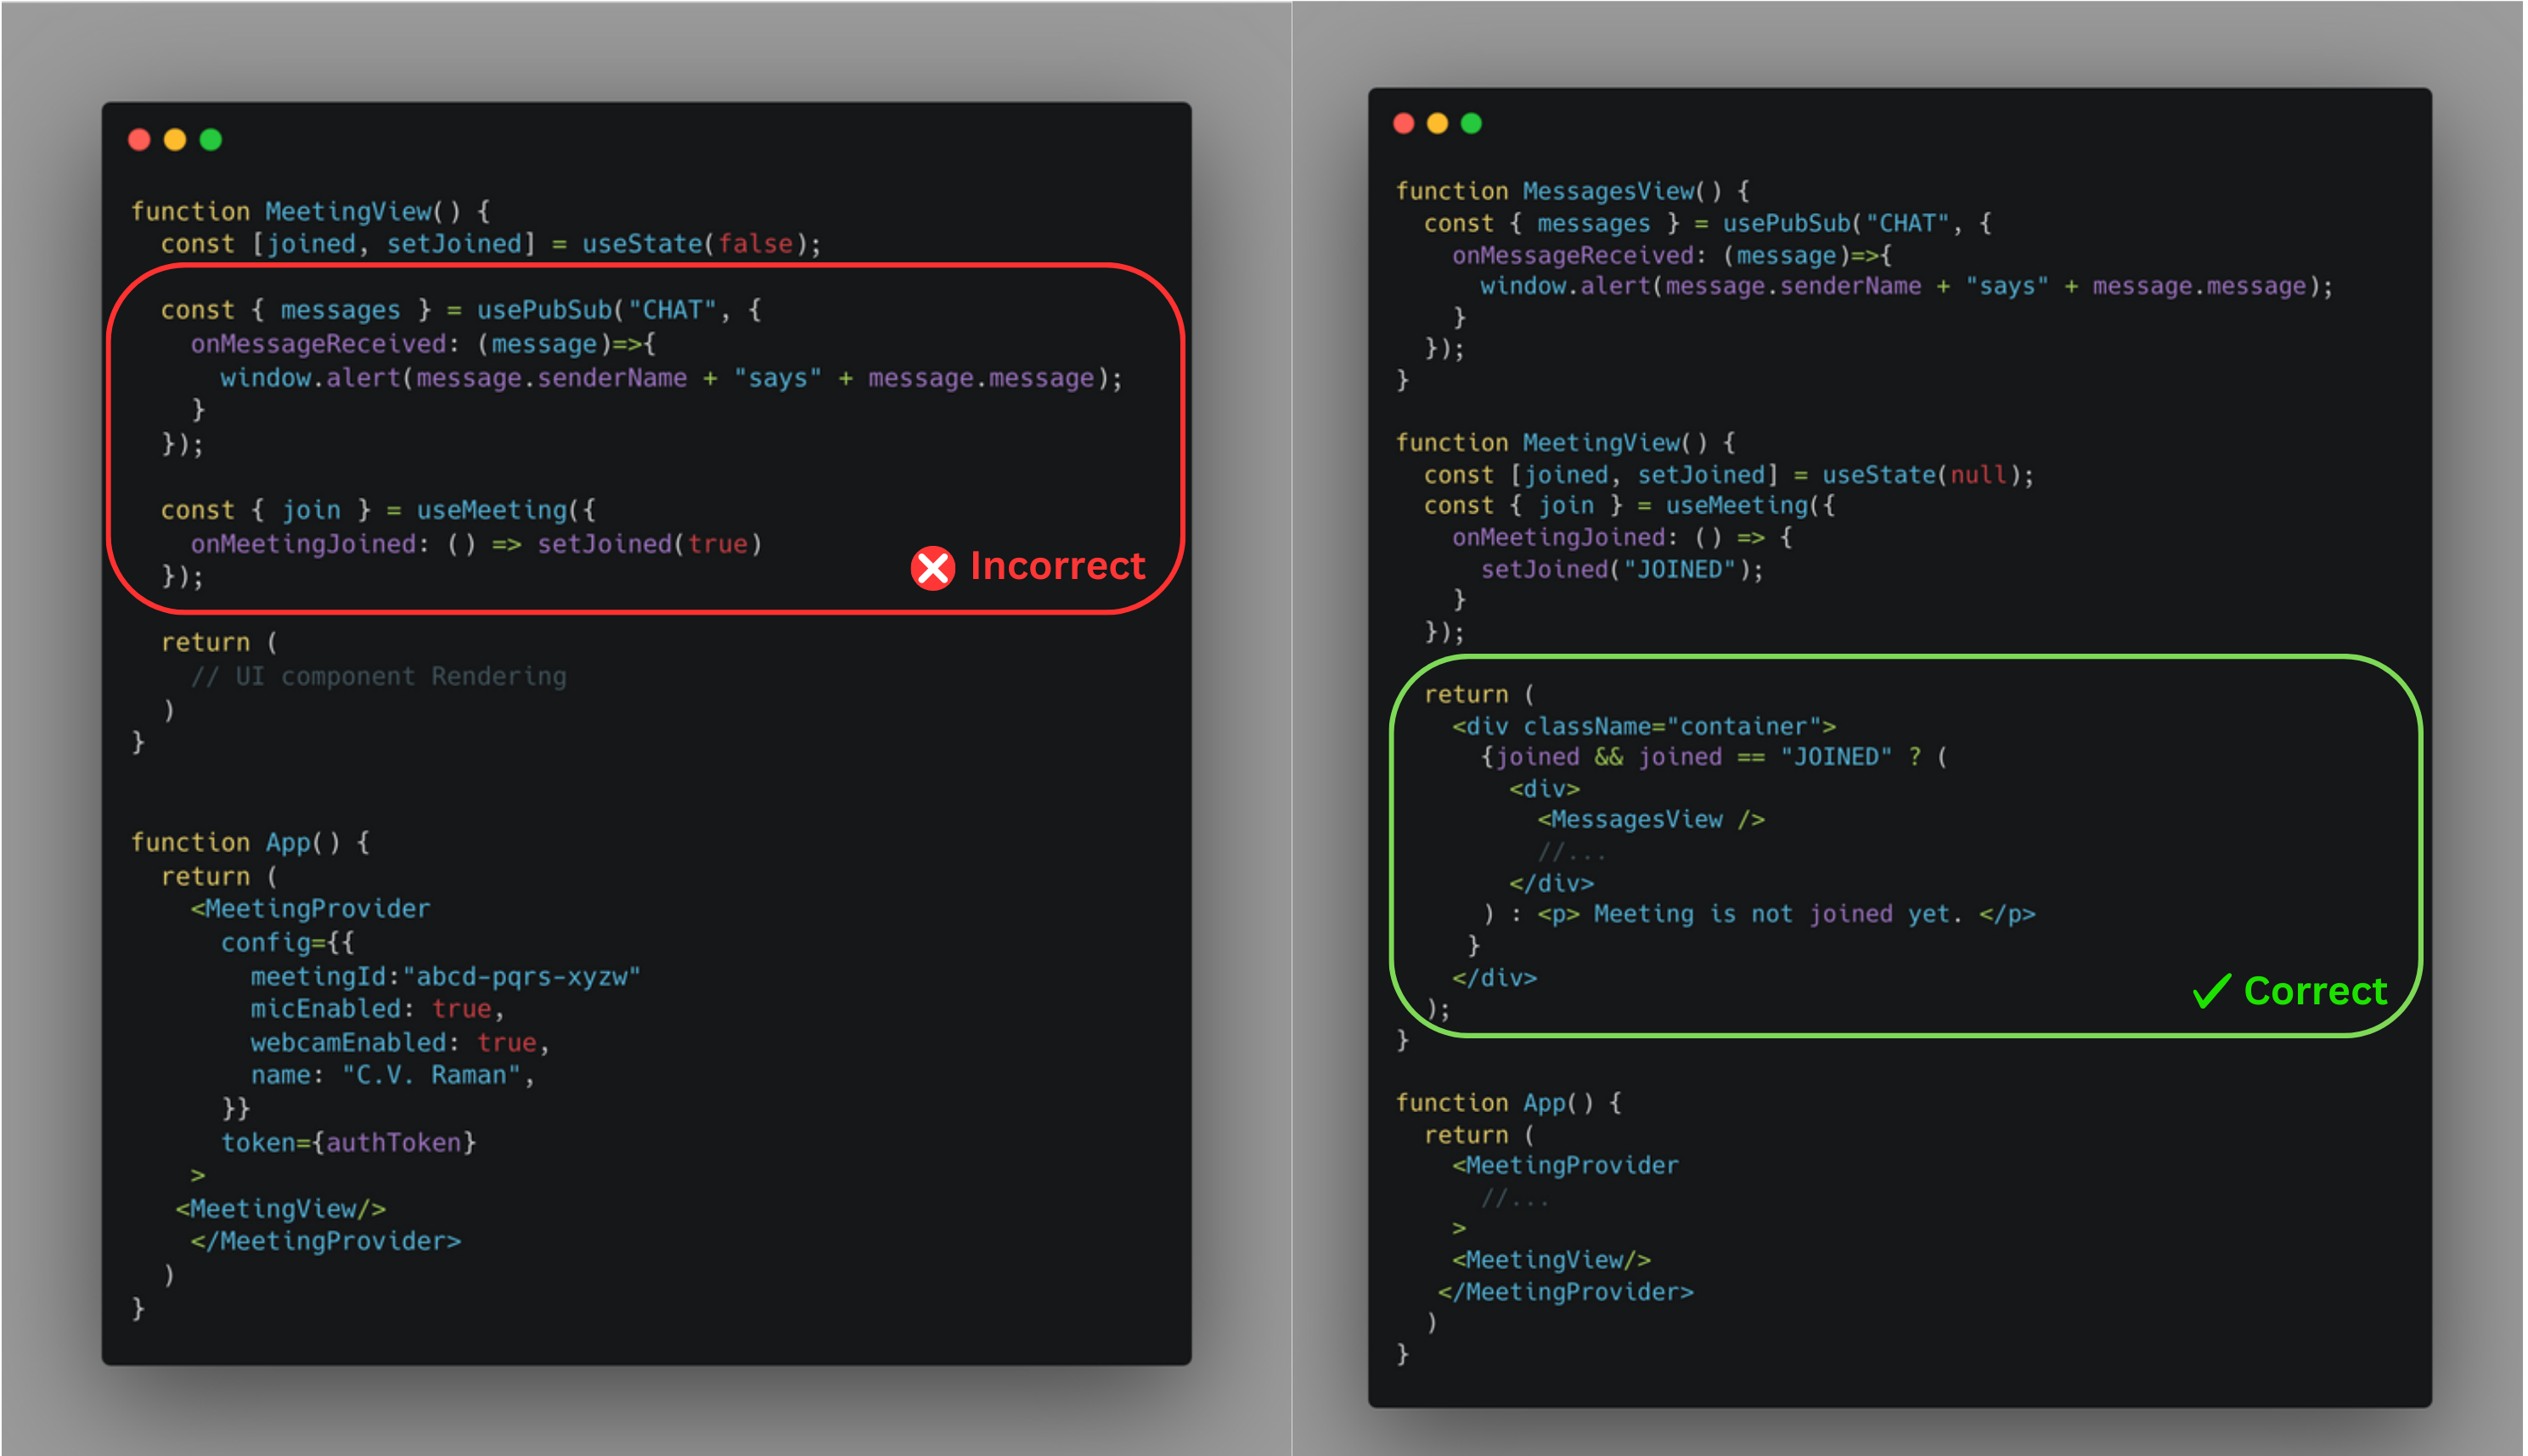
Initiate Key Features After Meeting Join Event
To provide a seamless and reliable meeting experience, initiate specific features only after the onMeetingJoined() event has been triggered.
-
Trigger Key Actions After Joining the Meeting : Initiating crucial actions after the
onMeetingJoined()event helps avoid errors and optimizes the meeting setup, ensuring a smoother experience for participants. If your application utilizes any of the following features or you want to perform any action as soon as meeting joins, it's recommended to call them only after the meeting has successfully started:-
Chat Subscription: To enable in-meeting chat functionality, subscribe to the chat topic after theonMeetingJoined()event is triggered. This ensures that messages are reliably received by participants.

-
Device Management: If you need users to use specific audio or video devices when the meeting is first joined, you can utilize the custom track. Pass thecameraIdto the createCameraVideoTrack() method for video, and themicrophoneIdto the createMicrophoneAudioTrack() method for audio. Once the track is created, provide it to the Meeting Provider. -
Recording and Transcription: To automatically start recording or transcription as soon as the meeting begins, configure theautoStartConfigin thecreateMeetingAPI. For detailed information, refer to the documentation here.
-
Dispose Custom Tracks When Necessary
Proper disposal of custom tracks is essential for managing system resources and ensuring a smooth experience. In most scenarios, tracks are automatically disposed of by the SDK, ensuring efficient resource management. However, in specific cases outlined below, you will need to dispose of custom tracks explicitly:
-
When Enabling/Disabling the Camera on a Precall Screen:
- If your application includes a precall screen and you want to ensure that the device's camera is not used when the camera is disabled, you must dispose of the custom video track. Otherwise, the device’s camera will continue to be used even when the camera is off.
- Additionally, remember to create a new track when the user enables the camera again.
- If you don’t need to manage the camera's usage on the device level (i.e., you’re okay with the camera being used whether it’s enabled or disabled), you can skip this step.
- Here's how you can manage customTrack on a precall screen :
const [videoTrack, setVideoTrack] = useState(null);
const [webcamOn, setWebcamOn] = useState(null);
const videoTrackRef = useRef();

const _toggleWebcam = () => {
    const videoTrack = videoTrackRef.current;

    if (webcamOn) {
        if (videoTrack) {
            videoTrack.stop(); // Disposing the track when webcam is turned off
            setVideoTrack(null); // Resets video track reference
            setWebcamOn(false); // Updates the state to indicate webcam is off
        }
    } else {
        // Re-enabling the webcam by getting a new track
        await createCameraVideoTrack({
            cameraId: webcamId , // Passes the ID of the webcam selected by the user
            encoderConfig: "h540p_w960p", // Specifies the desired video resolution
        })
        .then(newVideoTrack => {
            setVideoTrack(newVideoTrack); // Sets the new video track in the state
            setWebcamOn(true); // Updates the state to indicate webcam is on
        })
        .catch(error => console.error("Error enabling webcam:", error));
    }
};

useEffect(() => {
    if (webcamOn) {
        // Close the existing video track if there's a new one
        if (videoTrackRef.current && videoTrackRef.current !== videoTrack) {
            videoTrackRef.current.stop(); // Stop the existing video track
        }
        videoTrackRef.current = videoTrack;
    }
}, [webcamOn, videoTrack]);
Listen for Error Events
Listening to error events enables your application to handle unexpected issues efficiently, providing users with clear feedback and potential solutions. Error codes pinpoint specific problems, whether from configuration settings, account restrictions, permission limitations, or device constraints. Here are recommended solutions based on common error categories:
-
Errors associated with Organization: If you encounter errors related to your organization (e.g., account status or participant limits), reach out to support at support@videosdk.live or reach out to us on Discord for assistance.
-
Errors associated with Token: For errors related to authentication tokens, ensure the token is valid and hasn’t expired, then try the request again.
-
Errors associated with Meeting and Participant: Check that meetingId and participantId are correctly passed and valid. Also, ensure each participant has a unique participantId to avoid duplicate entries.
-
Errors associated with Add-on Service: If you encounter errors with add-on services (such as recording or streaming), try restarting the service after receiving a failure event. For example, if a
START_RECORDING_FAILEDerror event occurs, attempt to call thestartRecording()method again. If you're using webhooks, you can also retry on recording-failed hook. -
Errors associated with Media: Inform the user about media access issues, such as microphone or camera permissions. Design the UI to clearly indicate what is preventing the mic or camera from enabling, helping the user understand the problem.
-
Errors associated with Track: Ensure that the track you’ve created and passed to enable the mic or camera methods meets the required specifications.
-
Errors associated with Actions: If you need to perform actions as soon as a meeting joins, only initiate them after receiving the onMeetingJoined() event, otherwise it will not work well.
- Here's how to listen for the error event:
function onError(data) {
  const { code, message } = data;
}

const {
  meetingId
  ...
} = useMeeting({
  onError,
  ...
});
Got a Question? Ask us on discord

