Precall Setup - Android
Picture this: before diving into the depths of a video call, imagine giving your setup a quick check-up, like a tech-savvy doctor ensuring all systems are a go. That's essentially what a precall experience does- it’s like your extensive debug session before the main code execution—a crucial step in ensuring your app's performance is top-notch.
Why is it necessary?
Why invest time and effort into crafting a precall experience, you wonder? Well, picture this scenario: your users eagerly join a video call, only to encounter a myriad of technical difficulties—muted microphones, pixelated cameras, and laggy connections. Not exactly the smooth user experience you had in mind, right?
By integrating a robust precall process into your app, developers become the unsung heroes, preemptively addressing potential pitfalls and ensuring that users step into their video calls with confidence.
Step-by-Step Guide: Integrating Precall Feature
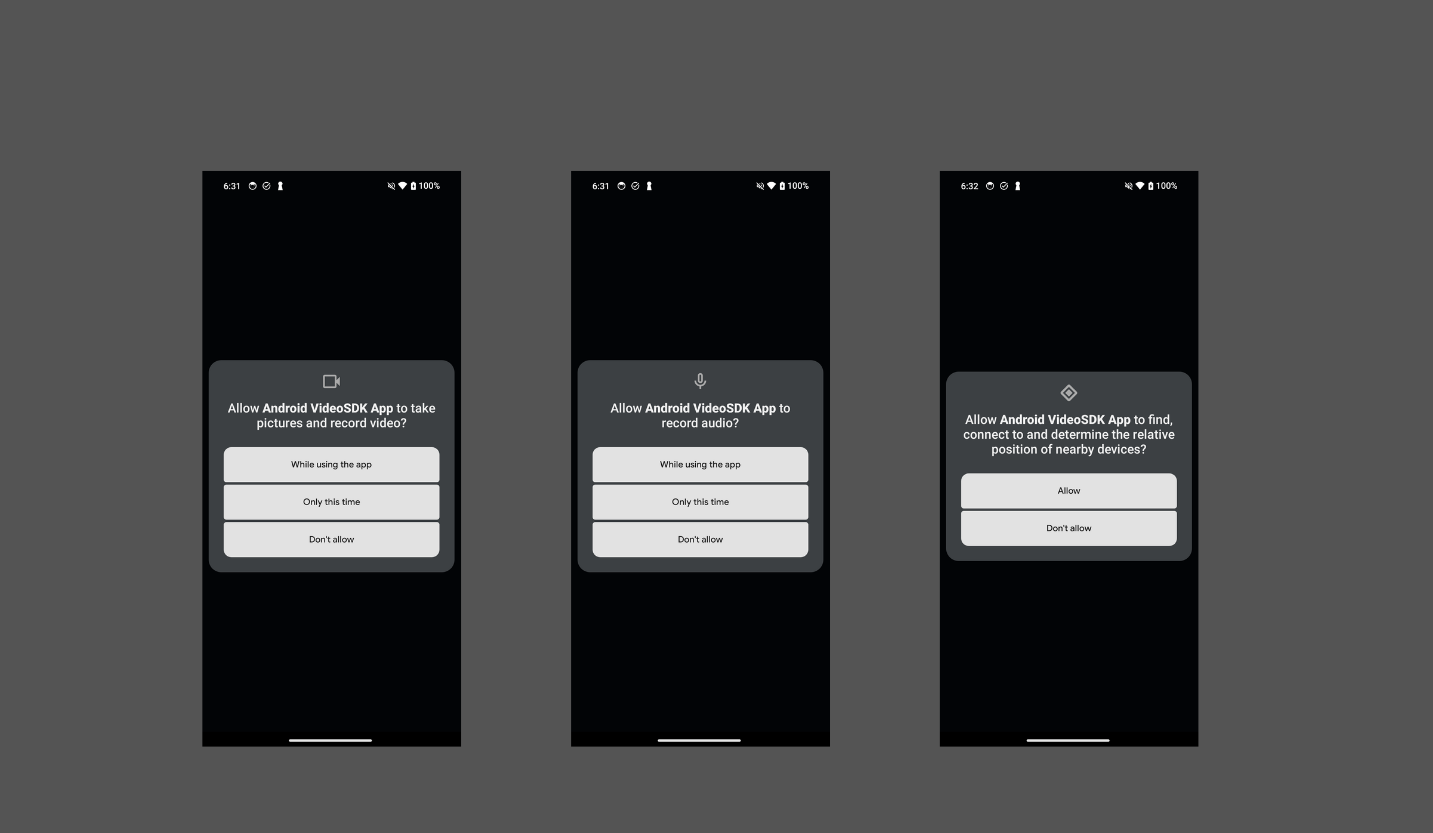
Step 1: Check and Request Permissions
- Begin by ensuring that your application has the necessary permissions to access user devices, such as the camera, microphone and Bluetooth.
- Utilize the
checkPermissions()method of theVideoSDKclass to verify if permissions are granted. - If the permissions are not granted, the method will request the required permissions.
PermissionHandleris used to manage and handle permission-related events (such as granting, denying, or blocking permissions).onGranted(): This method is called when all requested permissions are granted.onBlocked(): This method is called when one or more permissions are permanently blocked (i.e., the user has checked "Don't ask again").onDenied(): This method is called when one or more permissions are denied.onJustBlocked(): This method is called when one or more permissions are just blocked (i.e., the user has just checked "Don't ask again" for the first time).
- Kotlin
- Java
private fun checkPermissions() {
    val permissionList: MutableList<Permission> = ArrayList()
    permissionList.add(Permission.audio)
    permissionList.add(Permission.video)
    permissionList.add(Permission.bluetooth)
    val options = Permissions.Options()
                  .setRationaleDialogTitle("Info")
                  .setSettingsDialogTitle("Warning")
    VideoSDK.checkPermissions(this,
        permissionList,
        options,
        permissionHandler
    )
}

private val permissionHandler: PermissionHandler = object : PermissionHandler() {
    override fun onGranted() {
      Log.d("VideoSDK Permission", "onGranted: All permissions granted")
    }
    override fun onBlocked(
      context: Context,
      blockedList: java.util.ArrayList<Permission>
    ): Boolean {
        for (blockedPermission in blockedList) {
              Log.d("VideoSDK Permission", "onBlocked: $blockedPermission")
            }
      return super.onBlocked(context, blockedList)
    }

    override fun onDenied(
      context: Context,
      deniedPermissions: java.util.ArrayList<Permission>
    ) {
        for (deniedPermission in deniedPermissions) {
              Log.d("VideoSDK Permission", "onDenied: $deniedPermission")
            }
      super.onDenied(context, deniedPermissions)
    }

    override fun onJustBlocked(
      context: Context,
      justBlockedList: java.util.ArrayList<Permission>,
      deniedPermissions: java.util.ArrayList<Permission>
      ) {
          for (justBlockedPermission in justBlockedList) {
              Log.d("VideoSDK Permission", "onJustBlocked: $justBlockedPermission")
            }
      super.onJustBlocked(context, justBlockedList, deniedPermissions)
    }
  }
private void checkPermissions() {
    List<Permission> permissionList = new ArrayList<>();
    permissionListSDK.add(Permission.audio);
    permissionListSDK.add(Permission.video);
    permissionListSDK.add(Permission.bluetooth);

    Permissions.Options options = new Permissions
      .Options()
      .setRationaleDialogTitle("Info")
      .setSettingsDialogTitle("Warning");

    VideoSDK.checkPermissions(this, permissionList, options, permissionHandler);
}

PermissionHandler permissionHandler = new PermissionHandler() {
    @Override
    public void onGranted() {
      Log.d("VideoSDK Permission", "onGranted: All permissions granted")
    }

    @Override
    public boolean onBlocked(Context context, ArrayList<Permission> blockedList) {
        for (Permission blockedPermission : blockedList) {
                Log.d("VideoSDK Permission", "onBlocked: " + blockedPermission);
            }
            return super.onBlocked(context, blockedList);
        }

      @Override
      public void onDenied(Context context, ArrayList<Permission> deniedPermissions) {
        for (Permission deniedPermission : deniedPermissions) {
                Log.d("VideoSDK Permission", "onDenied: " + deniedPermission);
            }
            super.onDenied(context, deniedPermissions);
        }

      @Override
      public void onJustBlocked(Context context, ArrayList<Permission> justBlockedList, ArrayList<Permission> deniedPermissions) {
        for (Permission justBlockedPermission : justBlockedList) {
                Log.d("VideoSDK Permission", "onJustBlocked: " + justBlockedPermission);
            }
            super.onJustBlocked(context, justBlockedList, deniedPermissions);
        }
};
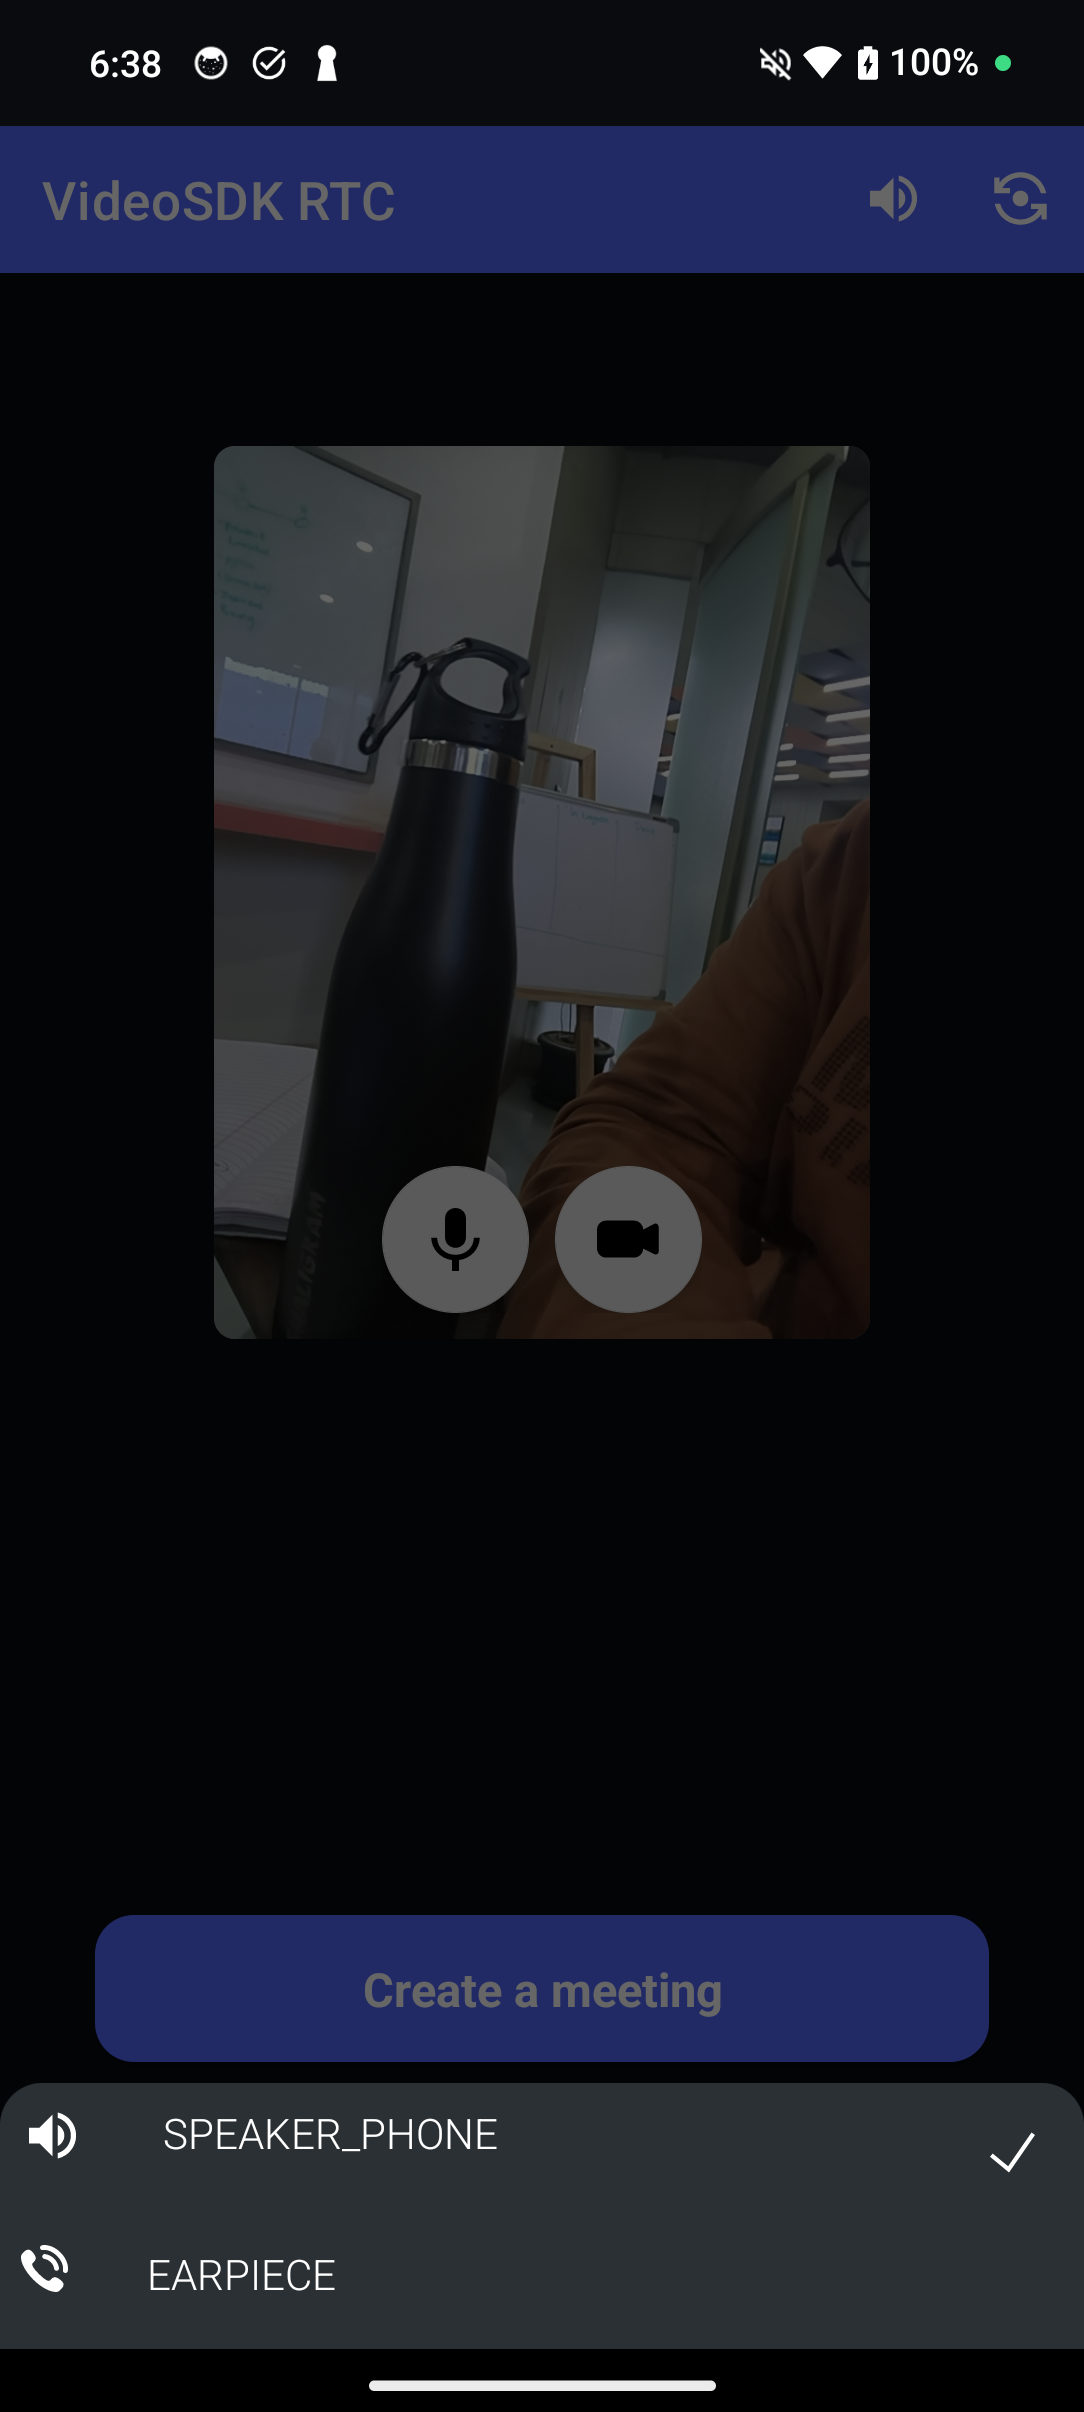
Step 2: Render Device Lists
- You can fetch and render lists of available video and audio devices using the
getVideoDevices()andgetAudioDevices()methods of the VideoSDK class, respectively.
- Kotlin
- Java
private fun getAudioaDevices() {

  val audioDevices: Set<AudioDeviceInfo> = VideoSDK.getAudioDevices()
    for (audioDevice in audioDevices) {
        Log.d("VideoSDK", "Audio Device's DeviceId " + audioDevice.deviceId)
        Log.d("VideoSDK", "Audio Device's Label " + audioDevice.label)
        Log.d("VideoSDK", "Audio Device's Kind " + audioDevice.kind)
    }
}

private fun getVideoDevices() {
    val videoDevices: Set<VideoDeviceInfo> = VideoSDK.getVideoDevices()
    for (videoDevice in videoDevices) {
        Log.d("VideoSDK", "Video Device's DeviceId " + videoDevice.deviceId)
        Log.d("VideoSDK", "Video Device's Label " + videoDevice.label)
        Log.d("VideoSDK", "Video Device's Kind " + videoDevice.kind)
      }
}
private void getAudioDevices() {
    Set<AudioDeviceInfo> audioDevices = VideoSDK.getAudioDevices();
    for (AudioDeviceInfo audioDevice:
        audioDevices) {
        Log.d("VideoSDK", "Audio Device's DeviceId " + audioDevice.getDeviceId());
        Log.d("VideoSDK", "Audio Device's Label " + audioDevice.getLabel());
        Log.d("VideoSDK", "Audio Device's Kind " + audioDevice.getKind());
    }
}

private void getVideoDevices() {
    Set<VideoDeviceInfo> videoDevices = VideoSDK.getVideoDevices();
    for (VideoDeviceInfo videoDevice:
            videoDevices) {
        Log.d("VideoSDK", "Video Device's DeviceId " + videoDevice.getDeviceId());
        Log.d("VideoSDK", "Video Device's Label " + videoDevice.getLabel());
        Log.d("VideoSDK", "Video Device's Kind " + videoDevice.getKind());
    }
}
Step 3: Handle Audio Device Changes
- Implement the
onAudioDeviceChanged()callback of theVideoSDKclass to dynamically re-render audio device lists whenever new devices are attached or removed from the system. - Ensure that users can seamlessly interact with newly connected devices without disruptions.
- Kotlin
- Java
VideoSDK.setAudioDeviceChangeListener(object : VideoSDK.AudioDeviceChangeEvent {
    override fun onAudioDeviceChanged(
        selectedAudioDevice: AudioDeviceInfo?,
        audioDevices: MutableSet<AudioDeviceInfo>?
    ) {
        Log.d(
            "VideoSDK",
            "Selected Audio Device: " + selectedAudioDevice.label
        )
        for (audioDevice in audioDevices) {
            Log.d("VideoSDK", "Audio Devices" + audioDevice.label)
        }
    }
})
VideoSDK.setAudioDeviceChangeListener((selectedAudioDevice, audioDevices) -> {
    Log.d("VideoSDK", "Selected Audio Device: " + selectedAudioDevice.getLabel());
    for (AudioDeviceInfo audioDevice :
            audioDevices) {
        Log.d("VideoSDK", "Audio Devices" + audioDevice.getLabel());
    }
});
Step 4: Ensuring the selected devices are used in the Meeting
- Ensure that the status of all relevant devices, such as the microphone and camera (on/off), as well as the selected devices, are correctly configured and passed into the meeting from the precall screen.
- To select a video device, you can either create a custom track with the chosen
VideoDeviceInfoand pass it to theinitMeetingmethod of theVideoSDKclass, or you can use thesetSelectedVideoDevice()method of theVideoSDKclass. - To select an audio device, use the
setSelectedAudioDevice()method of theVideoSDKclass. - By ensuring this integration, users can seamlessly transition from the precall setup to the actual meeting while preserving their preferred settings.
- Kotlin
- Java
class MainActivity : AppCompatActivity() {

    override fun onCreate(savedInstanceState: Bundle?) {
        super.onCreate(savedInstanceState)

        val customTracks: MutableMap<String, CustomStreamTrack> = HashMap()

        // Specify the video device to use in the meeting
        val videoDeviceInfo: VideoDeviceInfo = selectedVideoDeviceInfo

        val videoCustomTrack = VideoSDK.createCameraVideoTrack(
            "h720p_w960p", "front", CustomStreamTrack.VideoMode.TEXT, true,
            this, VideoSDK.getSelectedVideoDevice()
        )
        customTracks["video"] = videoCustomTrack

        VideoSDK.setSelectedVideoDevice(videoDeviceInfo)

        // Specify the audio device to use in the meeting
        val audioDeviceInfo: AudioDeviceInfo = selectedAudioDeviceInfo

        VideoSDK.setSelectedAudioDevice(audioDeviceInfo)

        val meeting: Meeting = VideoSDK.initMeeting(
            this@MainActivity, "meetingId", "John Due", true,
            true, null, null, false, customTracks, null
        );
    }
}
public class MainActivity extends AppCompatActivity {

    @Override
    protected void onCreate(Bundle savedInstanceState) {
        super.onCreate(savedInstanceState);

        Map<String, CustomStreamTrack> customTracks = new HashMap<>();

        // Specify the video device to use in the meeting
        VideoDeviceInfo videoDeviceInfo = selectedVideoDeviceInfo;

        CustomStreamTrack videoCustomTrack = VideoSDK.createCameraVideoTrack(
            "h720p_w960p", "front", CustomStreamTrack.VideoMode.TEXT, true,
            this, VideoSDK.getSelectedVideoDevice()
        );
        customTracks.put("video", videoCustomTrack);

        VideoSDK.setSelectedVideoDevice(videoDeviceInfo);

        // Specify the audio device to use in the meeting
        AudioDeviceInfo audioDeviceInfo = selectedAudioDeviceInfo;

        VideoSDK.setSelectedAudioDevice(audioDeviceInfo);

        Meeting meeting = VideoSDK.initMeeting(
            MainActivity.this, "meetingId", "John Due",true,
            true, null, null, false, customTracks,null
        );
    }
}
Step 5: Get Selected Devices
- VideoSDK library provides two methods,
getSelectedVideoDevice()andgetSelectedAudioDevice(), which allow us to determine which video and audio devices are currently selected on our Android device.
- Kotlin
- Java
private fun getSelectedVideoDevice(){
    Log.d("TAG", "onCreate: " + VideoSDK.getSelectedVideoDevice().label)
}

private fun getSelectedAudioDevice(){
    Log.d("TAG", "onCreate: " + VideoSDK.getSelectedAudioDevice().label)
}
private void getSelectedVideoDevice() {
  VideoDeviceInfo selectedVideoDevice = VideoSDK.getSelectedVideoDevice();
  Log.d("TAG", "Selected Video Device Label: " + selectedVideoDevice.getLabel());
}

private void getSelectedAudioDevice() {
  AudioDeviceInfo selectedAudioDevice = VideoSDK.getSelectedAudioDevice();
  Log.d("TAG", "Selected Audio Device Label: " + selectedAudioDevice.getLabel());
}
By following these step-by-step instructions, you can seamlessly integrate a precall feature into your application, empowering users to optimize their audio and video setup for a superior communication experience.
You can explore the complete implementation of the Precall feature in the official Android SDK example available here.
API Reference
The API references for all the methods utilized in this guide are provided below.
Got a Question? ![]() Ask us on discord
Ask us on discord

